
- Bunnings Workshop
- >
- Discussion
- >
- Garage and Shed
- >
- Making a benchtop router trolley (and dr...
Making a benchtop router trolley (and drawers)
- Subscribe to RSS Feed
- Mark Topic as New
- Mark Topic as Read
- Float this Topic for Current User
- Bookmark
- Subscribe
- Mute
- Printer Friendly Page
Share
- Mark as New
- Bookmark
- Subscribe
- Mute
- Subscribe to RSS Feed
- Highlight
- Report Inappropriate Content
Making a benchtop router trolley (and drawers)
I bought this Scheppach Benchtop Router when it came up on special but had nowhere to put it so I made a trolley for it. Timber is expensive and I try to get what I can free or cheap, the grey melamine sheet used here was actually side panels from office work stations that I bought at auction for about $12.50 for 2 of them. I measured up what I needed and was able to cut the panels for the dual tops and the bottom leaving 3 sides with the existing edge banding still in place. The side panels and shelf only required 1 face with edge banding. It was a very simple "H" design build that I just screwed the panels together, starting with the shelf and sides then the top and bottom then finally adding the 2nd top which is glued down covering the screws of the initial top. I fitted some castors and it was completed in a couple hours.
Several months later I got around to adding some drawers.
I had some 18mm Form Ply on hand cut the drawer carcasses to size, ran them through the table saw and cut a 6mm Dado channel for the plywood drawer bottoms then used pocket hole joinery to screw them together, I had 2 sets of steel drawer slides already that were intended for another project and finished mounting the drawers in the cabinet.
Next it was time to make the drawer fronts and I had no more grey melamine left so I used what were shelves from a salvaged office bookcase.
I cut them to size then affixed a contrasting brown PVC edge band with high strength double sided tape.
I used a trim router to remove the overhanging edge banding then applied 2 coats of Minwax Wipe on Polyurethane.
I used some chrome disability hand rails as handles because I wanted to achieve that beefy look. The drawer fronts are just screwed on from behind through the front carcass panel.
Top drawer for router bits and collets and the bottom drawer for handheld routers.


- Mark as New
- Bookmark
- Subscribe
- Mute
- Subscribe to RSS Feed
- Highlight
- Report Inappropriate Content
Re: Making a Benchtop Router Trolley (and drawers)
As always, a brilliant use of resources, & an end product that looks amazing.
I'll look into getting some of that FastCap SpeedTape too, so thanks for putting me onto it. : )
- Mark as New
- Bookmark
- Subscribe
- Mute
- Subscribe to RSS Feed
- Highlight
- Report Inappropriate Content
Re: Making a Benchtop Router Trolley (and drawers)
https://mcjing.com.au/categorybrowser.aspx?categoryid=1242
I think I would rather drill some holes in some wood or plastic...
How have you found the router table to be? The reviews I have read on it haven't exactly been glowing, people have complained about the flatness and the shaft lock mostly, it may be that people expect too much quality for the price they are paying?
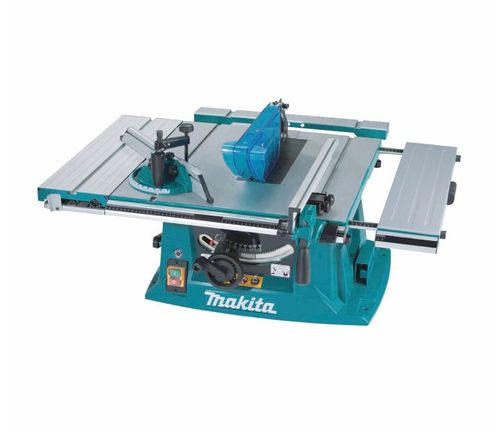
They also have a table saw https://www.machineryhouse.com.au/W443 it gets better reviews although it wouldn't match it with the gold standard of DIY saws http://www.bosch-pt.com.au/au/en/table-saw-gts-10-xc-131476-0601b30440.html
- Mark as New
- Bookmark
- Subscribe
- Mute
- Subscribe to RSS Feed
- Highlight
- Report Inappropriate Content
Re: Making a Benchtop Router Trolley (and drawers)
The biggest issue I have found is the flimsy fence that comes with it, with my small and fat fingers the spindle lock is impossible to use so I just use two spanners to change bits. The biggest pluses are the height adjustment with a machine wheel and the adjustable speeds. I rarely use the fence at all with most routing done using bearing bits. I also have a CNC Router which I use to perform a lot of tasks one would normally do with a handheld or table router.
- Mark as New
- Bookmark
- Subscribe
- Mute
- Subscribe to RSS Feed
- Highlight
- Report Inappropriate Content
Re: Making a Benchtop Router Trolley (and drawers)
Hi Wayne, This post caught my eye as I'm looking at the Scheppach benchtop router at the moment. I'm wondering if, since this is an older thread, whether this would still be your go-to for a height adjustable router table. Also looking at plates but didn't want to have to create the whole shebang.
- Mark as New
- Bookmark
- Subscribe
- Mute
- Subscribe to RSS Feed
- Highlight
- Report Inappropriate Content
Re: Making a Benchtop Router Trolley (and drawers)
Welcome to the Bunnings Workshop community @Lis. It's brilliant to have you join us, and many thanks for your question about benchtop routers.
Hopefully @Wayne can answer your question, but given this is an older discussion, let me mention some of our other woodworking enthusiasts, @Brad, @r23on, @JoeAzza and @hazesnow, to see if they have some recommendations.
We look forward to hearing all about your projects and plans around the house and garden. Please feel free to reach out anytime you need assistance or have something to share with the community.
Mitchell
- Mark as New
- Bookmark
- Subscribe
- Mute
- Subscribe to RSS Feed
- Highlight
- Report Inappropriate Content
Re: Making a Benchtop Router Trolley (and drawers)
I have a Kreg table with a Triton router, I can't fault it.
Carbatec have plates and lifts with a motor available to fit the lift.
Scheppach is what it is, it is budget friendly but that comes at a cost to quaility.
Why join the Bunnings Workshop community?
Workshop is a friendly place to learn, get ideas and find inspiration for your home improvement projects
You might also like


We would love to help with your project.
Join the Bunnings Workshop community today to ask questions and get advice.