The Bunnings Workshop community can help with your home improvement projects.
- Bunnings Workshop
- >
- Featured Projects
- >
- Internal doors replaced
Internal doors replaced
Share
- Subscribe to RSS Feed
- Mark as New
- Mark as Read
- Bookmark
- Subscribe
- Printer Friendly Page
- Report Inappropriate Content
Interior doors removed and replaced with doors from Bunnings as well as doors upcycled with new handles, hinges and paint.

The project
We had several old doors in our home which needed to be replaced. Hoping to use recycled materials, we looked at Facebook Marketplace and found some doors that were being given away. We also sourced two solid doors which were over thirty years old and decided to pick these up as well.
The doors were mostly sliding doors and didn’t have any hinge recesses. This worked out well, as we could chisel out the new recesses. As most of the recycled doors already had handles, these were removed, and the cavities was then filled with putty, sanded down and painted over. We couldn’t find everything on Facebook, and the remaining doors were bought from Bunnings (Hume Internal Doors).
We replaced seven doors in total, using four recycled doors and three from Bunnings. The solid door was easier to work with, and we had to sand down the solid door. The hollow door surface was a kind of print made from composite paper; looks nice, but nothing beats solid wood.
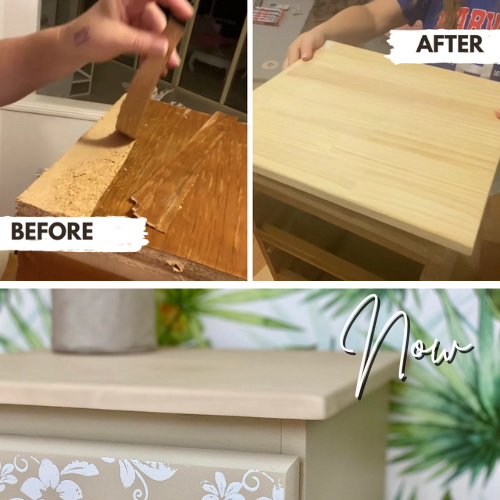
This sliding door is thirty years old.

Remove handle.

Fill in cavity with putty.

Use leftover cuts as a cover.

I used the old door as a template.

Marking the hinges.

Marking the latch and handle.

Replacing the hinges.

Mark the new hinge.

Invest in a good chisel set.

Slowly chisel away the wood.

Hinge recess can be sanded down.

Mark the places for the door handles and latch.

Drill 25mm hole using a spade bit.

Make sure everything fits.

Pre-coat with water-based Prep 4-in-1 Primer and then two coats of Dulux Vivid White Aquanamel Gloss.

We have never replaced or installed any doors before. The first door took longer than we thought, but it got easier as we did the others. It’s a good D.I.Y. job that everyone can do. Just give yourself some time and have fun.
Here is a video we watched on installing a door handle before getting started.
More inspiration for your door project
Community member JoeAzza created a stylish new look with his replacement wardrobe doors, using six slim doors to take the place of three broad ones.

Workshop member sjloves decided that decorating pantry doors was the best way to give their room a bright facelift.

Be sure to check out our Top 10 most popular indoor furniture projects and Top 10 most popular renovation projects for even more clever and creative ideas.
- Mark as Read
- Mark as New
- Bookmark
- Highlight
- Report Inappropriate Content
Good Evening @Nham
Nice work with the doors, Id like to do the same one day. How did you do the verticle marks when chiseling the hinges? I was maybe thinking you tapped down with the chisel then angled to remove the wood?
I really like how the doors turned out. So far the only door I have rehung was my screen door  Next step an actual door!
Dave
- Mark as Read
- Mark as New
- Bookmark
- Highlight
- Report Inappropriate Content
Thanks @Dave-1 and good to meet you. Yes you are right, I just tap down then chisel out the cavity. This is great video I watched on youtube, go to 7:44 mins. Also note which side of the chisel you need to use to get an even flat cavity for the hinge. Doing the cutout for the door handles was the most challenging part, but I found out that there are door installation kits that clamp onto the door. Good luck:-)
- Mark as Read
- Mark as New
- Bookmark
- Highlight
- Report Inappropriate Content
Morning @Nham
Thanks for that video and the explanation. In all the tyears I have been chiseling and notching timber I havnt done it that way Shows being self taught means not all the skills are learned lol
Dave
Why join the Bunnings Workshop community?
Workshop is a friendly place to learn, get ideas and find inspiration for your home improvement projects