Steps
Step 1
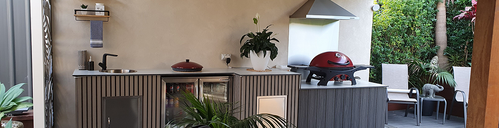
Plan your space and design your cabinet.

Create your room and enter the dimensions into the Lugna Online Planner. You can add doors, windows and even switches to match your space.
Next, you can move on to adding the cabinets to design your mudroom. There is a large variety of sizes and finishes to choose from, so you can get creative. You can add drawers, doors and shelving. If you can, add drawers. They're the easiest way to access and organize your things.
Review your design at the end and double check that all of the items you need are on the list. You can then print the list and take it to your local Bunnings Special Order desk to organise pick up or delivery.
You can assemble the Lugna yourself if you're confident in your D.I.Y. skills. Or, you can use the Bunnings Storage Assembly Service.
Step 2
Assemble your cabinet shells. To assemble your cabinet shells, get ready and find the instructions included in the box. I like to unbox everything, lay all the parts out and get a little production line going.
NB: Skip to Step 6 if you are using the Bunnings Storage Assembly Service.

The cabinets use a pin and cam system. First, screw the pin into one panel. Then, push or knock the cams into the opposite panel. I prefer using a nylon hammer to prevent mishaps.
Once the pins and cams are in you can turn the screw head of the cam to lock in the pin and it keeps the panels together. Set your assembled cabinet shells aside, ready for installation later.

Step 3
Assemble your drawers. We assemble the drawers using the same pin and cam design.
First screw in your pins and push in your cams. To assemble the drawer, first attach the face and sides. Then, insert the base sheet and lock it in place with the remaining panel.

While you're at this stage, it's a good chance to add your drawer runners. Inside the runners, there is a small black release latch. Pull down on the latch to remove the inner rail. After that, you can screw the inner rail to the drawer base. Make sure that the rail is facing the correct way so that the prongs will be able to slide into the drawer runner.

Step 4
Install your cabinet shells. Now let's put our plan into action. Put the cabinet shells into the position you want them.

Step 5
To ensure safety, fix the cabinets to the wall and screw them together for a seamless finish. To prevent the screw from popping out on the other side of the panel, use the appropriate length screw. You can test this by holding it in front of the panels it will be going through.

Step 6
Install your drawers. Install the drawer runner into the cabinet shell. Slide the drawer into position by lining up the rails on the drawer into the drawer runners of the cabinet.

Hint: Support the weight of the back of the drawer while sliding it onto the runner to make it go in easier.

Step 7
Attach the door hinges to the doors. Then screw the hinge plate to the inside the cabinet shell. The holes are pre-drilled here, so all you need to do is line them up into position.
Hint: You can also separate the hinge and plate for easier installation.

Step 8
Make the D.I.Y. seat pad. I found an MDF sheet that was the perfect size, so I didn't have to cut it. I also had a piece of high-density foam cut to the same size, which was 1800 x 600mm.
I sprayed the MDF sheet and foam pad with contact adhesive. Then, I lined them up and stuck them together.


Step 9
Add the material to the seat pad. Choose the material you want. Wrap it around the seat pad. Flip it over and cut it to fit.
Fix the material in place by pulling it tight, but not too tight so that it doesn't distort the foam. Staple it in place.

Fold the front edge and corners neatly. They will be the most visible. Once they look good enough, staple them in place.

Step 10
Install your seat pad.

Slide the seat pad into place. There's no need to screw this in as it already fits nice and snug.

Step 11
Sit back, relax and enjoy your new mini mudroom and organised space.

Thanks for reading, and I hope you're feeling inspired to give this project a go in your own home. If you have any questions, feel free to leave a comment below.
Tools and materials
Materials used in the project:
Tools used in the project: