The Bunnings Workshop community can help with your home improvement projects.
- Bunnings Workshop
- >
- Featured Projects
- >
- Outdoor kitchen with drawers
Outdoor kitchen with drawers
Share
- Subscribe to RSS Feed
- Mark as New
- Mark as Read
- Bookmark
- Subscribe
- Printer Friendly Page
- Report Inappropriate Content
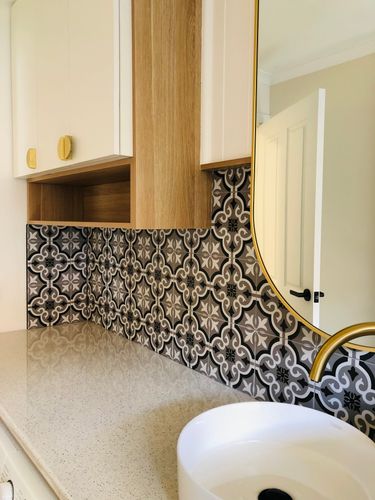
A timber benchtop with tiled splashback and drawers for cooking outdoors.

The project
I built this outdoor cooking top and drawers so I can grill and fry meals outside to reduce oil splatter in the kitchen. I had a small grill for frying. I then bought a spare induction cooker that I can use for frying outside. I built the drawer/top to accommodate the induction cooker. I also added a tiled splashback.
I didn't do the traditional glue and grout with the tiles. The reason was that the cement sheet backing that I required wouldn't fit in my car. So, I came up with this idea - loose tiles held in place with a channel on the bottom and L-shaped timber on top, so if I ever want to change the tiles to another colour, this would be easy to do.
Tools and materials
Materials used in the project:
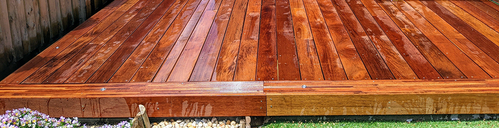
- Merbau timber for the top
- Cypress Pine for the cabinet
- Marine ply for the drawers
- Screws for the drawers
- Exterior wood glue
- Bondall Monocel Exterior Clear Varnish Satin
- Table top mounting brackets
- Cabinet drawer runners.
Tools used in this project:
- Table saw
- Mitre saw
- Trim router
- 45-degree router bit
- Spirit level
- Sander
- Sandpaper 80 grit to 240 grit
- Clamps.
Steps
Step 1
Cut Cypress Pine to make up cabinet frame.

Router timber to join together. I used a tongue and groove method for joinery.


Then I glued and clamped timber pieces.


Step 2
Cut to length and width to remove radius on Merbau timber.


This was done to enable gluing of the timber joins and removing the oiled surface which allowed for gluing them together, otherwise the timber wouldn't stick together.
Then I glued and clamped the timber. Sanded flat used 80 grit to 240 grit sandpaper. Cut to length, and bevelled the edges with a small trim router.

Step 3
Cut the marine ply to make the drawer. Assemble drawer and paint with clear varnish.


Install the drawer runners, then the cabinet and finally the top.


Step 4
Install the splashback tiles.


More inspiration for your outdoor kitchen
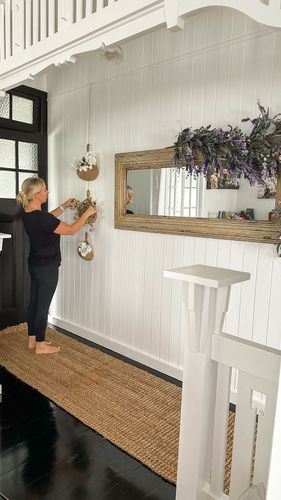
Workshop community member Leanne used Acacia Project Panels and a tiled splashback on her outdoor entertaining area servery.

Using a Viking theme, community member sideshowmatt built this rustic entertaining area with built-in barbecue using recycled pallets.

Our Top 10 most popular outdoor kitchen projects features more inspiration from Bunnings Workshop community members.
- Mark as Read
- Mark as New
- Bookmark
- Highlight
- Report Inappropriate Content
Your outdoor kitchen is a great blend of style and functionality, @JoeAzza, congratulations. Trust you've been getting good use out of it, especially now that we're in the middle of summer.
Thanks for sharing this project. Looking forward to seeing what you tackle next.
Akanksha
- Mark as Read
- Mark as New
- Bookmark
- Highlight
- Report Inappropriate Content
Good Evening @JoeAzza
Done it again!  Thats a sweet looking Bench and cooking area! I saw your benchtop and splashback ide anad went "bugger" is he looking over my fence! hahahaha Ive just built and outside bench and it has a splashback deal but I used hardie plank as it was cheaper and it fitted with what I had.
What material did you uses? It looks like concrete sheeting? If so what did you use to cut it?
Think it looks brilliant and definently inspiring!
Dave
- Mark as Read
- Mark as New
- Bookmark
- Highlight
- Report Inappropriate Content
@JoeAzza I truly admire your woodworking skills ! I would love to learn more from you 😃
- Mark as Read
- Mark as New
- Bookmark
- Highlight
- Report Inappropriate Content
Hi @Dave-1, Re materials used for backing, I just used what was already installed, the weatherboards, the tiles aren’t glued to any thing, I just installed a top and bottom rail, the tile slide into place , no glue , no grout, easy to keep clean and change over if want a different coloured tile, simple. The only reason I didn’t use cement sheet backing, is that my car is small to fit the size (Jimny), I required,
When I did my apprenticeship many years ago, we had a motto on the wall, at a training centre, that read, “Necessity is the Mother of Invention”, this I will never forget😀
- Mark as Read
- Mark as New
- Bookmark
- Highlight
- Report Inappropriate Content
hahahah I know that saying well and yep I heard it so long ago I cannot tell you when!
I have done mine the same way as in your tiles but I used hardie plank, price plus it fitted in my car And pretty much the same way of thinking.
Will post the project ;later this week
Dave
Why join the Bunnings Workshop community?
Workshop is a friendly place to learn, get ideas and find inspiration for your home improvement projects