
The Bunnings Workshop community can help with your home improvement projects.
- Bunnings Workshop
- >
- Discussion
- >
- Living and Bedroom
- >
- Re: D.I.Y. plant stand
D.I.Y. plant stand
- Subscribe to RSS Feed
- Mark Topic as New
- Mark Topic as Read
- Float this Topic for Current User
- Bookmark
- Subscribe
- Mute
- Printer Friendly Page
Share
- Mark as New
- Bookmark
- Subscribe
- Mute
- Subscribe to RSS Feed
- Highlight
- Report Inappropriate Content
D.I.Y. plant stand

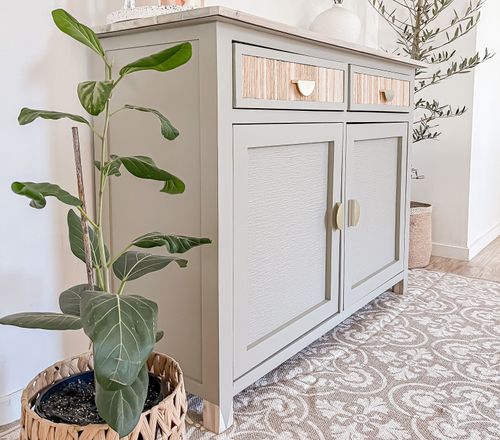
So, like probably most of us here who live in apartments, I've been growing a steadily larger plant collection. Having such a small place leaves very few places to store your plants where they'll get adequate lighting, so I've taken it upon myself to make a plant stand that sits to the side of my existing entertainment unit, so that some of the plants that I have growing in smaller pots can get more indirect light. I have an existing IKEA Bestå unit in my loungeroom and wanted it to kinda-sorta match it in terms of height and dimensions, whilst fitting into a space that sits to the side of the unit. Now, it turns out that gap is around 410mm, and well... SpecRite just so happens to make FJ Panels in that size! We're In the money!
So, one call to @hazesnow and it turns out she has some Spotted Gum panels in stock in her shed, as well as some lengths of Merbau that'd make for a great little side unit. So, huge shoutouts to mum for the timber for this project! 

As is the norm for me, I am cutting most of these things by hand since both space and power tools are a premium for me. My trusty Zetsaw Kataba Saw and guide come in real handy for this normally, but seeing as I had to cut panels and I have no room for a track saw, I improvised. Enter the Saw Rail! Literally just a piece of aluminum extrusion and a piece of Jarrah DAR clamped to a panel with quick-grip clamps, spaced exactly one saw-blade-width apart (the Zetsaw guide kit contains a spacer to dial in the guide that's the exact width of the saw blade)
This made quick work of the SpecRite 405mm x 1800mm x 18mm Spotted gum panels, which would get trimmed into exact 405x405mm squares... Well, about as square as I could get them with what are essentially rudimentary tools.

I then laminated these panels together using Gorila Wood Glue, and screwed them in the corners with pilot-drilled holes and Zenith 10gx25mm screws. I initially had a go with another pair, however I, being a clumsy person at times, forgot to spread the glue before laminating the panels! That resulted in one of my glue-ups being completely ruined, with the centre splitting upwards, causing these butt-jointed panels to split apart! Don't worry, this isn't the first time you'll see splitting panels get in the way of this job... My stepdad's old Black and Decker WorkMate comes in real handy as a clamp to clamp the centre down.

As for the corners, clearance holes were drilled for M8x1.0 bolts in the corners, spaced exactly in the centre (kinda) of a 42x42mm square. Fun fact! IKEA Bestå legs are M8 threaded, so if you need a good source of through-hole legs (apart from the ones that Bunnings sells, of course) they're cross-compatible. I chose the Bestå legs to go with the existing unit, that and it'll be easier to match them.

So, there's a few things that happen to timber if you store it in a hot shed for an extended period of time. Sometimes, the wood can bow, twist or warp, leading to the wood sometimes becoming unusable. In this case, this is exactly what happened... These 42mm DAR Merbau strips had a solid 10mm bow from end to end, and one of them even had a few degrees of twist. So, I did a little reading as to how I can make these have less bow in them. Turns out, steaming timber is the only way to get it to straighten out. Now, I don't exactly have a timber steamer that can take a whole 1.9m length of Merbau, but I do have a spray bottle, some paper towel roll and some glad wrap. So, I got to work soaking paper towels with water and placing them on the concave side of the bow, and clamping two bowed planks together with the concave sides facing inward, wrapped them in glad wrap and had them sit outside for a week. The end result? Well, i took out some of the bow, but not all of it, but it went down from about 10mm concavity to about 5mm, so that was at least workable, I could just simply put the shelves under tension.

boy are these little nuggets hard to find! These Taskmaster M8 Nut Inserts are pretty hard to come across these days, so when i saw that Harrisdale Bunnings had two packs in stock (just the amount I needed in fact) I snapped them up straight away! I used some Sika TechGrip to strengthen their bond seeing as these nutserts are going into endgrain, and I used stepped pilot hole drilling to get them kinda centered.

Being a sucker for punishment I decided to go with countersunk M8 bolts on the top to allow the screwheads to sit flush. I would then add an additional 10gx60mm screw on the inside corner of these to further increase the strength of the joint. Let's just say this isn't going to spin itself apart anytime soon. The bows are pointed with the concave sides facing outwards and the convex sides facing inwards. you'll see why below!

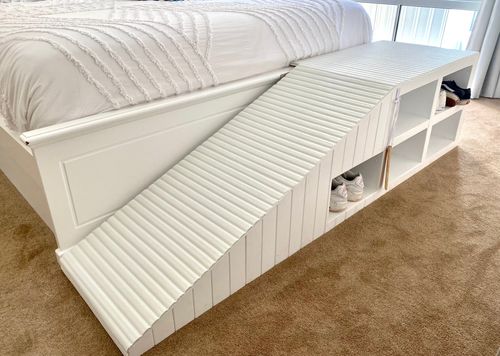
And here it is! In Situ! To get these shelves in I had to first cut out a 42x42mm cutout on each corner to make clearance for the uprights. I then had to basically knock them in with a hammer to position because of the fact that I had put the convex sides of the bows facing inwards. That allowed me to essentially square and level off the shelves and secure them on the outside faces with more 10g x 60mm screws in countersunk pilot holes. I ended up splitting a shelf, but that's nothing that once again, Gorilla glue can't fix.
So, what's next? Well because of my earlier mishap with the first attempt at gluing up the panels, I need more spotted gum shelving. I Intend on painting the uprights black, due to the fact that the shelf screw hardware is exposed and well, i kinda don't want it to be seen. That and it'll match the unit. I know I'll have to sand it down quite a bit first before i paint/stain it, But it'll go with the remainder of the unit and in all honesty, it means I don't have to use such an aggressively dark stain to begin with to get that nice, dark colour. I also intend on painting and filling the screw hardware to hide it.
Also there's some additional cutting and trimming that i'll need to do to get the shelving "level" with the front of the unit
I also plan on adding LED Strip Lighting to each shelf and have it connected to a timer or better yet, a ZigBee/Tuya enabled relay, so that I can turn it on remotely or automatically at sunset.
- Mark as New
- Bookmark
- Subscribe
- Mute
- Subscribe to RSS Feed
- Highlight
- Report Inappropriate Content
- « Previous
-
- 1
- 2
- Next »
Why join the Bunnings Workshop community?
Workshop is a friendly place to learn, get ideas and find inspiration for your home improvement projects
You might also like

We would love to help with your project.
Join the Bunnings Workshop community today to ask questions and get advice.