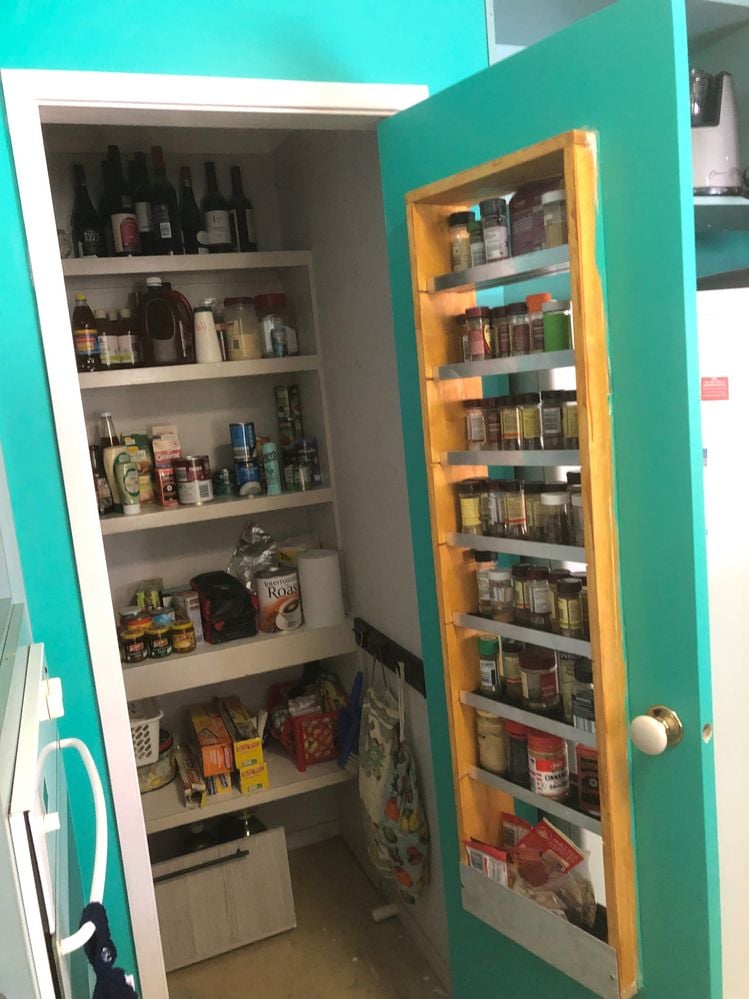
A spice rack built into the pantry door to help create an organised kitchen and make cooking and cleaning easier.

The project
I got this idea from a combination of places such as those fridges with the double doors from the outside (access the drinks via outer door, or use fridge inside by fully opening the door). This is a pantry door which was originally plain and featureless, and inspired me to add a built-in spice rack, as we had a number of spices stored in plastic tubs that we had to rummage through each time we went for a spice. Secondly, all the conventional spice racks were too small and wouldn't hold our larger size spice jars, so we would have some spice in a small rack, the rest in the tubs.
Steps
Step 1
Spice door design features. The spice racks are 100mm wide allowing for a double row of standard spice jars or larger diameter bottles. The bottom spice shelf has a back on it to allow sauce mix packets and or packet spices to stand there. The door now has double-swinging hinges allowing access to new storage behind the door (previously inaccessible). The door has a foot stopper to allow the door to be held open, into or out of the pantry. Door handle's original latch was removed to allow ease of dual-swing handles, left on for pushing / pulling the door open. I haven't covered its hole yet. Standard bottle spice rack capacity is approximately 98 spices as shelves are double-sided. More spices if squeezed in, or you make spice rack bigger in door.
Step 2
It looks like an easy project but there were several surprise problems to overcome as in most projects. Firstly that door is a hollow thin ply-like wood outer, and cardboard inner, and 20 to 30mm outer edge of timber. So I had to add internal timber of the same thickness inside the door to support the spice rack timber frame. This was right down to the door internal base so the weight of the rack and spices would not twist and buckle the whole door.
The door opening into the kitchen allows access to a potential second row of spices and access (previously unreachable) behind the door for hanging stuff and ease of cleaning.
Step 3
Door pinned open into the pantry allowing ease access while cooking.

Step 4
Door hinges: Limitations are that the door can't carry unlimited weight, but it's currently working perfectly. I did use Bunnings heavy duty quality hinges and I can always add more hinges to the door if required. The cheaper small hinges I tried won't carry weight, as the spring-loaded hinges will drop and not operate well. I might be able to get a couple of regularly used sauce bottles into it but where do you stop?
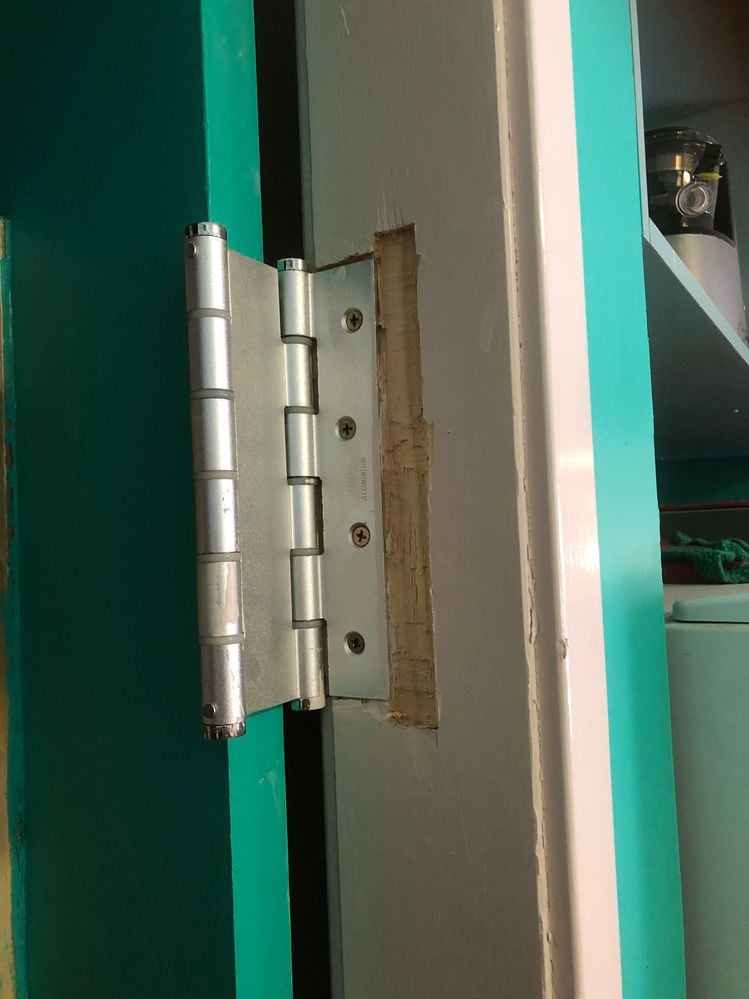
The hinges I used are not designed to be mounted onto a flat door frame. They should mount onto frame approximately 38mm wide, the same thickness as the door. The problem with flat-mounting these hinges is they need room to open, and the only way was to create slots into the timber frame to allow the hinge to drop into, for proper door opening into the room. Opening the other way was fine as the hinges where mounted on the inside of the door frame where the original position of the door was. Slots are a little messy, but I have cleaned and painted them now. You can buy hinges that allow proper flat-mounting but they are very expensive.
Step 5
So all these spices sitting in the door, how do you stop them falling out each time the door opens and closes?
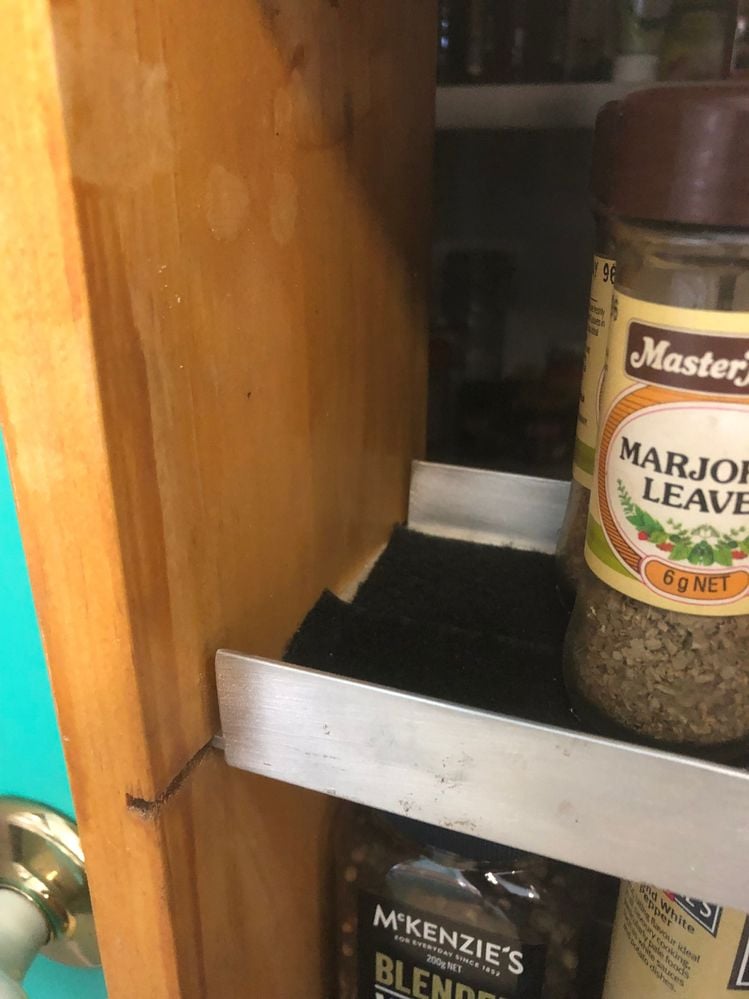
Well I used 100mm velcro strip glued on to the base of the shelves and I cut out round velcro for each of the bottles I wanted to mount in the door, plus some extras for new jars. If we buy the same new spice we can open old bottle and add spices into the jar to save re-velcroing every spice purchase. The glue on the velcro wasn't strong enough to hold the round dots to the jars as we grabbed the spices, so I used builders adhesive that worked.

Step 6
I originally set out at a metal specialist to buy some c-shape aluminium 100mm wide with 20mm edges for the shelves but they said they would have to order them in specially, so I changed plan on the spot and bought 100mm wide flat 3mm thick and 2 x 30mm angle. Notice the timber frame has saw cuts that the flat aluminium slotted into nicely, as the saw was a 3mm blade too. I cut the angle and simply glued them on to the flat plate with builders' adhesive. I glued the shelves into place to stop them moving. Some may want to fill saw cuts and hide them, I am ok with them.
Step 7
Well, finally all my spices are easy accessible out of tubes with room for many more spices if we want them and the sauce packets have a home, which are fiddly to rummage though loose in a pantry.
Hope you like and want to design a better version of this prototype.

Tools and materials
Materials used in the project:
Tools used in the project:
More inspiration for your spice rack project
Bunnings Workshop member DIYology came up with this Slimline pull-out spice rack.

Community member softwareburnout made this instantly recognisable D.I.Y. spice rack.
