🖼️
The project:
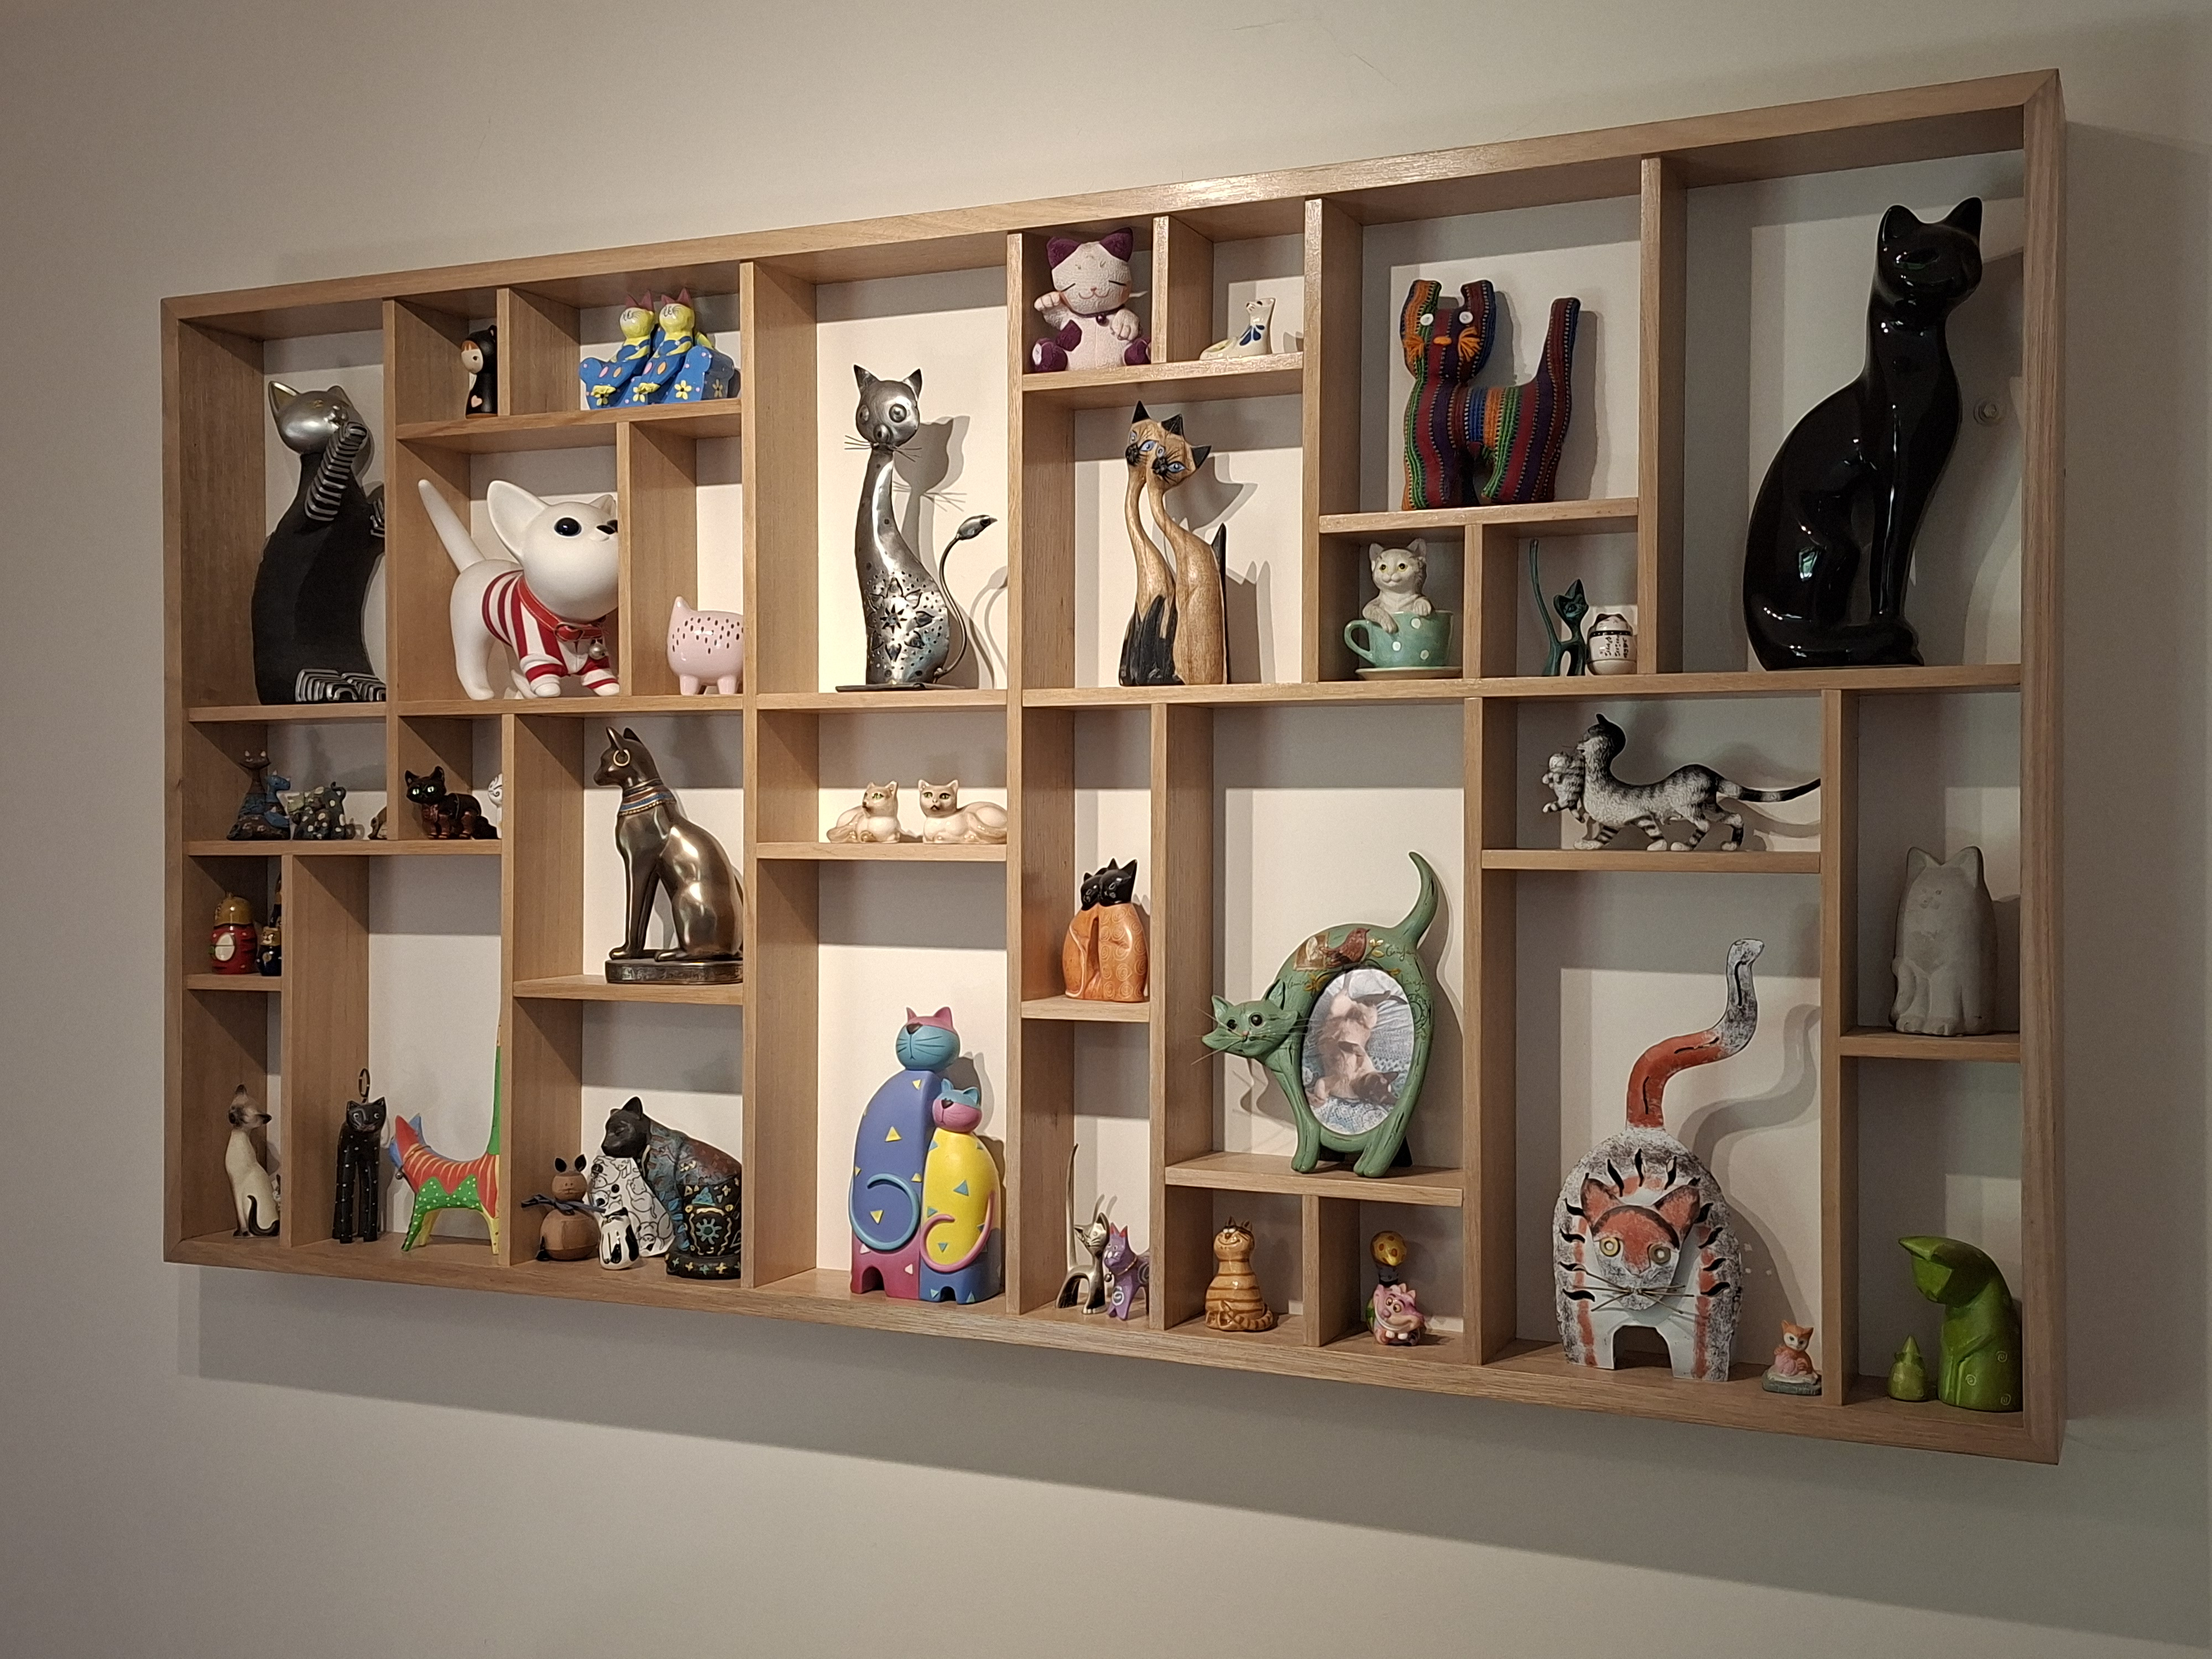
My wife is a crazy cat lady and has a collection of cat knick-knacks accumulated over some time. These are of a range of sizes and were displayed in various places throughout our house. I decided that they would be better presented in a shadow box style display case on a wall.
- Materials:
Dressed hardwood: outer frame 10mm x 19mm; internal dividers 90mm x 12mm
Backing board: 12 mm MDF
Wood glue; bullet head nails; hardwood colour wood filler
Clear finish: Cabot's Cabothane water based
- Tools:
Ozito sliding mitre saw with 64 tooth blade
Trojan mitre clamp
Router; bench drill stand
Hammer; nail punch; sash clamp; G clamps; screws and driver for backing board attachment
Steel rulers and Combination square
Sandpaper; paint brushes (including brush with cut off handle to fit in smallest opening)
Stud finder
- Step 1:
DESIGN:
Initial design step was to gather all the cat knick-knacks, count them, and graduate them in size. From this I decided on the size of the smallest opening of 100mm square. The other openings were based on multiples of this "base" up to 200mm x 300mm. The 100mm x 200mm openings were either vertical or horizontal based on the orientation of the "cat" to go into the opening.
The layout took a number of iterations as I wanted to ensure there were minimal "cross" joints (3 only) and that all "T" joints had access for nailing the joint. This criteria also required consideration of the sequence of adding the dividers.

- Step 2:
From this initial design I decided on the timber to be used and produced a scale drawing of the unit. The outside dimensions were 810mm x 1482mm. Openings were 90mm deep.

- Step 3:
I decided that a backing board was required to hold the dividers rigid and support the weight of the "cats". I routed a 13mm x 9mm housing around the outer frame for the mounting of the 12mm backing board.

- Step 4:
The outer frame timber was cut to the required lengths using my mitre saw, and the mitre joints were glued and nailed.
The backing board was cut with my router to fit, and was screwed into the housing in the outer frame timbers.
- Step 5:
From the scale drawing I counted the number of dividers of each of the different lengths. 6 off 100mm, 2 off 212mm (2 x 100mm plus 12 mm divider thickness), etc. These were then cut with my mitre saw.
- Step 6:
Starting at the bottom left hand corner I gradually added the dividers gluing and nailing (and clamping as necessary). To keep all dividers square and parallel I used my square and unused pre-cut dividers.

- Step 7:
Ultimately all dividers were in place. I then removed the backing boards (to give access to both the back and front of the dividers for painting). I was pleasantly surprised with the strength and rigidity of the completed matrix even without the backing board. I applied two coats of clear finish. Even with my cut down brush, painting the dividers proved a chore, particularly in the 100mm square openings.
Note: I did not want to paint the dividers before assembly as I thought that this would impact the strength of the glued joints.

- Step 8:
I painted the backing boards the same colour as the wall on which the display case was to be mounted, and then re-screwed them back in the outer frame. I also applied some screws through the backing board into some strategic dividers for further rigidity (maybe a bit of overkill !).
- Step 9:
The display case was then mounted on the wall using two relatively heavy screws through the backing board into the wall studs. I also had a pair of spot lights installed on the ceiling to better illuminate the display case.
- Step 10:
The last step was to place my wife's cat collection in place.
I was very pleased with the finished product and my wife loves it! Visitors and family have praised my project, although maybe some of these comments for my wife's cat collection rather than my handiwork!


