I was cleaning this cabinet bottom - please see the photos and I destroyed the finish of it, how to fix it or maybe replace it if faster
Hi @ahmedsakr,
Welcome to the Bunnings Workshop community, it is fantastic to have you with us.
Is it possible to get a slightly wider photo showing where exactly this damage is?
What did you use to clean it?
To me, it doesn't really look like you've damaged the finish; it looks like there was oily residue on the underside of the cabinet that the cleaner has removed. There may also be some filler at the top of the second photo, but without the context of where it is, I am not 100% certain what I'm looking at.
When you can provide a few extra details, I will happily assist further.
Jacob
Hi Jacob,
Thank you so much for your response, Unfortunately I am not currently at the unit but I had a stain that most probably was caused by laundry liquid and left a yellow stain. I used wet wipes first, then I used white king - mould soap scum remover, then applied baking soda and vinegar. After scrapping it, I noticed this damage. The paste you see in the photo is the baking soda and vinegar. This mix helped but needed a softer scrap.
I hope this helps 🙏🏽
Thank you
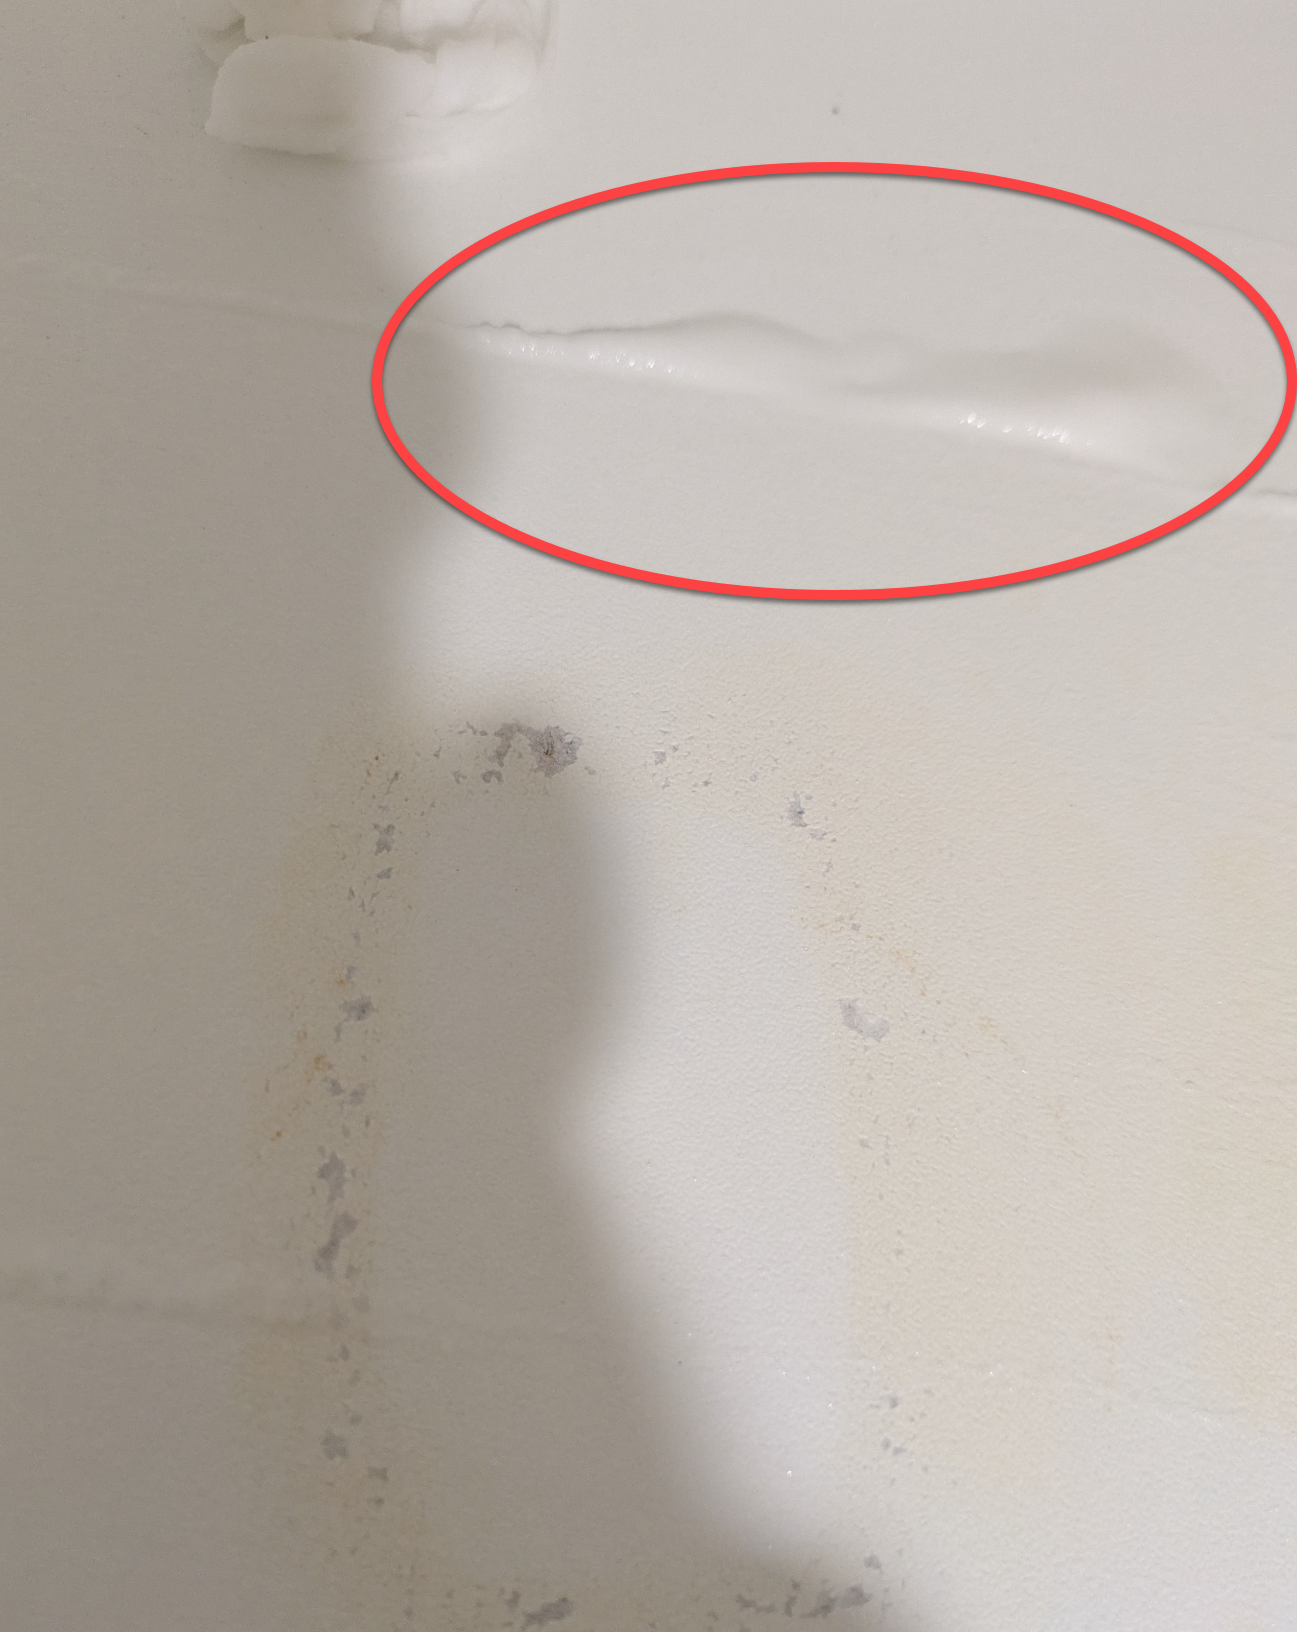
Is this the damage you are referring to?
Or is the grey stuff around the white patch at the bottom?
If it is the top, then it looks like there is a void that has been filled in the past. To fix this, I would continue cleaning the cabinet to remove any residues, then apply a filler such as this UNi-PRO 500g Multi Purpose Interior Filler, then prime and paint it to match.
If it is the grey stuff around the white patch, you should be able to just prime and paint it.
Let me know what you think.
The scuffing would imply that the board was painted previously, as I find it very unlikely that a vinyl coating would come off with simple baking soda and vinegar.
To fix this, I would finish cleaning, allow everything to dry, then lightly sand the spots with 240 Grit Sandpaper to remove any sharp edges.
I would then spot prime with primer using a craft brush to keep it nice and precise.
Once the primer has dried, paint over it to blend it in with the surroundings.
Let me know if you have any further questions.
Thanks Jacob,
As soon as I get back home, I will make sure to check if I can get this bottom part off and maybe get a replacement, otherwise, I can only follow the procedure of sanding, prime and paint.
Thanks again for your help.