A Murphy bed with wardrobe and cabinets made from plywood with Pine timber supports.

The project
This room was originally a very disorganised playroom that I gave up on. Before I attempted to make the Murphy bed, I went crazy trying to find something I could understand but decided to just figure it out as I went. Once you make the frame, you’ll be surprised how easy it all comes together. (This Murphy bed is a queen size.)
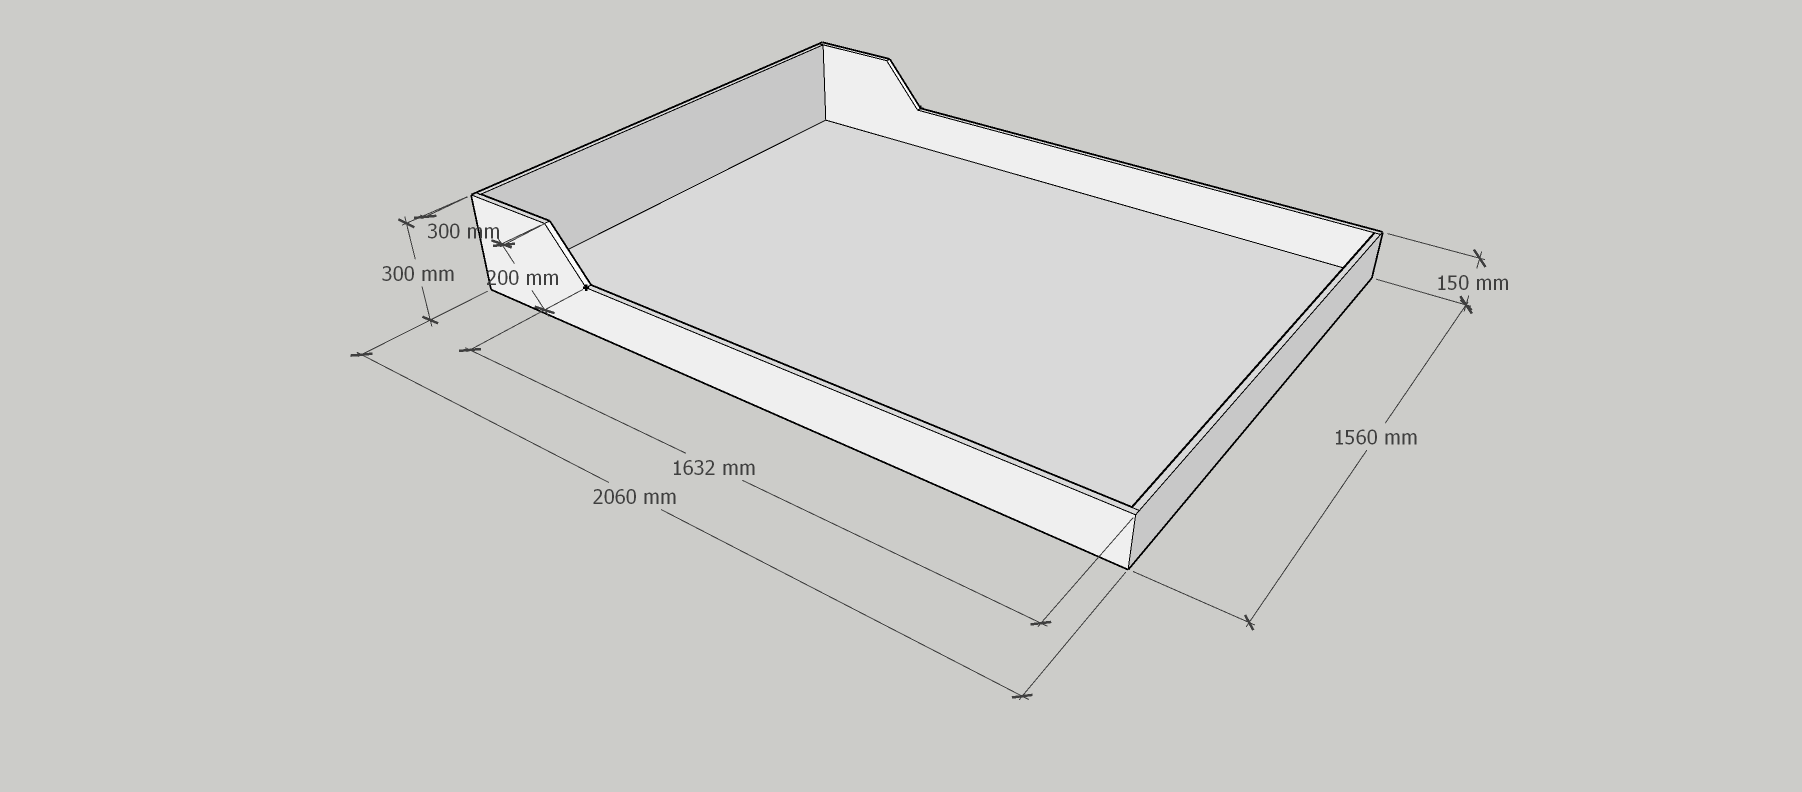
For this project I did purchase two sheets of Formply as it was the only ply I could buy at the time and I’m impatient. Formply was the perfect size to create the base and the frame that holds the bed to the wall. The two sheets were enough to make the bed frame and the outer frame to hold the bed to the wall.
I cut two panels at 2040 x 250mm (bed length) and two panels at 1530 x 200mm for the bed frame top and bottom width.
I drilled pocket holes on the inside of the two shorter panels on both ends. I added Wood Glue and attached with Pocket Hole Screws.

The panels have a tapered design to allow the section to be wider where the mechanism sits. This taper also allows the mattress to sit high above the frame, so you don’t hit your shins when jumping into bed. I made this mistake and had to correct it.

The mattress covers the pocket holes from the inside, so I’m not worried about covering them. I then attached the Pine supports on the inside of the frame with pocket holes. The bed slats are attached to these supports. This is what the mattress will rest on.

Once the bed frame was made, I calculated how wide to make the wall frame. The mattress sits on average to 300mm thick. I made my wall frame to 410mm. This gave me some space (110mm) between the mattress and the wall in the up position.
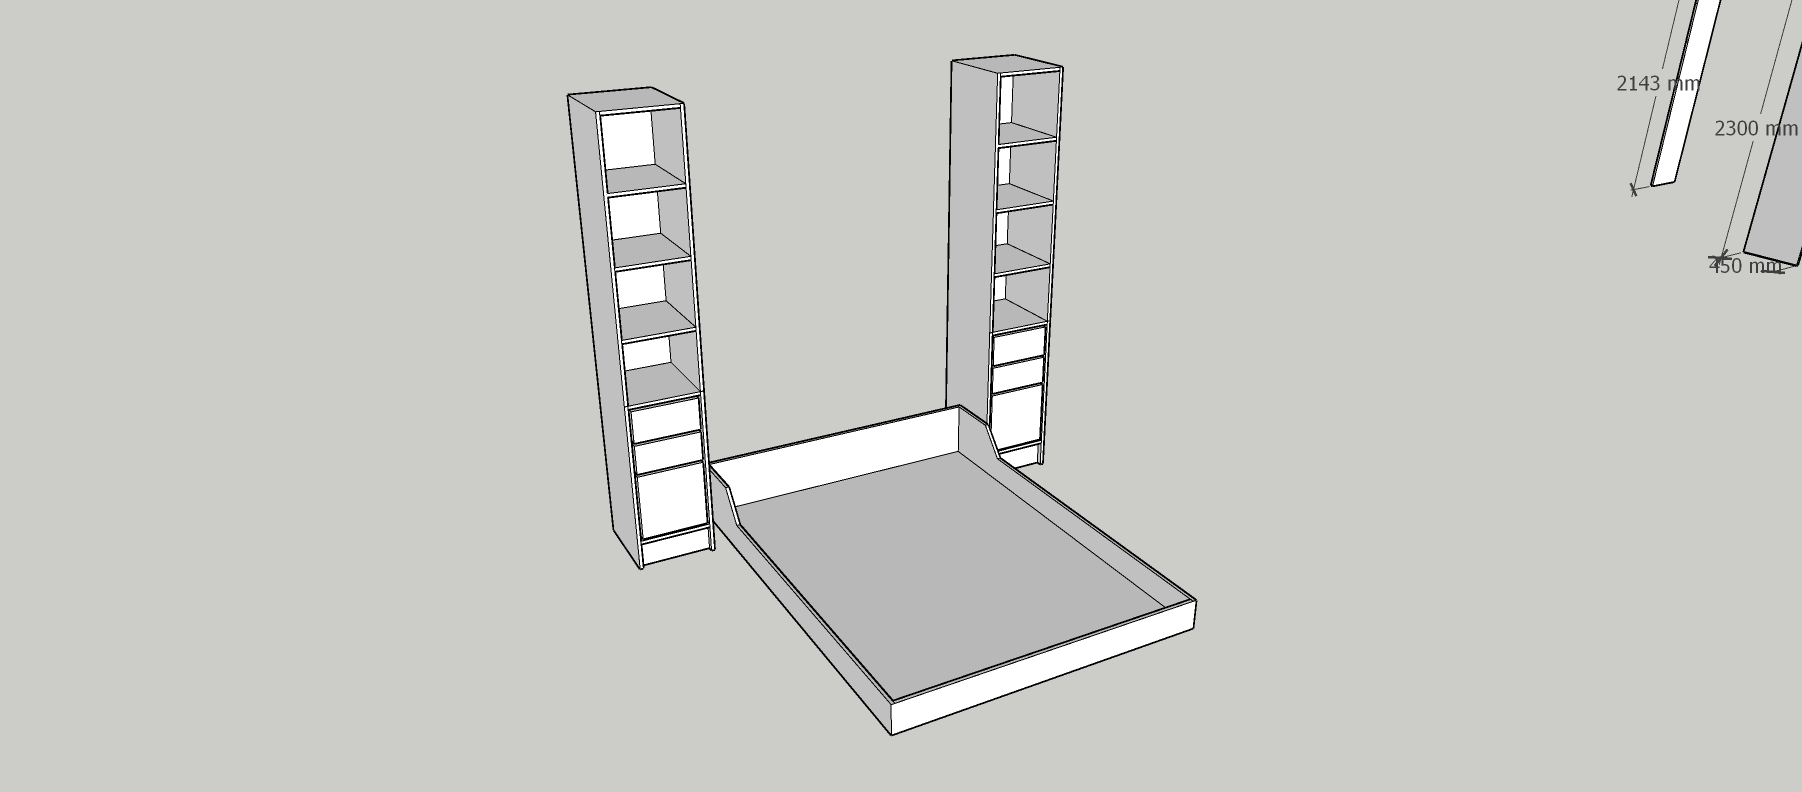
I cut two panels to 410mm wide and 2010mm. This was the distance between my floor and wall. You will need to measure your ceiling height to have the perfect fit. I located my studs and attached a panel at the top and bottom of my wall frame. The supports are marked in red.

I screwed through the panel and anchored the wall frame to the studs. The outer bed frame needs to be attached to the wall via studs or the bed will fall. If you are not adding additional cupboards, as I have, I would recommend doubling the outer frame for extra strength.
Murphy bed hardware can cost anywhere from $300+, so I thought I’d try a cheaper option. I opted for 2 x 7 inch Bearing Plates. The plates sit between the bed frame and wall frame. You can also try to drill a hole and use a flange and fittings to rotate on the fitting.
Once the wall frame was secured, I sat the bed frame inside and propped it up with some timber to give me a bottom gap. This bottom gap will house the concealed bed head and close the gap in the up position.

I positioned the swivels into place and drilled holes. It was a little tricky to tighten the bolts in the small gap, but long nose pliers did the trick to hold the nut into place.
One important note is before you drill your holes for the swivel, you need to set your bed frame back into the wall frame the thickness of the front face board So for example, I used 12mm Structural Plywood for the front face. I allowed this gap so that when it was in place and the front board is attached, it would all sit flush.
Once the swivels were attached, I screwed the front face on. This is the face that is in view in the up position. I purchased 2 x 2030 x 1200mm structural plywood and cut one panel from each. I allowed an overhang of 18mm on each length. This is so when the bed is up, it covers the gap created by the swivel.


I drilled two holes at the top of the bed. This hole goes through the wall frame and bed frame. I used some long screws. I had when the bed is up, the pins (or screws) will pin the bed in place and secure it. The pins are pulled out on both sides to drop the bed.
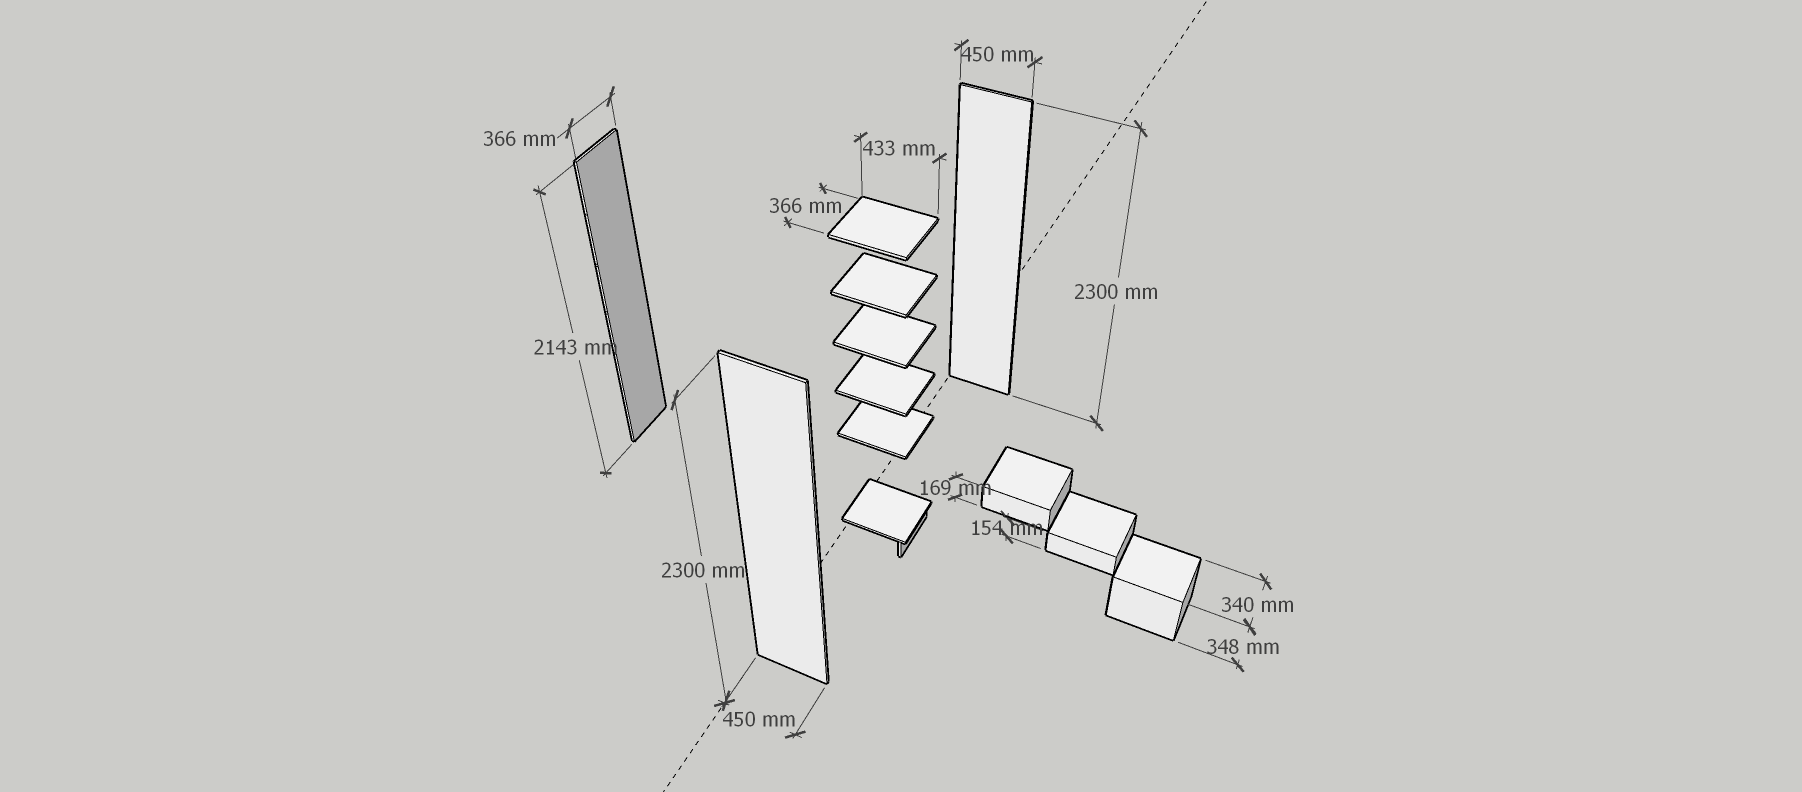
The wardrobes were made from MDF and other recycled materials.

I created a floating shelf which acts as the bed leg. This timber was found with a bunch of pallets, so I cleaned it up and attached it to the front panel of the bed.

I also cut some MDF to 450mm strips to create a Shaker style look to the area.
The hidden bedhead was made with Plywood, lined with wadding and covered with some material I had. I nailed in some Upholstery Nails in. The height of the bed head must not exceed the width of the wall frame. This is so it slides at the bottom of the frame.


I made some new toy storage cubes and used my Plywood offcuts to glue to the front face.


To stop the bed accidentally opening, I used a long bolt that I saved from my kids' old cot. When I put the bed into position, I drilled a hole slightly wider than the bolt. When the bed is lifted up, the pins are put in place on both ends. I placed them inside the top cupboard so they cannot be pulled out by little fingers.
Without the mattress inserted, I can easily lift it in my own, however with the mattress I do need assistance. I was thinking to also invest in some sort of gas strut. Might help with lifting it in my own.
I’ve drawn a quick sketch of the bed layout in the down position for you. The room is approximately 3.5 x 3.5m. It does give you one metre either side and about 1.3 metres at the end. For me, it’s a perfect space to move about.

You may also want to consider having the bed fall horizontally so the swivels are fixed on only the right side of the bed.
My D.I.Y. Murphy bed is finally finished and is already a game changer in my small home. I'm sure I’ve missed some steps but feel free to ask. This really was a rewarding build for me and I'm happier it’s finished. If you ever consider making one, we are certainly all here to help. I have faith that you can do yours a lot better than mine and can’t wait to see what you create.
A small video can be viewed here of the bed being put up: DIY Murphy Bed.
Before and after