The Bunnings Workshop community can help with your home improvement projects.
This easy D.I.Y. desk utilised RapidMesh furniture legs and a Pine panel.
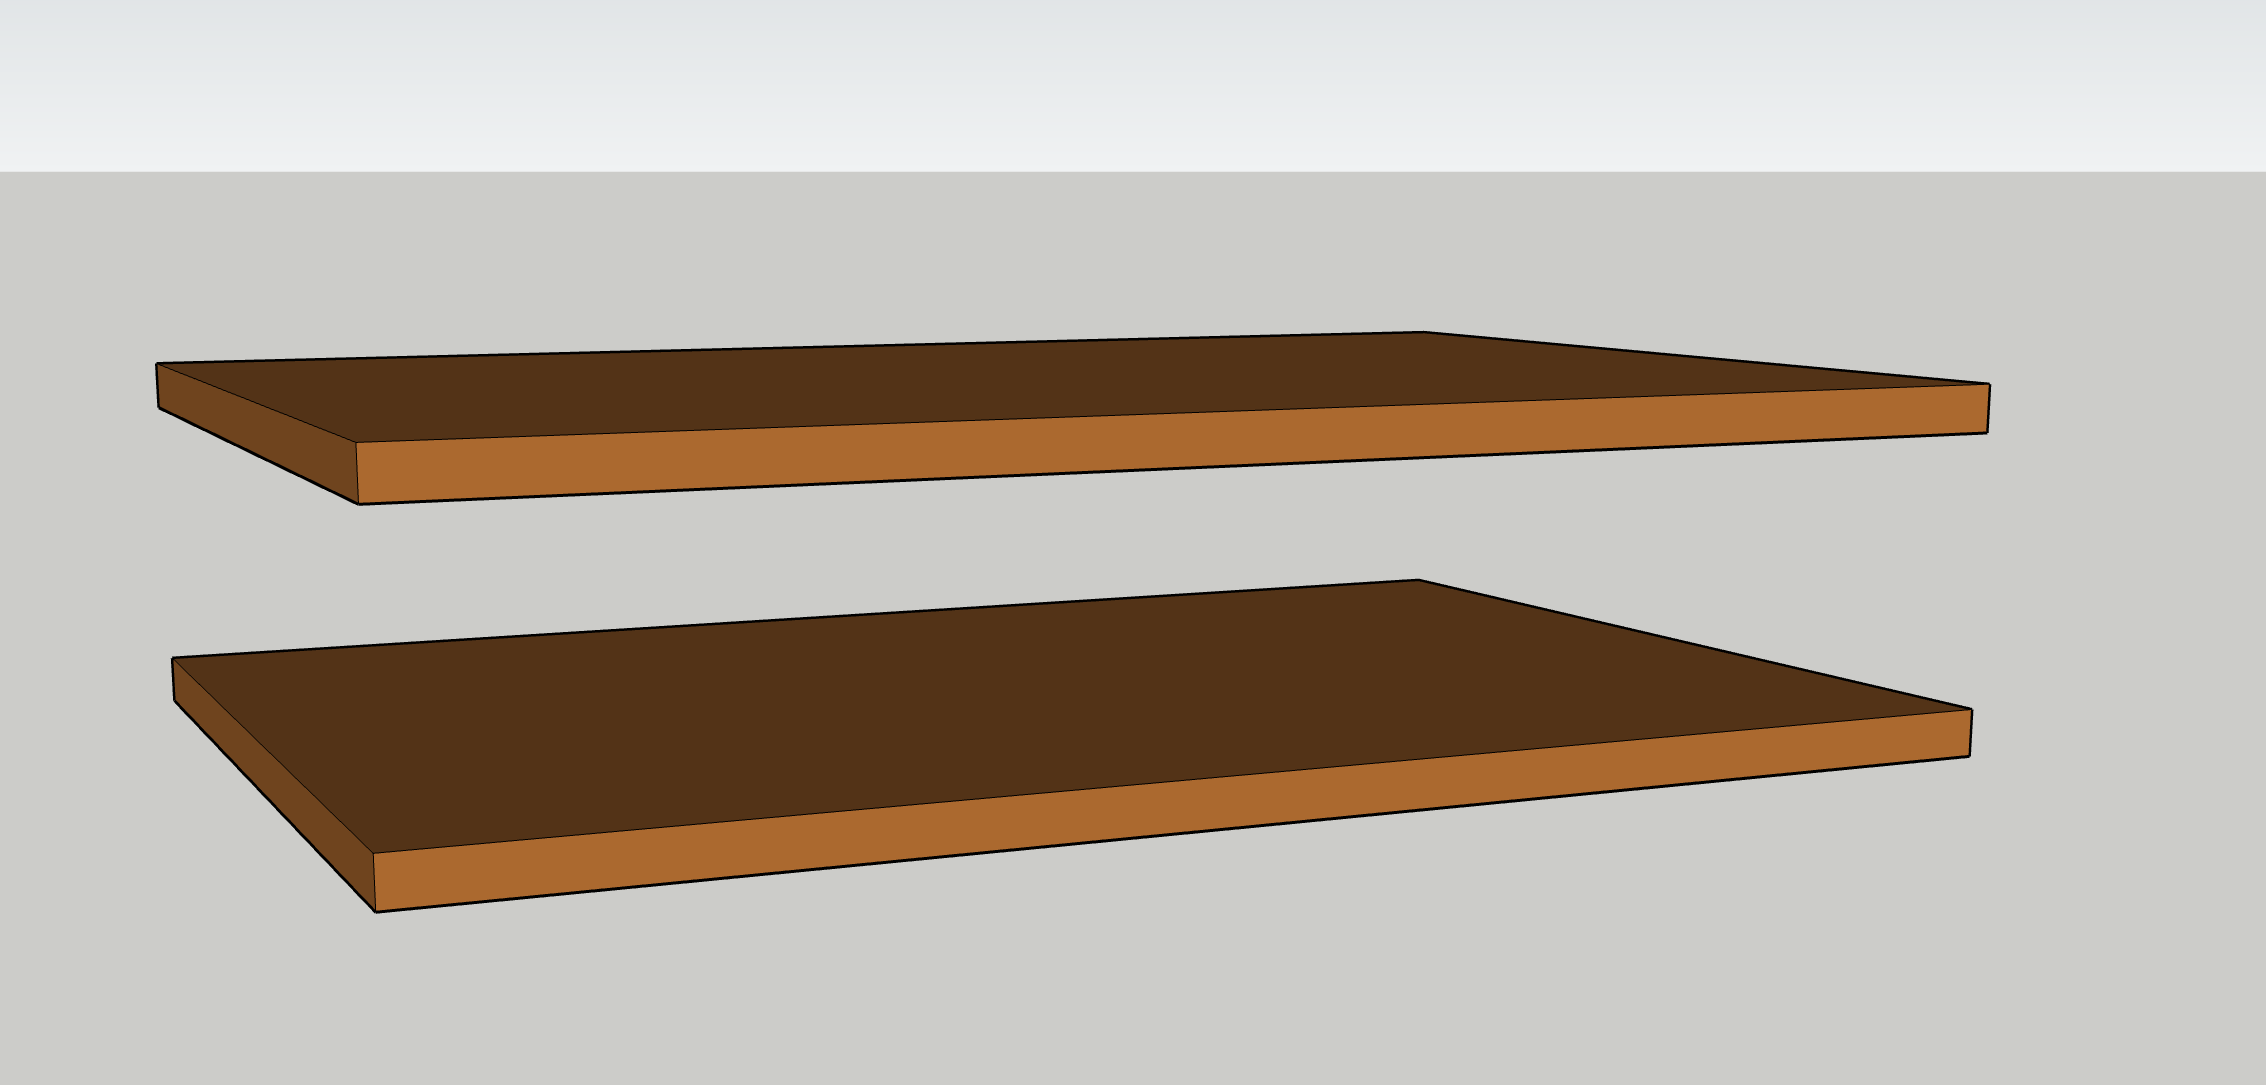
In need of a new desk, I had two RapidMesh furniture legs and a Pine panel delivered during lockdown.
We painted the panel with liming white paint and it came up really well.
The liming wash was great to use and it's a more subtle white than a white gloss. I only used one coat of the liming wash as I still wanted to see the grain of the timber. It was easy to apply and I left it to dry overnight before I added the desk legs.
I used six screws to secure each leg. The holes are already in the legs so it's easy and solid.
Creating a dedicated workspace or updating an existing one can be simple and affordable, and you'll have everything you need to be more productive when working from home. For more simple D.I.Y. desk projects, check out our Top 10 most popular desk projects.
This simple and spacious deck by robchin should also provide inspiration.
Hi
I am planning to make same for myself.
Can you please confirm which screws to use?
Welcome to the Bunnings Workshop community @vikasb. It's wonderful that you've joined us, and many thanks for your question on this project.
Zenith 10G x 30mm Gold Passivated Type 17 Countersunk Head Timber Screws would be suitable for attaching the RapidMesh 70 x 73.2 x 6cm Black Santos Steel Tube Table Furniture Legs to the AraucoPly 2100 x 900 x 30mm Clear Pine FJ Laminated Panel. A 30mm screw is about as long as you'd want to go to ensure you don't penetrate the 30mm top. The thickness of the leg prevents the 30mm screws from penetrating the timber's surface.
Please let me know if you need further assistance, and we look forward to following along with your table project.
Mitchell
@cmstar Great looking desk, you’ve inspired me to replicate the exact one for my home office. I’m a complete novice, so apologies if the below questions appear as common sense.
Can you please advise how many millimetres from either sides of the table you positioned the legs before drilling in?
Did you also sand the top of the table before applying the liming white?
Thank you in advance!
Hello @Mohamed1
Welcome to the Bunnings Workshop community. Thank you for joining the discussion and sharing your question about the easy D.I.Y. desk.
It's fantastic that @cmstar's project has inspired you to make your own desk. We are more than happy to answer any of your questions regarding this project. It is always best practice to sand timber, especially a timber benchtop. I recommend using the Ozito ¼ Sheet Orbital Sander. This will remove all the splinters on top of the table and give you a smooth surface. Having a smooth splinter-free surface will allow you to paint the tabletop without damaging the brush, it will also give you a blemish-free finish.
A recommended leg distance of at least 300mm from the edge of the table is suggested. This will give the tabletop excellent support and prevent the timber from bowing.
Please keep us updated, we look forward to seeing your desk once it is complete.
If you need further assistance, please let us know.
Eric
Thanks for the prompt response and recommendations @EricL!
I’ll take in that advice and get to work this weekend, excited to see how it comes up 😊
Let us know how you go @Mohamed1; I trust everyone will be keen to see your results.
Shout out if you get stuck. We're here to help.
Mitchell
Got the job done over the weekend!
It’s come up really nicely, what a difference a big desk makes. Thanks again for the advice and recommendations, I’m keen to see what my next project will be 😊
Amazing work, @Mohamed1! You've replicated this project beautifully.
Having space to work certainly makes life easier. Give us a shout when you decide on your next project; we're all keen to assist.
Mitchell
I am a novice and pretty useless at DIY hence I have given a username Homer-Built because I usually yell DOH! after one of my failed projects 😣 BUT, I am a glutton for punishment and determined to have a go at this. Can you please help out? I am trying to cost this job. The RapidMesh furniture leg on Bunnings website is $59.. is this for 1 leg ?
Would be great if it’s a 2 pack but I am assuming it’s a single leg.
Total cost so far is $314.50.
For the lime wash, the recommended Feast Watson brand states that it requires a top coat. Do I need a top coat? I didn’t see that anyone used a top coat. If so, which topcoat do you recommend?
@Homer-Built The cost of the legs are for one only, so you would need to purchase two. As for the stain and varnish liming white, I didn’t put a top coat, but maybe the other experienced team members can comment on that. I applied two coats of liming white with a light sand in between. Have a crack at it, it’s the only way you’ll know how you go 😊
Good luck 👍🏼
Hello @Homer-Built
Welcome to the Bunnings Workshop community. Thank you for joining us and sharing your question about costing the easy D.I.Y. desk.
It's great that you've received excellent advice from @Mohamed1. The Rapidmesh Leg is sold as a single item and not as a pair. There are two types of Liming White. One is Feast Watson 250ml Liming White Satin Stain & Varnish. This has a varnish component in it and does not require a topcoat. The other one is Feast Watson 500ml Liming White. This is oil-based paint and goes on much brighter. A topcoat will be needed to protect it from everyday use.
Please keep us updated with your progress, we look forward to seeing the start of your project.
If you need further assistance, please let us know.
Eric
Hi all
I am total newbie , the above project inspired me as have been working at home with a makeshift table. Ordered
Need some advise, prefer a Stain finish any recommendations ? and also prefer the edges to be more rounded . I have not used power tools besides basica drill assupmtion is that i would need to purchase an orbital random sander and some router ? not sure what type of bit to use to get the rounded edge . The panel looks big i may need to cut it assume circular saw should do it .
Thanks in Advance
Rohit
Hello @rmkassen
Welcome to the Bunnings Workshop community. It's fabulous to have you join us, and thank you for sharing your questions about the easy D.I.Y. desk.
It's wonderful that this desk project has inspired you to build your own. You've certainly nailed down the parts list and all you need to accomplish now is a bit of finishing and painting. Using a random orbital sander will make the job go so much faster and will allow you to achieve a uniform finish. If you want to have a very rounded bullnose edge to the table then using a router is the way to do it. But if you only want to remove the hard edge of the timber top, then using a sanding block will let you have a soft rounded pencil edge. If you do need to cut it down a circular saw will do the job.
There are a few paint brands that have the satin finish you're after. Some are oil-based others are water-based. I suggest visiting your local store and looking at the paint sample board in the paint department. There you will see the actual satin finishes on display. I use Cabot's 1L Satin Clear Benchtop Timber Finish for my personal projects. Its water-based paint and makes it easy to clean and does not yellow like oil-based sealers. My favourite part is that it is food-safe, does not release any toxins and the table can be used every day.
Here is a handy step-by-step guide: How to restore wooden furniture.
If you need further assistance, please let us know.
Eric
Nicely done, good on you. 👍
Hi All,
Great looking desk. I am also a complete novice and I want to make a dining table in a similar way. Could you please share how did you attach the metal legs with the timber table top. Don't the nails or the screws damage the top view of the table and do they make the table sturdy. I am not aware how can I attach the legs, so please excuse me for my silly questions.
Hello @Megha
Let me tag @cmstar to make them aware of your kind words and questions. It does sometimes feel that way when you screw in from the back of the table, it will pop out the other side. You can easily avoid this by getting the measurements of your table and legs.
Let's do some quick calculations, if the AraucoPly 2100 x 900 x 30mm Clear Pine FJ Laminated Panel is 30mm thick and the RapidMesh 70 x 73.2 x 6cm Black La Paz Steel Tube Table Furniture Leg has a top thickness of 5mm. The overall thickness would be 35mm. If you use Zenith 10G x 30mm Gold Passivated Type 17 Countersunk Head Timber Screws it won't breach the top of the table because it's only 30mm long.
However, if you're still worried about the screw length you can get the next size down. One of the best ways to do it is to place the legs right next to the top you'll be using and place the screw right alongside it. This will guarantee that the screw you'll be using won't be too long for the table and legs. I've placed a diagram below for you to see.
If you have any other questions we can help with, please let us know.
Eric

Looks great
Hi,
I’m planning on using the Specrite 2400 x 900 x 33mm Timber Multi Use Pine Panel and the Rapidhome 732 x 700 x 60mm White Santos Steel Tube Table Legs.
The description for the legs advises to use 12G fixings. In this post you’ve recommended to use 10G x 30mm, what would be the best screws for the piece I’m using?
I was also unaware until today that the timber panel was actually a laminated piece, will this change how it needs to be cut/sanded/waxed etc compared to a solid raw wood?
Thank you
Hi @TaylaB,
Welcome to the Bunnings Workshop community, it is wonderful to have you with us.
The difference between a 10G and 12G screw is going to be very minor, however it is best to follow the recommendations given by the product's manufacturer.
With this being said, these Zenith 12G x 30mm Galvanised Hex Head Timber Screws would work. You can simply remove the small rubber washer from them, as it is not necessary for your use.
Being laminated timber, there isn't really any major difference in how you would treat the timber. You should still follow the process of cutting to size, lightly sanding the surface and then coating all edges with a product such as oil or wax.
Let me know what you think and if you have further questions, please don't hesitate to ask.
Jacob
Hi everyone,
I'm really excited about this project, but I’m a bit of a novice when it comes to carpentry. I’m planning a small modification and could use some advice.
I’d like to mount my keyboard on a wooden tray that slides on rails underneath the tabletop. Could you recommend a suitable type of wood for the tray?
Also, I’m thinking of attaching both rails to angle brackets to simplify the build. Do you have any suggestions or tips on choosing the right brackets for this?
Thanks in advance!
Hi @hungrymind,
Creating a keyboard tray for your desk sounds like an excellent modification and a relatively simple project for a beginner.
Unfortunately, I don't know of a way you could simply mount drawer slides on an angle bracket, so it might be a bit more complex than you are thinking, but this is an option that you could use.
The idea is to essentially create a box, then add some side panels to attach the box to with some drawer slides.
I would suggest using a Specrite 1200 x 405 x 18mm Timber Multi Use Pine Panel for the top and bottom of the box. It could be cut into two equal-sized panels that are 600x405.

You could then join them together with 140 x 19mm DAR and timber screws to create a box.

You would then mount the inside part of a Goliath Standard Drawer Slide Pair to the box.

You would then mount two side panels to the underside of the desk using angle brackets and mount the outer part of the slides to these panels.


This would create a functional keyboard tray that you could attach to the underside of your desk.
Unfortunately, due to limitations in materials, it is much bulkier than some prefabricated trays, and to create rigidity, it likely needs to have a top.
If you see any issues or would like to suggest improvements, please let me know so I can make alterations to the render.
Let me know what you think.
Jacob
Thank you so much @JacobZ . That was very detailed answer. Initially I was looking something like a tray I attached below. But you gave me a nice idea by using two side panels to mount the rails. My question is why do we need a box? Can't we simply attach the rails to a wood panel?
Keyboard tray
Hi @hungrymind,
The main reason I thought a box would be better is because of the side panels, which I added because drawer slides are usually around 45-50mm thick, and I didn't think it would be great to just mount them to the side of a 19mm thick panel.
In hindsight, you could just screw a piece of 42 x 42mm DAR General Purpose Pine to the side of the tray and do away with the box shape.

Now that I've seen what you are looking at, I think something like this would be more suitable.


You could attach another piece of 42x42 to some angle brackets like these Carinya 75 x 50mm Zinc Plated Angle Brackets, then attach your slides to the 42x42 on each side.
Let me know what you think.
Jacob
This is perfect 🤗. I'll build this table and share the final product soon. By the way what is the tool are you using to render these design? Asking out of curiosity.
Hi @hungrymind,
I look forward to seeing what you come up with.
The software is called SketchUp. It's a brilliant tool for basic design and rendering.
Jacob
Workshop is a friendly place to learn, get ideas and find inspiration for your home improvement projects