Workshop
Ask a question

The Bunnings Workshop community can help with your home improvement projects.

How to create a screen on a Colorbond fence?

New2Retirement
Getting Established

How to create a screen on a Colorbond fence?

Hello everyone,

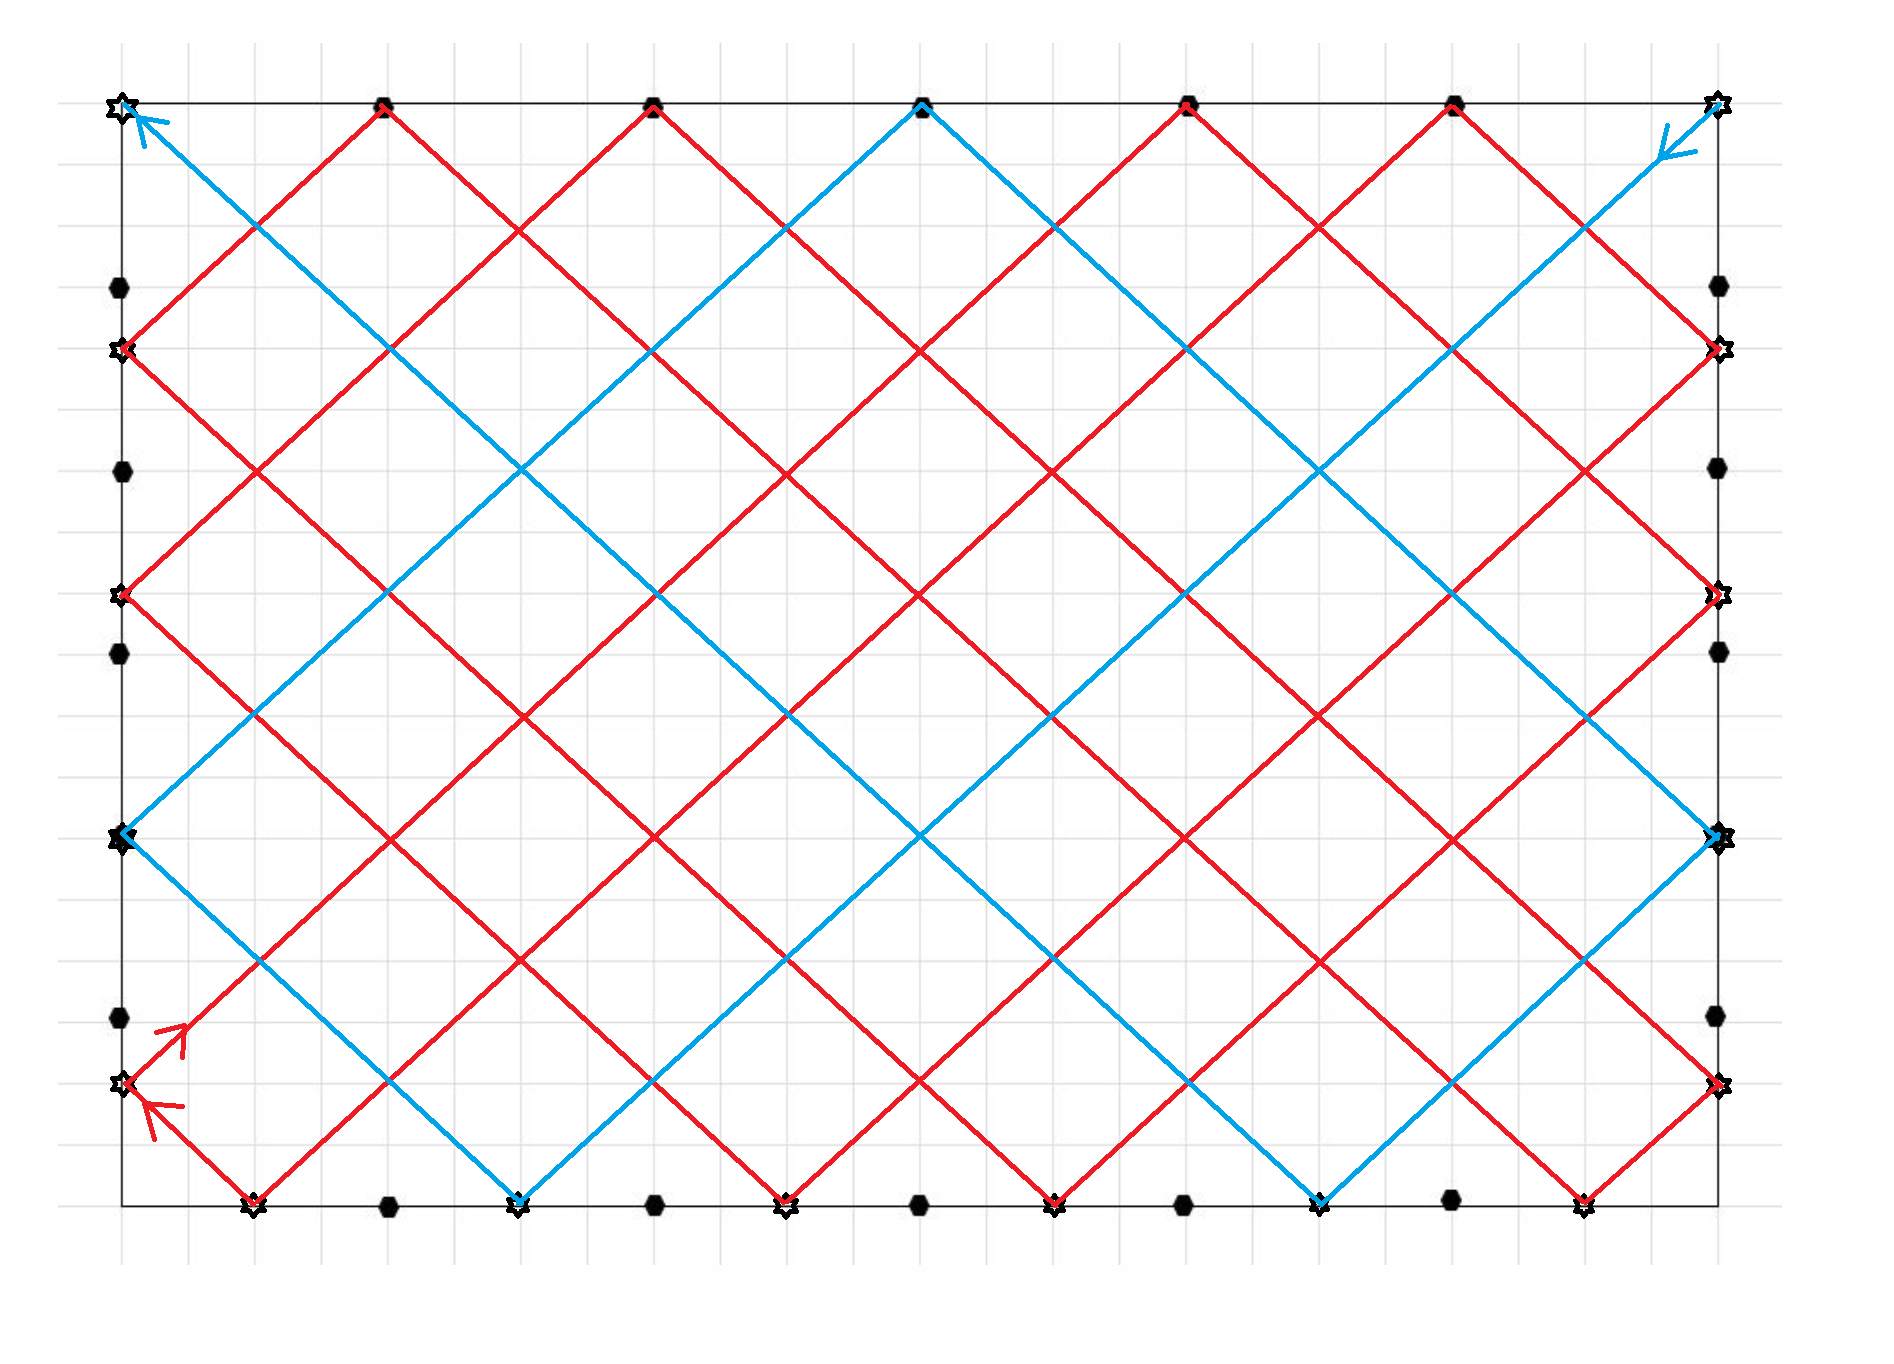
All the comments and ideas are much appreciated. So much so, I've used many of them for our own project.

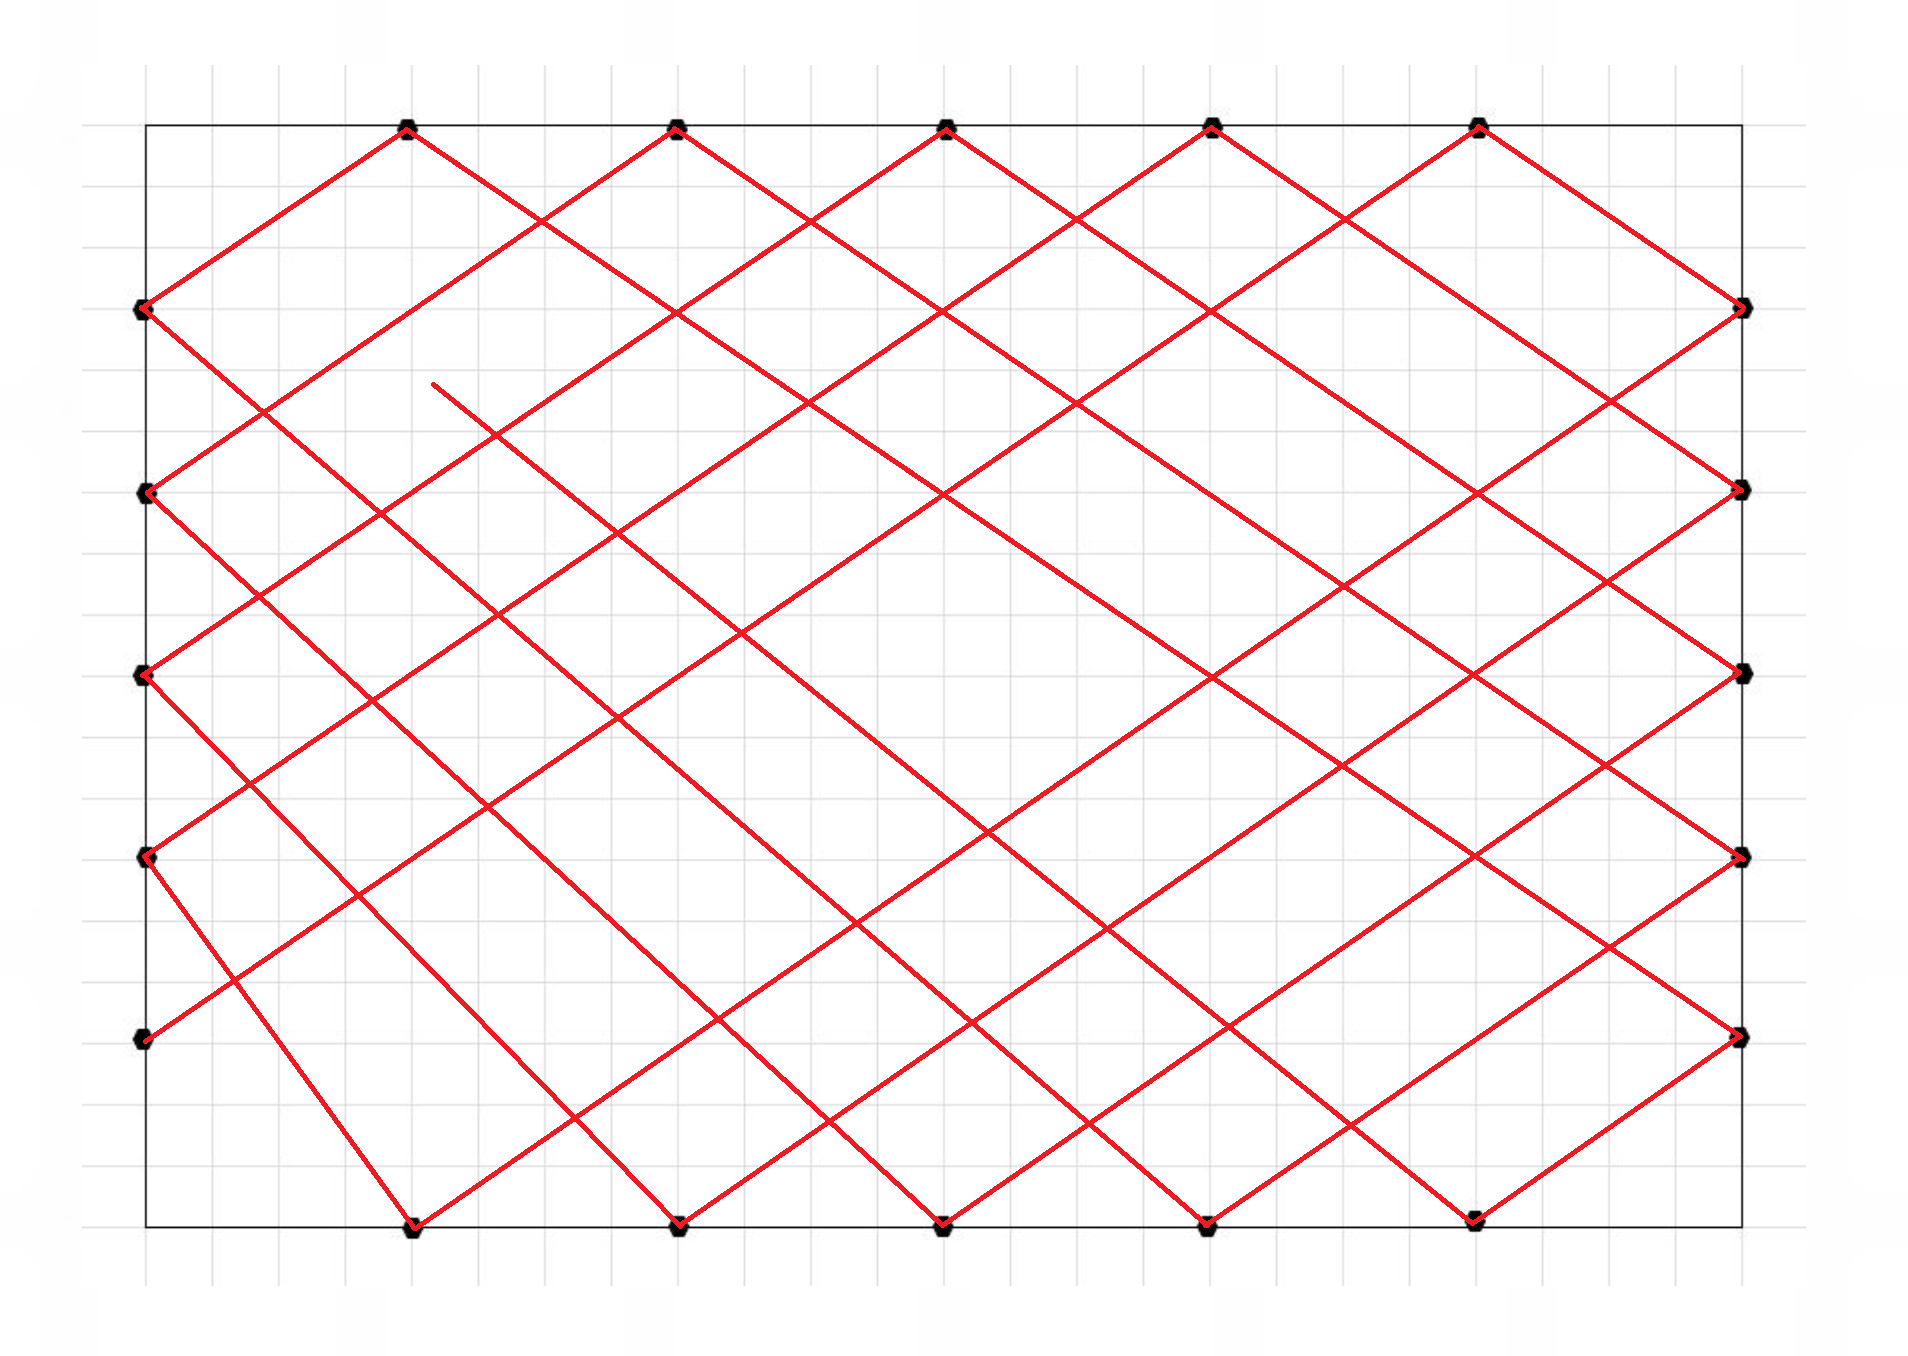
Our colorbond fence panels are 2400 x 1800mm and I've already spaced 5 screws on each side, top and bottom and would like to form diamond pattern if possible.

I've toyed with many plans and must be over-thinking because I'm stumped on how to form a diamond pattern with one strand of wire-rope.

Attached is a plan in excel that I've been using.

Any ideas please?Plan.jpg   


MitchellMc
Bunnings Team Member

Re: How to create a plan to create a screen on a colour bond fence

Hi @New2Retirement 


You're definitely not overthinking it — creating a clean, symmetrical diamond pattern using wire rope on a Colorbond fence is more complex than it first appears, especially when you're trying to do it with a single continuous strand. From what you've shared, I can see you're very close, but the current spacing and alignment of your fixings won’t allow you to form perfect diamond shapes. If you follow your existing layout, the wire would likely result in distorted or uneven shapes that won’t resemble the classic diamond pattern you’re after.


The main issue is that for a consistent diamond pattern — where each diamond is symmetrical and evenly spaced — your fixings need to be carefully offset both horizontally and vertically. You’ll also naturally end on a half-diamond along the bottom row because of the height limit, which needs to be factored into your plan. The fixings on the sides also need to be realigned, as your current setup may lead to stretched or compressed shapes.


To achieve even 200mm x 200mm diamonds, here’s a layout that should work well for your 2400mm wide by 1800mm high fence panel: On the top edge, add seven fixings at 0mm (left corner), 400mm, 800mm, 1200mm, 1600mm, 2000mm, and 2400mm (right corner). On the bottom edge, you’ll need six fixings offset from the top, at 200mm, 600mm, 1000mm, 1400mm, 1800mm, and 2200mm. Along the vertical sides, install fixings at 0mm (top), 400mm, 800mm, 1200mm, and 1600mm.


With this setup, you can then run your wire in two opposing diagonal directions, starting and finishing at the points I’ve marked out. This will give you uniform diamond shapes throughout the panel. It’s a smart idea to use your Excel grid plan and draw diagonals across it to visually map out where those fixings fall — it’s much easier than trying to calculate everything mathematically. I’ve also marked the two sets of wire runs in red and blue to help differentiate the direction each strand should follow.


Please let me know if you have any questions.


Mitchell


See something interesting? Give it the thumbs up!

Re: How to create a plan to create a screen on a colour bond fence

Thank you for your promptness, Mitchell.

That's excellent advice and what you say makes perfect sense.

I should have realised both vertical & horizontal spacings need to be the same to create the even diamond effect.

Will run your options past the 'boss' and finish this job which is only part of a much bigger picture which I'll share once complete.

Thanks again Mitchell :smile:

Re: How to create a plan to create a screen on a colour bond fence

Hi all,

We've finally finished this project which was only part of a larger (retaining wall) project but the outcome is excellent.

I just want to say thank you to all the Bunnings Team Members who contributed their friendly, professional advice - this is a great forum :smile:

Here are some before, during & afters.

The Tiger grass was a killer.

Tiger grass beforeTiger grass before

Tiger grass before removalTiger grass before removal

Garden & trellis doneGarden & trellis done

Finished!Finished!

Regards and thanks again guys.

Re: How to create a plan to create a screen on a colour bond fence

Hello @New2Retirement 


Thank you very much for the update, the screen guide looks perfect. I'm sure it will be fully covered with your climbers in a couple of months. We would definitely love an update once the fence is fully covered.


Eric


See something interesting? Give it the thumbs up!

Why join the Bunnings Workshop community?

Workshop is a friendly place to learn, get ideas and find inspiration for your home improvement projects