Hi everyone,
I came across an image (below) of a dining table that would function as a kitchen island.
I am trying to build something as close as possible to the table in the image.A similar question was asked here, however opted to use a waterfall instead of two legs: https://www.workshop.bunnings.com.au/t5/Kitchen/Need-help-with-my-DIY-kitchen-island-using-Ikea-MALM/td-p/67633
The total dimensions I have in mind are 2000Lx900Wx91cm.
I would use a tabletop similar to this, cut to size:https://www.bunnings.com.au/specrite-2400-x-900-x-33mm-timber-multi-use-pine-panel_p0419614
Would be great to hear how this can be done, likely using kaboodle base cabinets, and timber cut to size in the absence of square wooden legs of approximately 88cm.
Hi @Cecil66,
A warm welcome to the Bunnings Workshop community, it is fantastic to have you with us.
The Kaboodle 900mm White Base Cabinet would go close in terms of height, but you would end up with the black plastic feet showing at the bottom.
The closest I could find to the cabinet shown in terms of look is this Lugna 768 x 900 x 380mm White Cabinet Shell with Lugna White Adjustable Cabinet Shelf - To Suit 900 x 380mm. As it is 768mm tall and your benchtop is 33mm thick, you would need to make up 109mm to get the desired height of 910mm.
You could create a frame for it to sit on with Porta 90 x 90mm DAR Square General Purpose Pine, which could also be used for the legs at the other end of the table. If you wanted a cheaper option for this base frame, then there is the Specrite 90 x 35mm 0.9m DAR, which would also work
This would leave you with 19mm to make up, which you could do by attaching something like this 42 x 19mm 1.2m DAR Pine Standard to the top of the cabinet to create that slight shadow gap shown in your inspiration image.
You could use a pocket hole jig to screw your legs to the benchtop, with a screw on each side of the post for maximum strength. You could then use pine filler to cover the pocket screws.
You could use enamel paint to touch up the base frame and the 19mm riser on top of the cabinet, and use a clear polyurethane varnish like this Cabot's Satin Water Based Cabothane Clear Polyurethane for the benchtop and legs.
Let me know what you think and if you have further questions, please don't hesitate to ask.
Jacob
Hi @JacobZ
Thanks for the reply. Greatly appreciated.
I much prefer the sizing, particularly the depth, of the Laguna base cabinet you have listed above. However, I am curious whether it is structurally supported to hold up the weight of the benchtop, as the frame appears to be particle board compared to Kaboodle’s melamine. E.g would the rear panel need to be reinforced? Keen to hear your opinion.
Could you also illustrate the idea of the frame beneath the base cabinet? I prefer this idea against having to muck around with kickboards for a kaboodle cabinet, however am unsure of how this will look (and look good).
Cheers
Hello @Cecil66
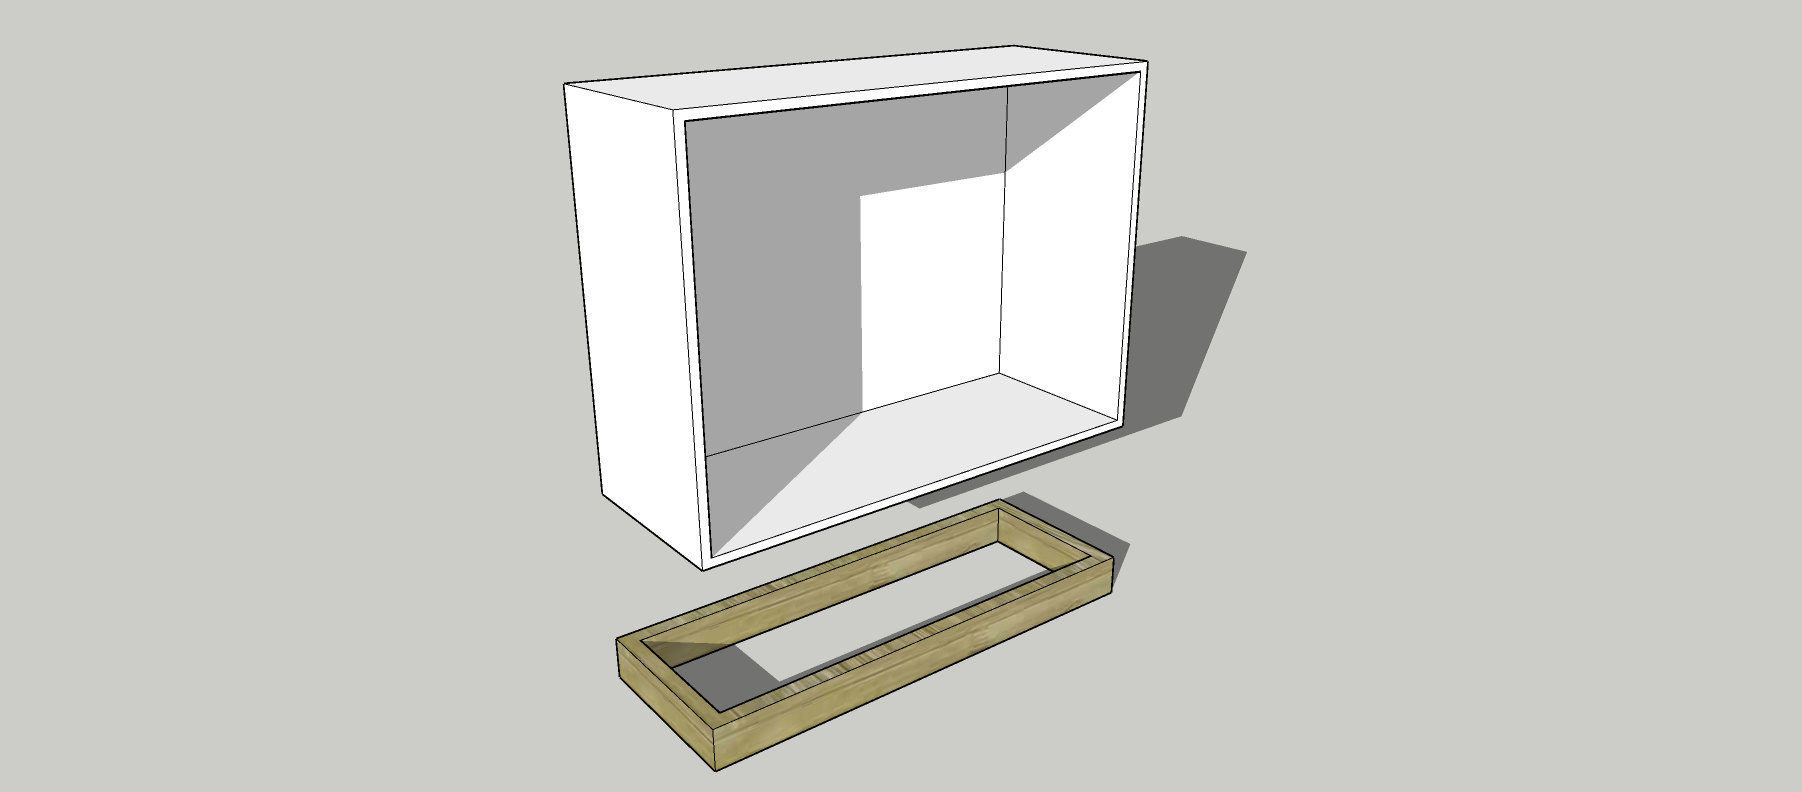
Yes, the back of the cabinet would probably need to be reinforced just to be on the safe side. This will make the cabinet stronger, and it should be able to hold the weight of the benchtop. I've placed a sample image below to give you an idea of what the frame beneath the cabinet looks like. I've used the 90 x 35 timber piece that Jacob suggested.
If you need further assistance, please let us know.
Eric
Thanks @EricL
Would you be able to explain how I could reinforce the rear panel? Particularly with the narrow width of the frame, I am unsure what the best way to do this is.
cheers
You could just grab a piece of Matt Carcass Particleboard (this is what is referred to as melamine), cut it to size and attach it to the back of the Lugna cabinet with 40mm Chipboard Screws.
The frame will be roughly 15-16mm thick, which is easily wide enough to accept a screw. You'll just want to mark your screw locations carefully, so they are in the centre of the frame, then predrill holes for the screws, ensuring the pilot hole goes in straight. You can use the 8G bit from this Frost 5 Piece HSS Quickbit Countersink Drill Set to quickly drill and countersink your pilot holes so when installed, the screws will sit below the surface of the material and they can be covered.
Once installed, you can cover the screws with White Self Adhesive Screw Caps and White Iron-on Melamine Edge to the cut edges of the board to give it a more finished look.
Let me know what you think.
Thanks @JacobZ and @EricL , much appreciated.
A few final questions:
- Will the 90x35 frame beneath the cabinet require any treatment if it is to serve as a kickboard?
- I assume the Matt Carcass Particleboard is going to function as a base cabinet end panel. What would you recommend using to serve as side panels? Going for a glossy look. I also think that if I am leaving the frame beneath the cabinet exposed, then the side panels should only be the height of the cabinet (768mm), and not to the floor? Is a kaboodle end panel the right way to go?
It'd be best to use H2-treated pine for the base as it is treated against boring insects such as termites. You could set it back from the edge of the cabinet and then use the White Matt Carcass Particleboard to clad the framing timber so that the bare framing timber doesn't stand out.
The Matt Carcass Particleboard that I mentioned is just a base material that you could really use for anything. The idea was that it would be attached to the back of the Lugna cabinet to help reinforce it, because it would be stronger than the thin MDF panel that is included with the cabinet. There isn't really any need to add it to the sides if you didn't want to.
If you wanted it to be glossy, you could always use a Kaboodle Gloss White Base End Panel instead of the White Matt Carcass Particleboard, but it would be considerably more expensive.
Hi @JacobZ Greatly appreciate your assistance.
I have purchased most of the parts. I think my last query is what sort of screws would you recommend to join the legs to the tabletop?Similarly, which screws would you recommend for joining the tabletop to the wood used for the shadow gap and the cabinet?Cheers
If you are going to use the Kreg Pocket Hole Jig 320, I propose looking at the Kreg 2-1/2" 64mm Coarse Thread Pocket Screws - 50 Pack. Please note that the length of the screw to be used is also dependent on the position of the jig. My best advice is to do a test fit on some timber offcuts before you drill into the actual leg.
In regards to the Lugna cabinet and the back panel, I suggest using Zenith 8G x 28mm Gold Passivated Countersunk Rib Head Chipboard Screws - 38 Pack.
I recommend using Zenith 8G x 40mm Countersunk Rib Head Chipboard Screws on the 42x19 timber piece. My best advice is to drill pilot holes on the timber surface so that the screws will travel correctly on the side of the timber piece and prevent it from splitting. Remember to always double check your mounting point and that the screw is travelling the right direction.