Workshop
Ask a question

The Bunnings Workshop community can help with your home improvement projects.

How to build custom wardrobe inserts?

SouthFieldSnoop
Growing in Experience

How to build custom wardrobe inserts?

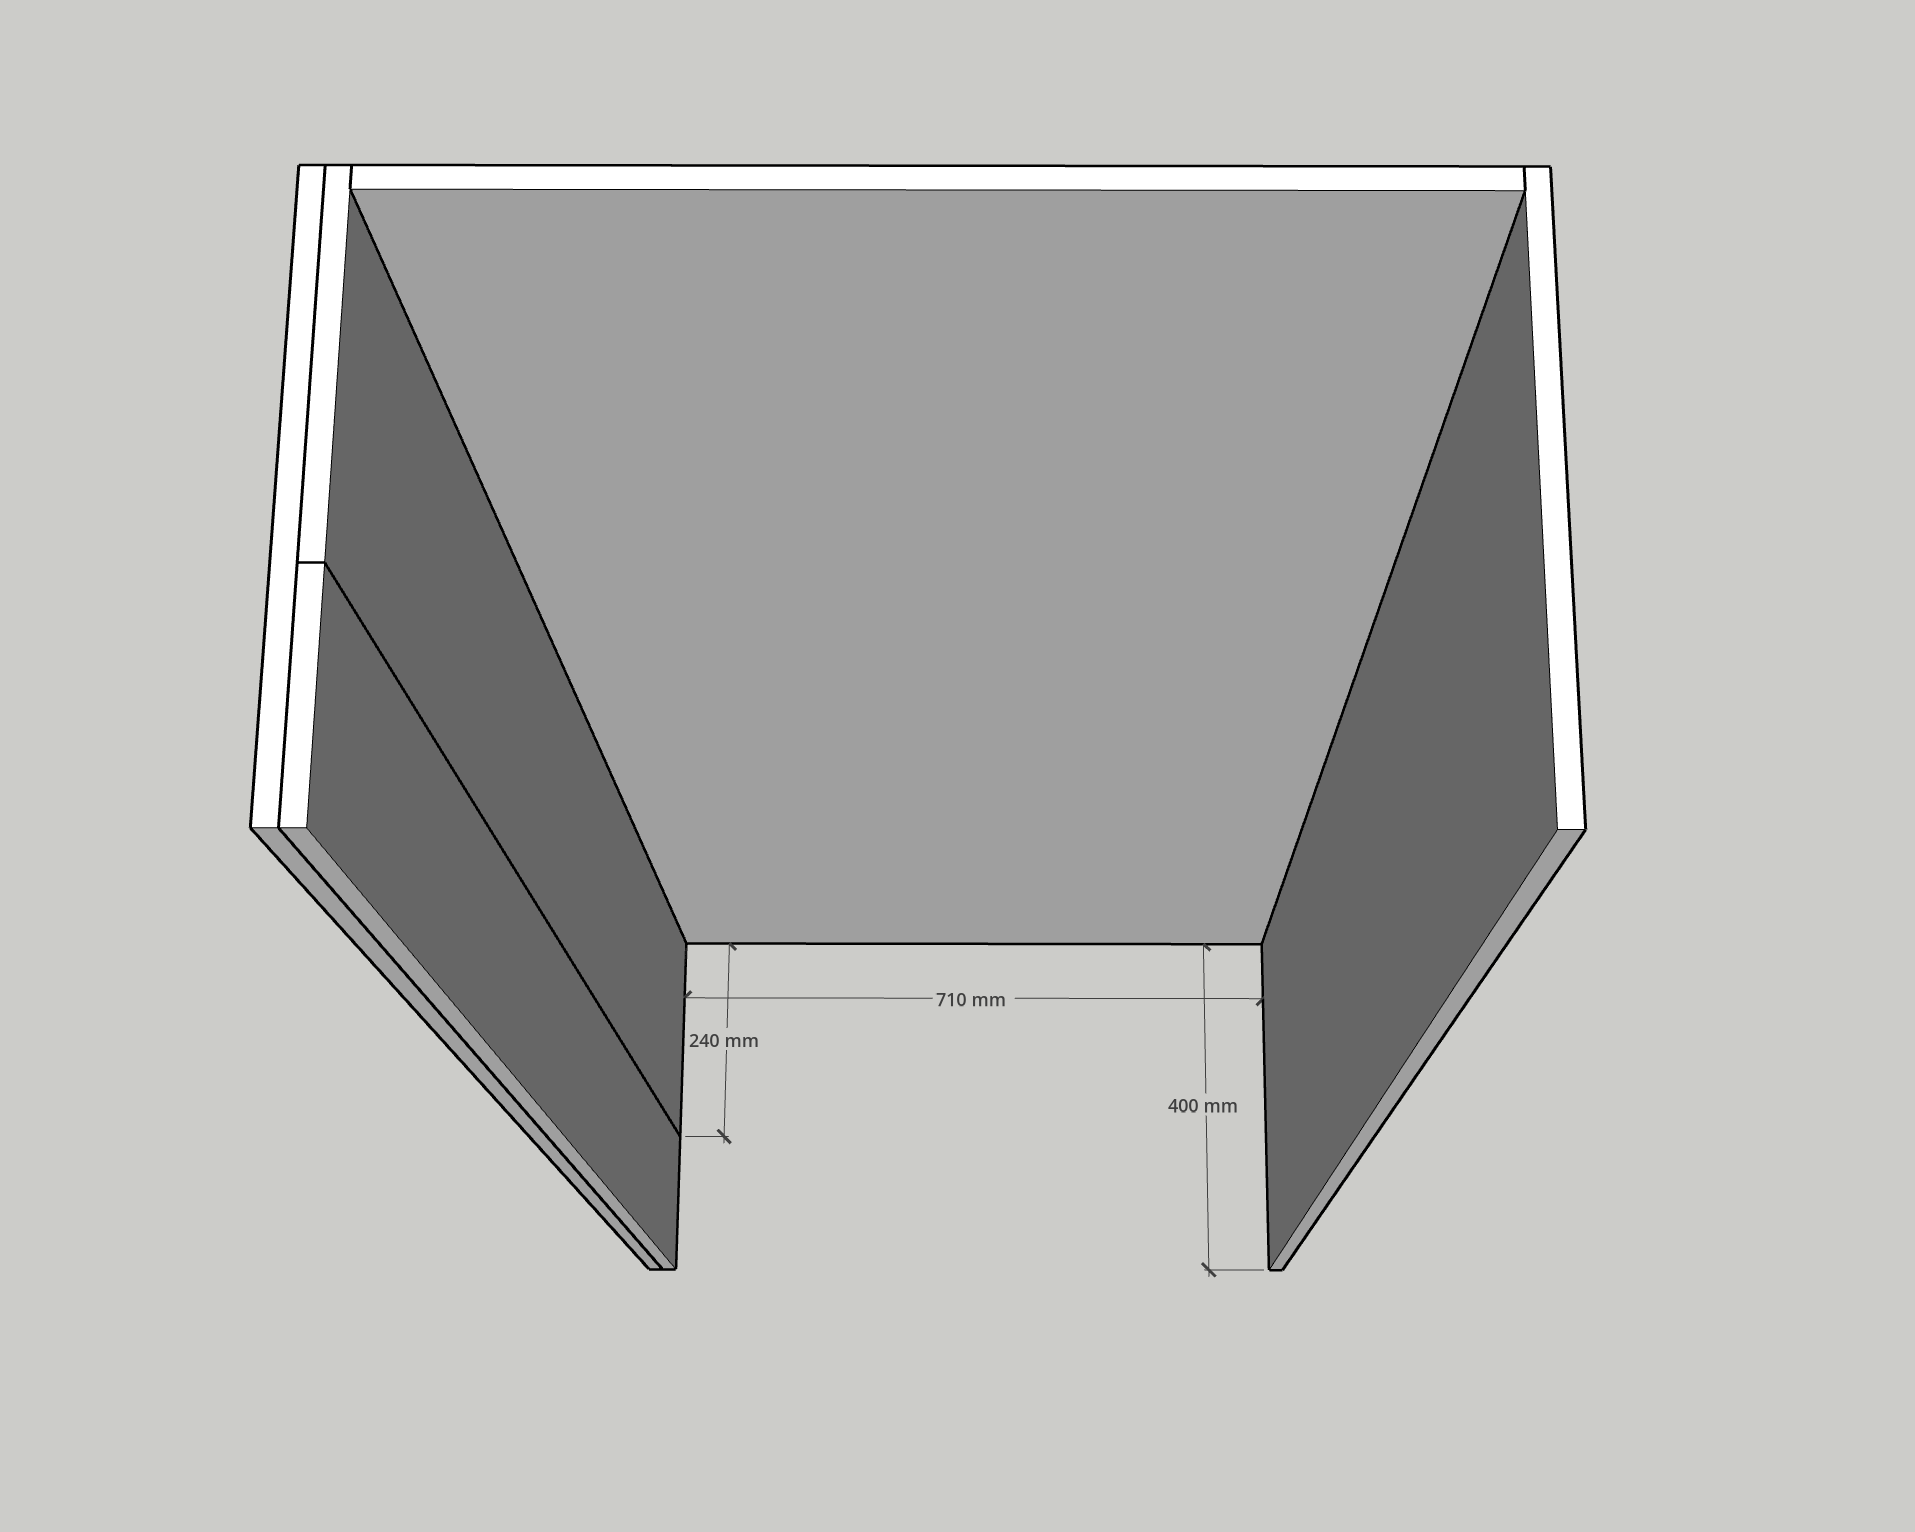
I have a freestanding wardrobe split into vertical sections. One compartment measures 71 cm wide and ~40 cm deep overall, but the interior depth is asymmetric: the left inside face is recessed / only 24 cm deep while the right side is ~40-44 cm deep (photo attached). I want a simple insert to store folded clothes — material thickness ~10–15 mm (height not important).

I was inspired by this post here, and wanted to do something similar, or my initial idea was

  • Glue + nail a board to the left partition to bring it out from 24 cm → 40 cm so both sides are even.

  • Fix white batten strips (timber or MDF battens) to the sides/back to act as shelf supports/cleats.

  • Fit custom shelves / a shallow drawer stack (board thickness ~10–15 mm) that sit on the battens and are secured where needed.

I’m after practical feedback on whether this is sensible and safe — specifically:

  • Is glue + finishing nails reliable enough for attaching a 15 mm board to an existing thin partition (likely hollow / thin MDF)?

  • If not, what’s the best way to reinforce the left partition before adding the board? 

  • Recommended adhesives and fasteners ?

  • Best batten/cleat options for a neat finish and solid load-bearing (timber batten dimensions, white)?

  • Any tips for finishing the seam/edge to look “built-in” (edge tape, silicone, small front trim)?

  • Would a free-standing shallow box or notched shelf be a safer/easier alternative given the thin partition?

I can drill into the back/right side and I don’t mind some permanent fixing, but I’d like to avoid wrecking the thin partition if possible. Any product links, quick how-to pointers or “don’t do this” warnings are welcome — thanks!pic1.jpeg


JacobZ
Bunnings Team Member

Re: Building Custom wardrobe inserts

Hi @SouthFieldSnoop,


Thank you for your question about updating your wardrobe to allow for a full-depth shelf.


Your existing wardrobe will almost certainly be made of melamine-coated chipboard, similar to this CUSTOMpine 16 x 2400 x 1200mm White Matt Carcass Particleboard, which is either 15 or 16mm thick.


The first question I'll ask is, do you have access to the outside of this back corner? And if you do, could you take a photo of it?


If you had access to this back corner and could remove the side panel, you would be much better off replacing the whole side panel than trying to attach a strip to it. This is because there isn't really a great way to butt join panels like this, especially if it is being used to support weight. If you can remove this panel, I'd use Zenith 8G x 40mm Countersunk Rib Head Chipboard Screws to attach the new side panel to the back panel.


If there was no way to remove and replace this panel, then I would attach a panel to the outside of the 24cm panel, that is, the full 40cm depth, then attach a 16cm strip to fill the gap left at the front.


You could use Liquid Nails and a series of 25mm brad nails to attach these boards.


Once the disparity in depth is managed, I'd suggest using No More Gaps to conceal the seam. 


I'd suggest using 42 x 18mm as your cleats, and I'd suggest gluing and screwing them to the side walls using 30mm Chipboard Screws and a bead of Liquid Nails. It would be better to use screws with your cleats, as when weight is applied to nails, they can pull out, whereas the thread in a screw makes them much more difficult to pull out.


If you use cleats and you glue and screw them, I don't think you'll have any issues with weight that would make a freestanding option more suitable.


Let me know what you think and if you have further questions, please don't hesitate to ask.


Jacob


Re: Building Custom wardrobe inserts

Thankyou @JacobZ 
This is really helpful, 

The middle piece/divider seems to be screwed and glued in , so I don’t really want to replace that. 

Will follow the steps outlined in the picture and attempt that. Some questions i wanted to ask was

Do we need nails for securing the vertical divider, or can i rely on screws here as well?
Im assuming Bunnings would be able to cut the board based on my measurement? if so is this submitted online or in person at the store?
Can i use this product or something similar to conseal the unsealed edges and screw holes? or are there better products that i can use ?

Thank you
@SouthFieldSnoop 

Re: Building Custom wardrobe inserts

Hello @SouthFieldSnoop 


Yes, you can use screws for the vertical divider, my best advice is to drill pilot holes for a clean precise entry. I'm sorry but the shop saws are not designed for precision cutting, I suggest cutting it at home so that it can be precisely cut. Yes, you can use the CUSTOMpine 21mm x 10m White Preglued Edgetape to cover the exposed edge of the panel. I propose using Taskmaster 15mm White Self Adhesive Screw Caps - 50 Pack to cover any screw holes.


If you need further assistance, please let us know.


Eric


See something interesting? Give it the thumbs up!

Why join the Bunnings Workshop community?

Workshop is a friendly place to learn, get ideas and find inspiration for your home improvement projects