A comprehensive garden landscaping project transforming a once overgrown yard and featuring a new irrigation system, turf, pavers, decorative pebbles and mulch.

The project
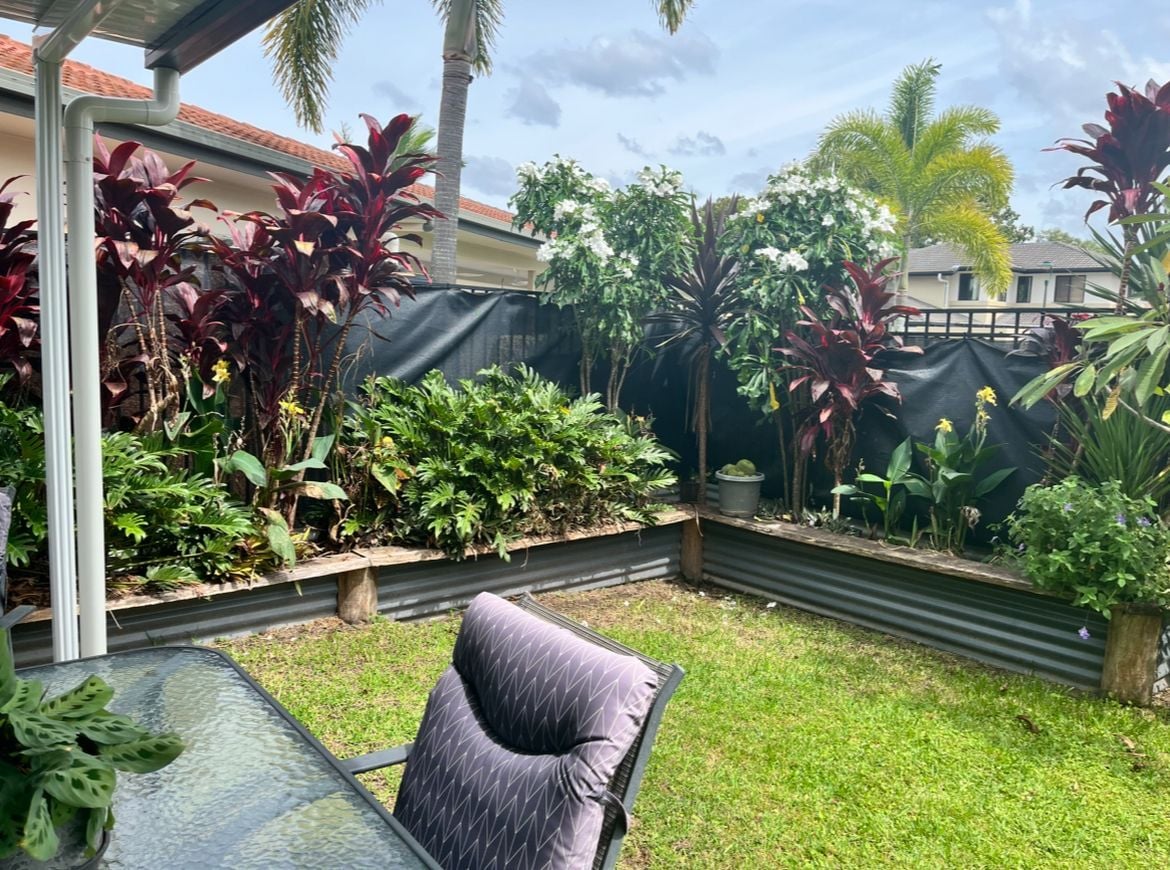
Our project was a true transformation — we ripped out the old raised garden and installed proper drainage to create a solid foundation. The heart of the space is filled with potted plants that have traveled with us through years of renting, now finally given a permanent home and a new lease on life.
We laid fresh turf, irrigation, pavers, weed mat, mulch, and decorative white stone to bring structure, beauty, and ease of maintenance. What was once an overgrown, unloved yard is now a peaceful, personal oasis — a space that reflects our journey and roots us in our very first home
Steps
Step 1
At this stage I remember thinking: "What a way to make our mark on our first home - this is going to be so good".

Let the games begin.
Step 2
Still motivated by the potential. Our prized pot plats that have remained with us on our rental journey were so close to getting planted, to grow without limitations of pots.

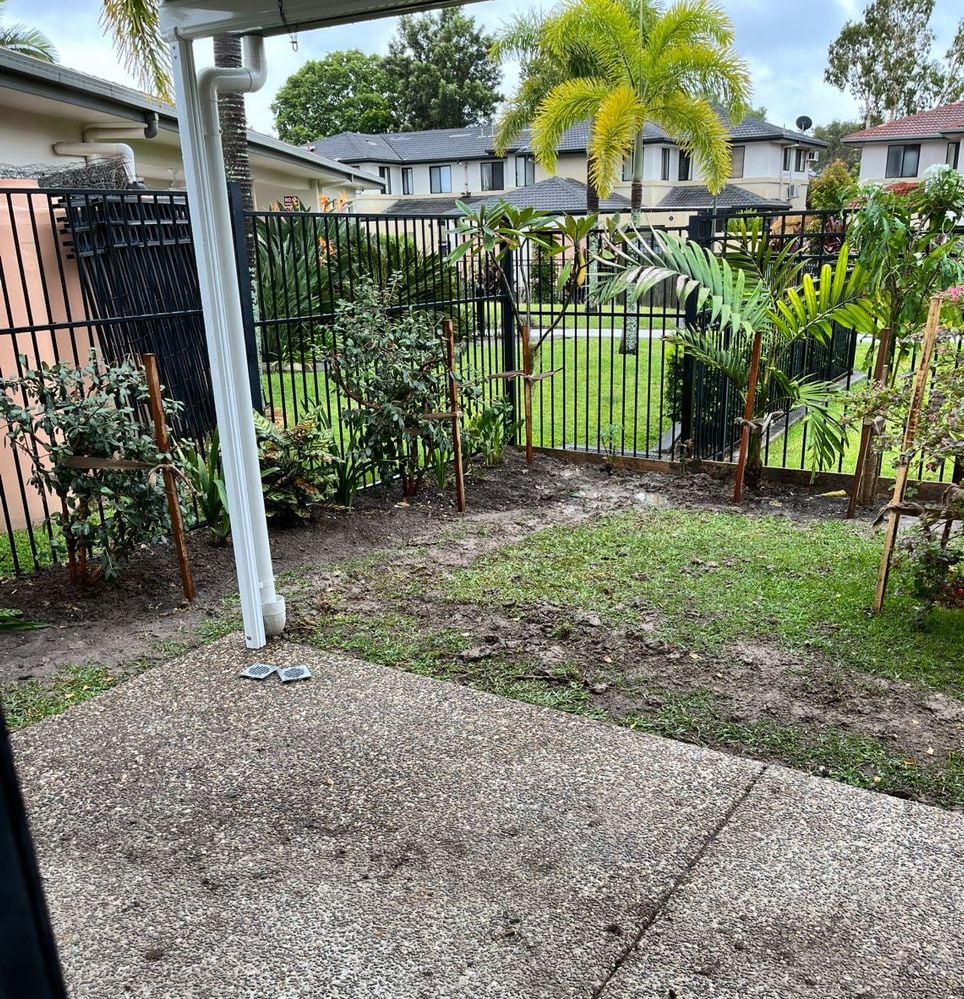
Before digging out existing plants, and raised gardens.

Taking it back to basics.
Step 3
We removed the existing plants, and shade cloth that wrapped the fence line. This opened up the area and made it feel less restrictive - we wanted to do these plants justice and set there new home up right. This included, plenty of fertiliser and water saver with warmer Queensland summer weather on its way.

Starting to come together.
Step 4
We had noticed the existing pergola's down pipes were not connected to the storm water - if we didn't set this up now we would have paid for it during the wet season. It was pure luck we found the existing storm water that was buried under existing turf.

Necessary back breaking, oh and mud, lots of mud.
Step 5
String line marked out the boarder for our brick edging. Drip-line water-feeder secured around our plants.

Drip line irrigation set up.
Step 6
I remember not quite being ready for the turf, but we were gifted it, so had to stop progress on the garden and turn my novice experience into laying turf.

Turf laid, not the best job but this was with my L plates on.

Piecing it all together.
Step 7
This was great to see it all coming together, ensuring the ground was nice and even in surface. There was a lot of going over the same areas multiple times. Using the string line really helped to keep us working within our set areas.

After mapping out the layout.

We removed enough of the existing ground.

To set the foundations for the pavers.
Step 8
I learnt something; while it may have been easier to just chuck the pavers down and cover the surrounds in stones, setting them with concrete, using weed mat ensured they stay in place long term - and the upkeep is minimal.

Crusher dust to compact the ground.

Weed mat and concrete to set the pavers in place.

The finishing touch: decorative white stone.
Step 9
Finished. We couldn't be happier with how this turned out.


Tools and materials
Materials used in the project:
Tools used in the project:
More inspiration for your garden makeover
Bunnings Workshop member chasingashlee completed a backyard reno with deck and vegetable garden, completely transforming the space.

Community member frediynewbie used treated Pine and Merbau decking for their backyard makeover with garden bed and firepit.

Get more ideas from our Top 10 most popular garden makeovers and 10 ways to update your garden.