A levelling tool measures whether a horizontal or vertical surface is straight. From hanging pictures to mounting shelves, it’s used in many D.I.Y. projects and can help ensure accuracy.
Here is our guide to selecting the right levelling tool for your needs and using it efficiently. If you have any questions, don’t hesitate to ask. We’re here to help.
Common terms used in levelling
Knowing commonly used levelling terms plays a key role in ensuring accuracy in your projects, and can also help in understanding how levelling tools work.
Here is a glossary of common terms used while levelling:
Level
A level surface is horizontal and flat, rather than at an angle.
Plumb
Plumb is the correct term for something that needs to be vertically straight. For example, floors are level and walls are plumb.
Fall
Fall is the amount a line slopes from level. For example, while building a deck, a 1:100 fall may be recommended. This means for every one vertical metre there should be 1cm of fall.
Benchmark
Benchmark is the main point you choose to take levels and other measurements from.
Types of levelling tools

There are many types of levels in the market. While some are versatile enough to be used for different projects, others may have a more specific use.
Below are some common types of levelling tools, along with tips on how to use them.
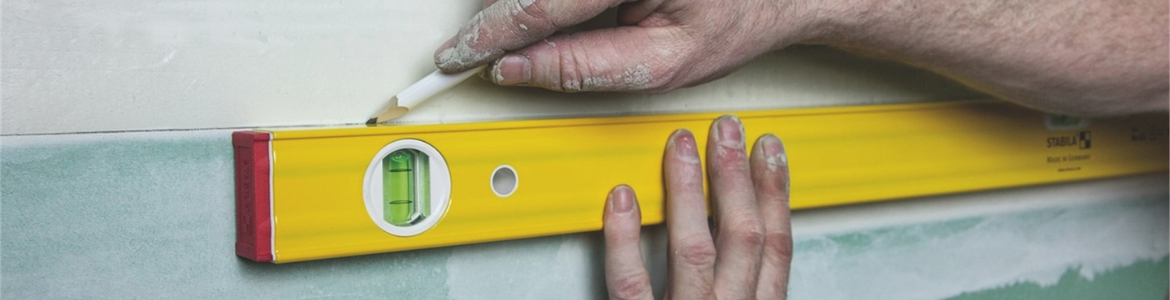
Spirit levels
A spirit level is the most widely used type of levelling tool. It comes in many different shapes and sizes. All spirit levels contain a bubble of air that is sealed in a vial of coloured liquid and level is found by bringing the bubble to rest evenly between the marked lines. Common spirit levels include:
Straight or beam level
A straight or beam level comes in various lengths, ranging from around 600m - 2400mm. Longer levels are better suited for larger jobs. Most beam levels have three levelling vials which are aligned for both vertical and horizontal use. Some have features like an adjustable vial for levelling angles and an LED light to make the vial more visible. More advanced versions have a digital display for increased accuracy.
Torpedo level
A torpedo level is a small straight level. It is generally around 200mm to 300mm in length and contains two measuring vials for measuring horizontal and vertical planes. However, some torpedo levels have an additional 45 degrees vial and a slope measure vial. These are designed for tight spaces like levelling cupboards. Many have strong magnets built in and are perfect for use on metal posts and pipes.
Pocket level
Pocket levels are very small. They are mostly under 150mm long and contain a single vial. They are designed to slide into your pocket. Some are also magnetic.
Line level
Line levels are small, single-vial levels with a hook on each end. These are designed for hanging on a taut string-line to check level over long distances. However, these are only accurate when the string is pulled taut and does not sag.
Post and pipe level
A post and pipe level is two-sided and wraps around the object being levelled. It can be used to check whether a post or pipe is plumb, and also ideal for levelling fence rails and pipes. These levels have hooks for a strap, so they can be used hands-free. Some are also magnetic.
Laser spirit level
A laser level is a hybrid device, containing a beam laser inside a spirit level. It uses the vial to level surfaces and then projects laser beams to level across a distance. These levels can be used for a range of tasks, including setting benchtop heights or shelving, and are ideal for use over long distances.
How to use a spirit level
It’s important to remember that these are carefully calibrated technical devices and they should be handled with care as hard knocks or falls can leave them reading incorrectly. Here are a few tips on using spirit levels.
Check the accuracy of a straight level by laying it flat on a surface. Look at the position of the bubble and remember its position, even if it’s not between the lines. Turn the level around (180 degrees). Look at the bubble. If it is not reading the same as the previous position, then the level is no longer accurate.
Ensure the underside of a level is free from any material. It must be completely clean and smooth, just like the surface you are laying the level on.
Always keep levels of different lengths in your kit.
There may be times when you’re unable to use your level at your desired point. In such cases, set an arbitrary distance above or below your benchmark point. Run your level from that point and measure down or up as needed.
Keep levels out of the sun. Direct sunlight can cause the coloured liquid in the vials to fade more rapidly.
Always clean your level before storing it, especially if you’ve been working around concrete, plaster or glue.
Store your levels in a place where they won’t fall over or receive any hard knocks or bumps.
Water levels

The reason why water levels are so effective is because the surface of a body of water will always settle to a perfectly horizontal level. Water levels consist of a clear, water-filled vinyl tubing that is generally 10mm in diameter. Food colouring is often added to make the water more visible. They are ideal for use around corners and across long distances.
How to use a water level
Note that the water level at one end of the tube will always be the same as the other end. Here are some other things to note when using water levels:
Fill the tube with water till it is partially full.
Ensure there are no bubbles in the water or kinks and twists in the tube.
Hold both ends at equal height against the position you wish to take a level from. Adjust the height of both ends equally until the water is exactly level.
If you are working alone, fix one end of the level in place without crimping the tube. Hold your thumb over the other end and then move to the position you need to transfer the level to. Release your thumb when you are at your desired height.
Only adjust the height of the distant end, not the start point.
If any water surges out of the tube, you will need to readjust the height and align it with your start point.
Clean, drain and dry your water level before putting it away.
Laser levels
Laser levels are affordable and useful. They emit dual beams that are used to measure both horizontal and vertical surfaces. These tools are user-friendly and contain several self-levelling features. When used with level rods, they allow you to check differences in height quickly and accurately.

A laser level has many uses. These include installing tiles or any other projects where long, straight lines are needed. They are also great for hanging anything, like pictures, at a consistent height around a room.
How to use a laser level
Note that most laser levels are only designed for indoor use. Additional detectors are required when using them outdoors. Here are some other things to remember when using laser levels.
Follow all safety directions when using a laser level. The majority of readily available lasers are safe and suitable for use. However, we always recommend not looking directly into any laser.
Handle laser units with care. They are delicate instruments and will not tolerate heavy drops and bumps.
If your laser level includes a lock, make sure you use it whenever you are moving and storing your laser.
A compatible tripod will make your laser more versatile and easier to use.
Optical levels
Optical levels are also referred to as dumpy, brickies or automatic levels. They are extremely useful, especially when it comes to outdoor landscaping projects.
Most optical levels require manual levelling to be accurate. They are always mounted on a robust tripod and an extendable measuring staff is required to take measurements. Setting up an optical level requires three levelling screws and an in-built bullseye level.
How to use an optical level
Ensure the tripod is firmly placed in the soil, so it cannot be easily moved.
When setting up, turn the level around to point different directions to ensure the bullseye still shows level.
Put a mark on or stake in the ground at your set-up point in case you need to come back later for more measurements.
Accurate recording is crucial. Don't forget to note your set-up height and calculate all measurements.
Have your helper put pegs or mark the points where measurements were taken using paint.
Use your optical level regularly as your project progresses, often checking levels to ensure accuracy.
Handle the unit with care. Before storing, ensure it is clean and dry. Don't forget to engage any locks.
More helpful tips for using tools
The Bunnings Workshop community team has also shared these useful guides as part of our tools series:
Need more help?
The Bunnings Workshop community is here to assist if you need a hand in choosing and using levelling tools. Don't hesitate to hit the Ask a question button and let us know your needs.
Sponsored Post
