Steps
Step 1
FreeCAD is very powerful software and often power comes with complexity. While this is true of FreeCAD, it's also a lot easier to work with once you know how to do things.
First we need to download FreeCAD. Just go to the Downloads page on the FreeCAD website. There's versions for Mac, PC, and Linux.
Once installed simply open the app.
Initially on first run you will be shown the configuration screen that sets the basic user details.
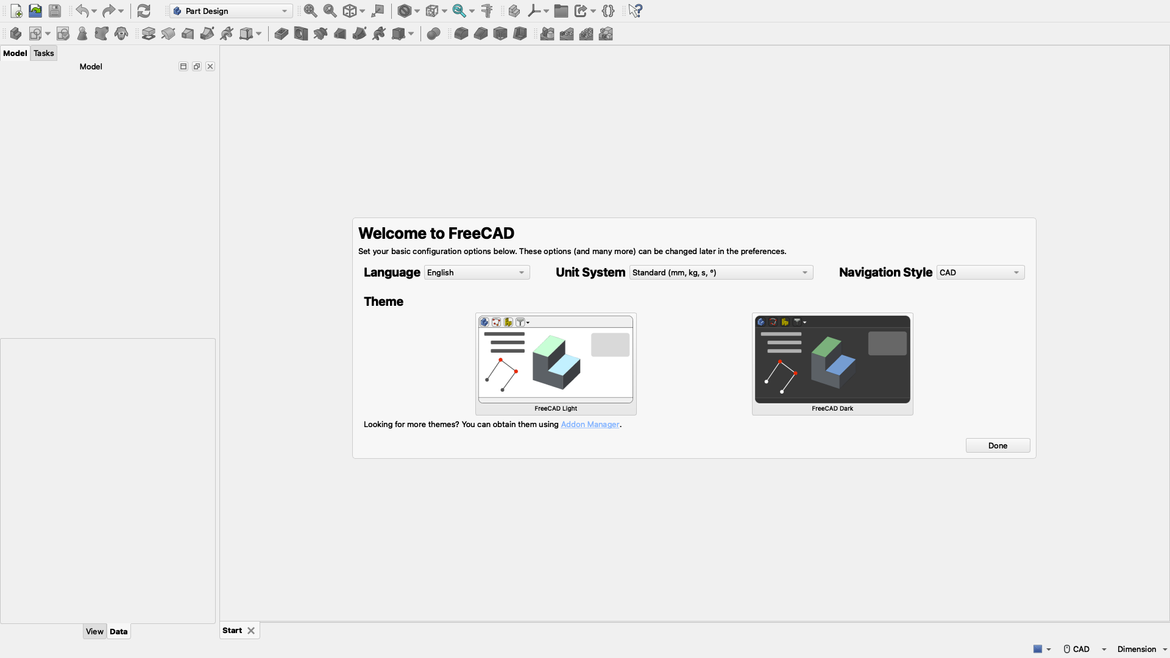
I chose English, Standard (mm, kg, s, º), and CAD. Click Done and you'll go to the standard splash screen.
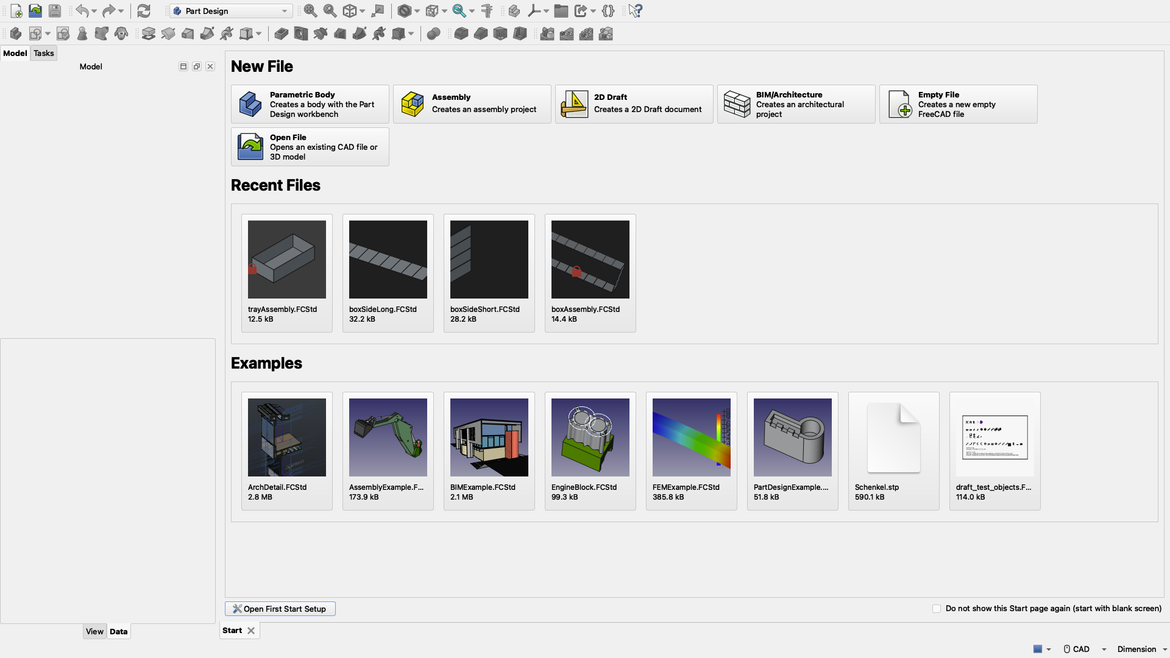
From here you can open existing projects, examples, or new projects.
Let's start a new project by clicking on the Empty File button.

Step 2
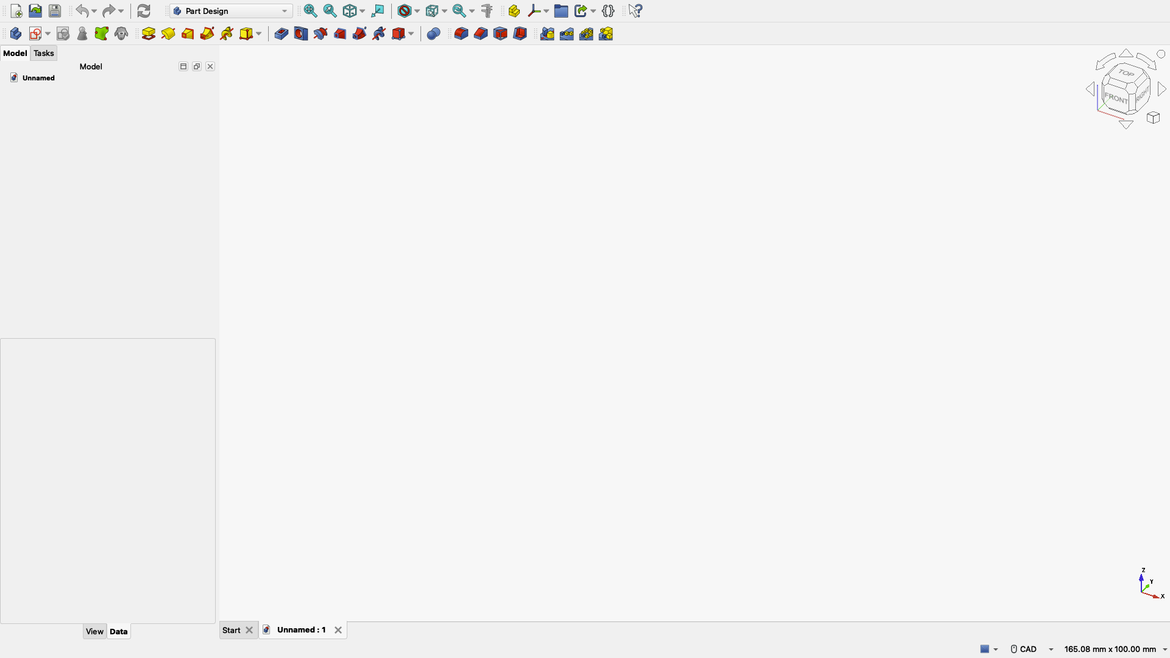
By default you will be in the Part Design workbench. You'll also notice on the side two tabs. By default you'll be in the Model tab so click onto the Tasks tab.
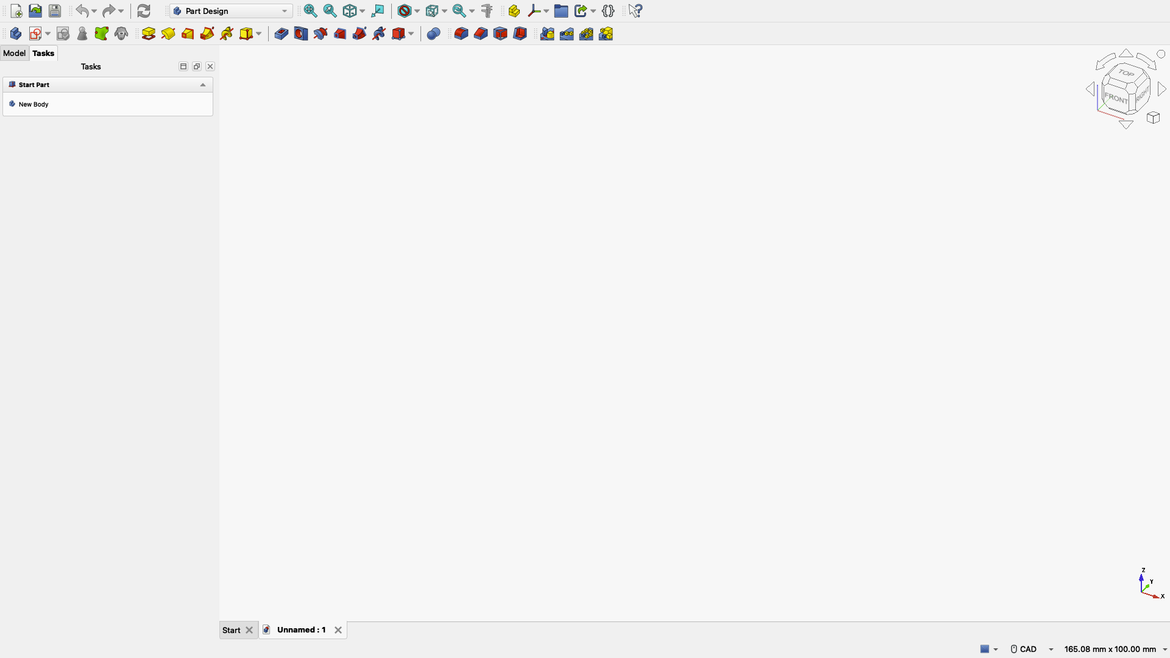
You should notice New Body show up. Click this. You can also use the toolbar at the top by clicking:

You should now notice that New Body has been replaced with New Sketch. Click this or click the toolbar button:

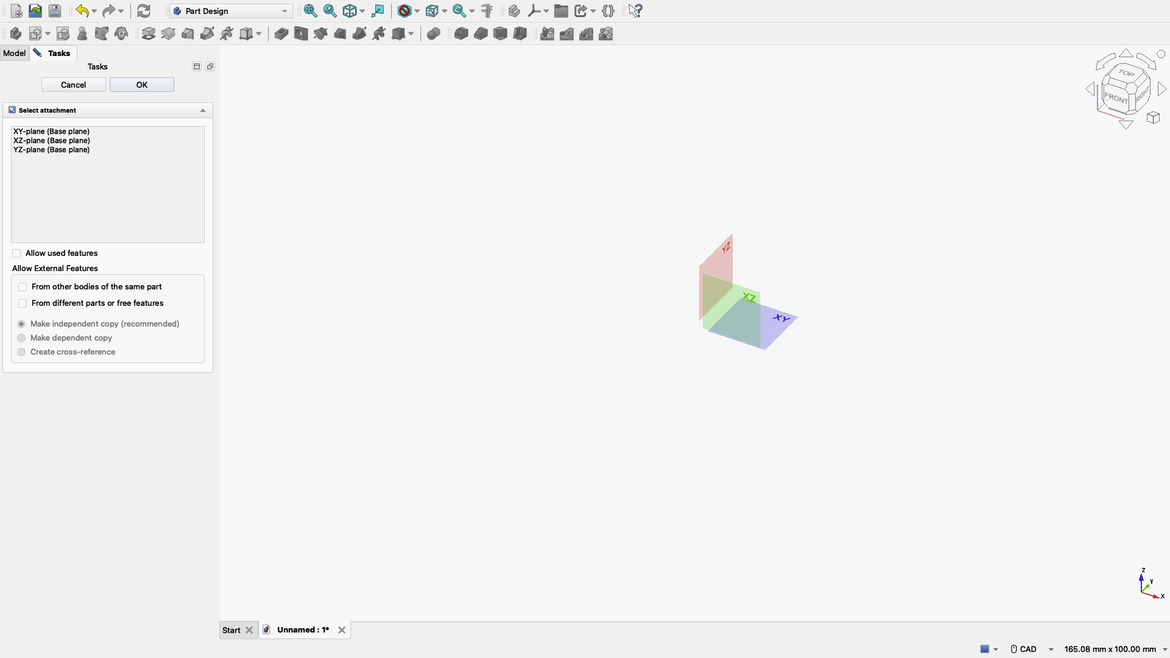
You'll notice heaps more toolbars and buttons and a weird Red, Green, Blue set of boxes. These are called Planes and they determine where the drawing is made from.
XY is from the ground up, XZ is the front face, and YZ is the side. For this project we'll choose XY. Do this from either the drawing window or from the Tasks window. I usually do it from the Tasks window because it's less risky getting the wrong plane. Click OK.
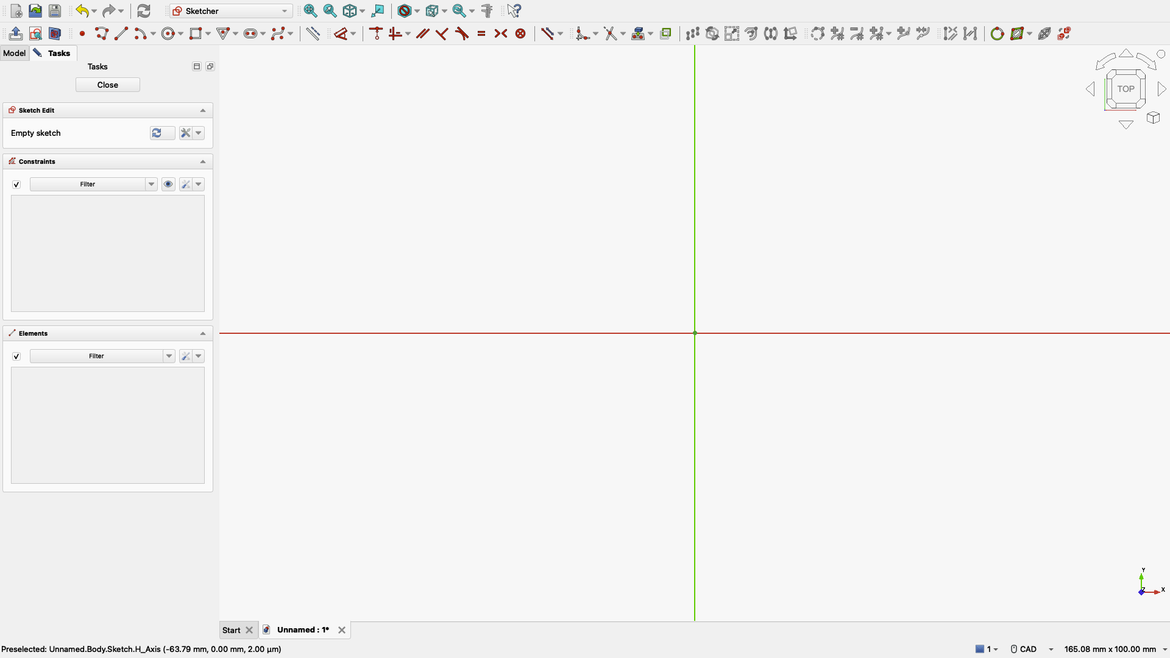
You should now see a red horizontal line and a green vertical line. Where they intersect is the Root Point and will always be 0,0. I prefer to start at this point but others start elsewhere. There's no real right or wrong way even though some will tell you otherwise. 0,0 makes sense to me.
Step 3
Let's draw a simple rectangle. Click the Rectangle button:

If you click the drop down arrow you'll see there are three types of rectangles.

They do as they say on the box. The same for most of the other shapes. For now just click the Rectangle button and then click on the 0,0 reference point. It's then simply a matter of dragging to the size you want. Drag, then click at the size you want. Once done you'll notice the pointer still shows the rectangle tool. Press the right mouse button to cancel the tool.
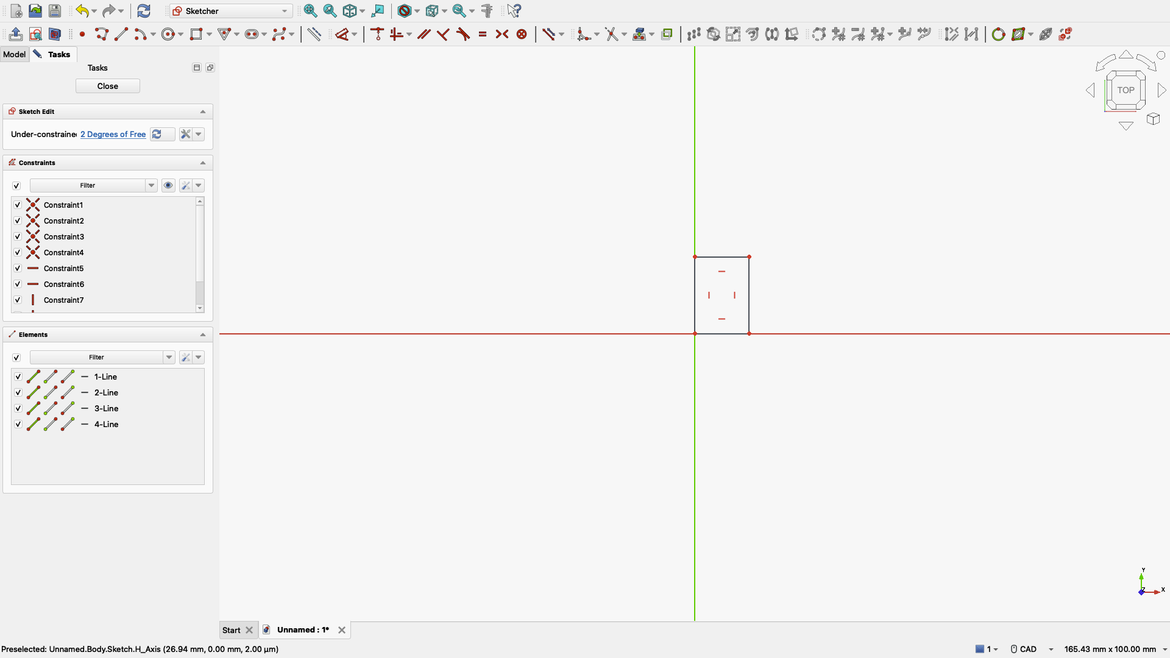
The rectangle is now drawn but notice in the Tasks window there is a message saying 2 Degrees of Freedom. This is because, unless you typed numbers into the fields as you were drawing, you haven't actually set any dimensions. If you didn't draw on that 0,0 reference you'll actually see 3 Degrees of Freedom, this is because you haven't bound to a reference.
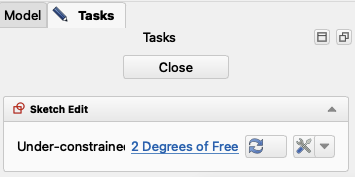
This is actually easy to fix. Click the top line of your rectangle. It should change colour. For me it's blue.
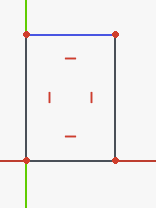
Now click the Dimension tool from the toolbar. Don't worry about the dropdown.

The cursor now changes to a measurement. Drag the number to somewhere out of the way and click the left mouse button. You should now see a screen for entering dimensions.
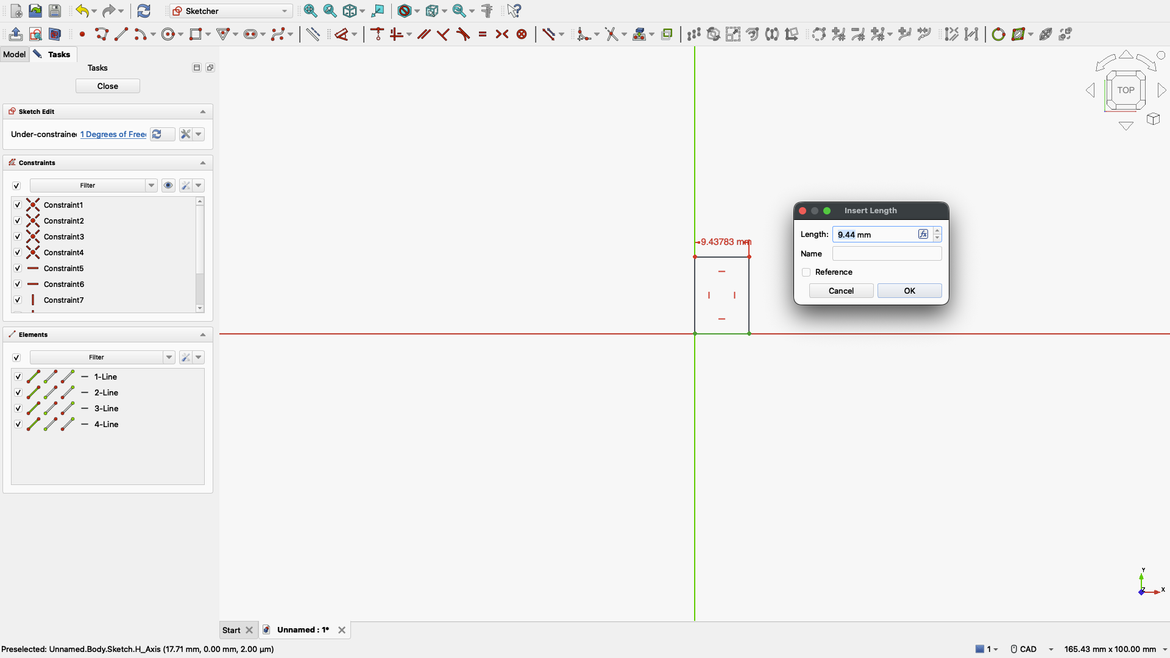
In the Length box type 100. mm will automatically be entered. Click OK.
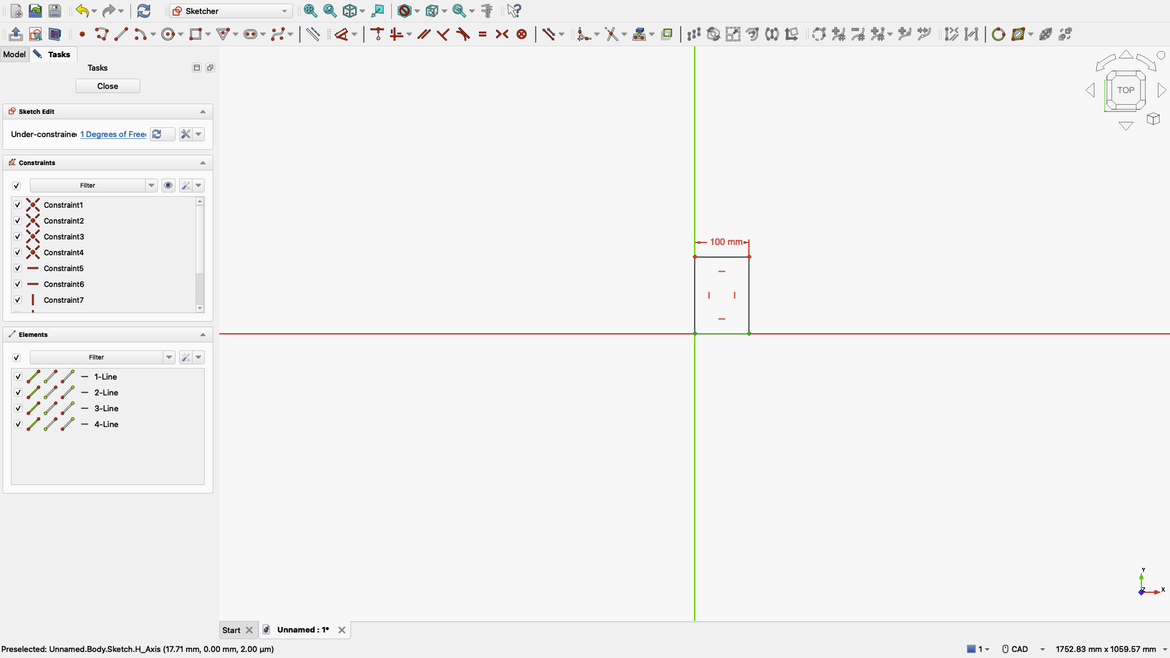
Notice how the number has changed to 100 mm but also notice that we're now down to 1 Degree of Freedom. Let's do the same to the right side of our rectangle.
You'll notice that the Dimension tool is still selected. We haven't clicked right mouse button yet so don't. Instead simply click on the right hand side of the rectangle and you'll get another box for entering dimensions. This time type in 50 then click OK.
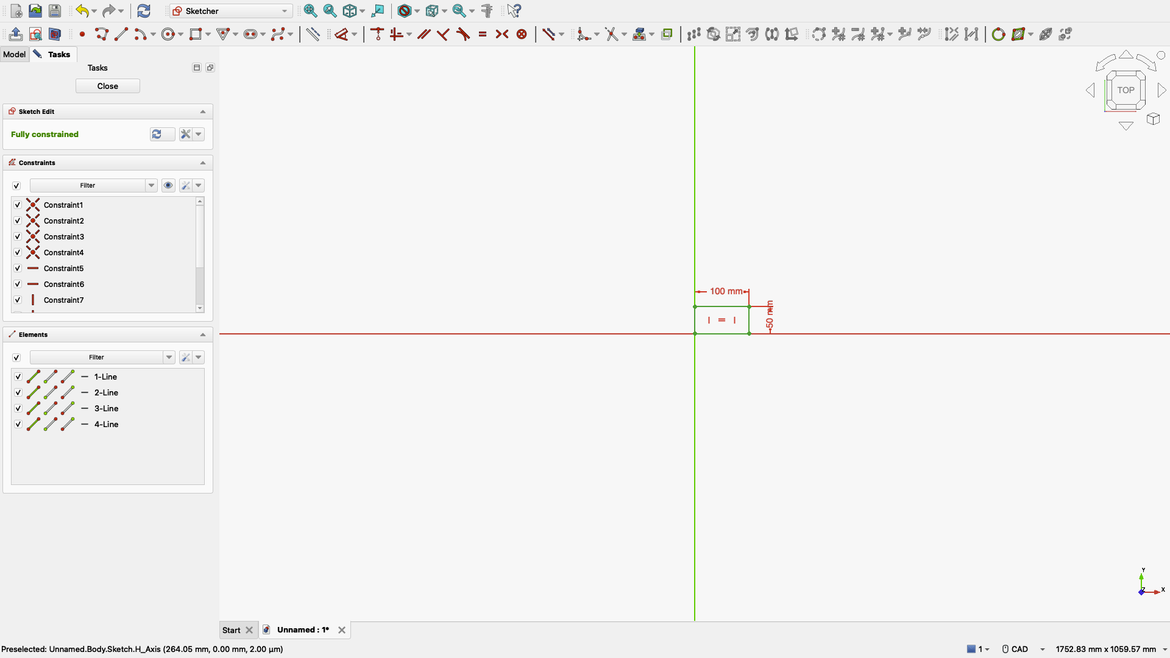
Now we have a green rectangle and the Tasks window says Full Constrained.
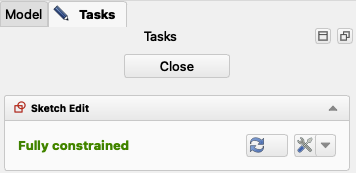
Congratulations, you've just completed your first sketch. Click the right mouse button to cancel the Dimension tool then click the Close button in the Tasks window.
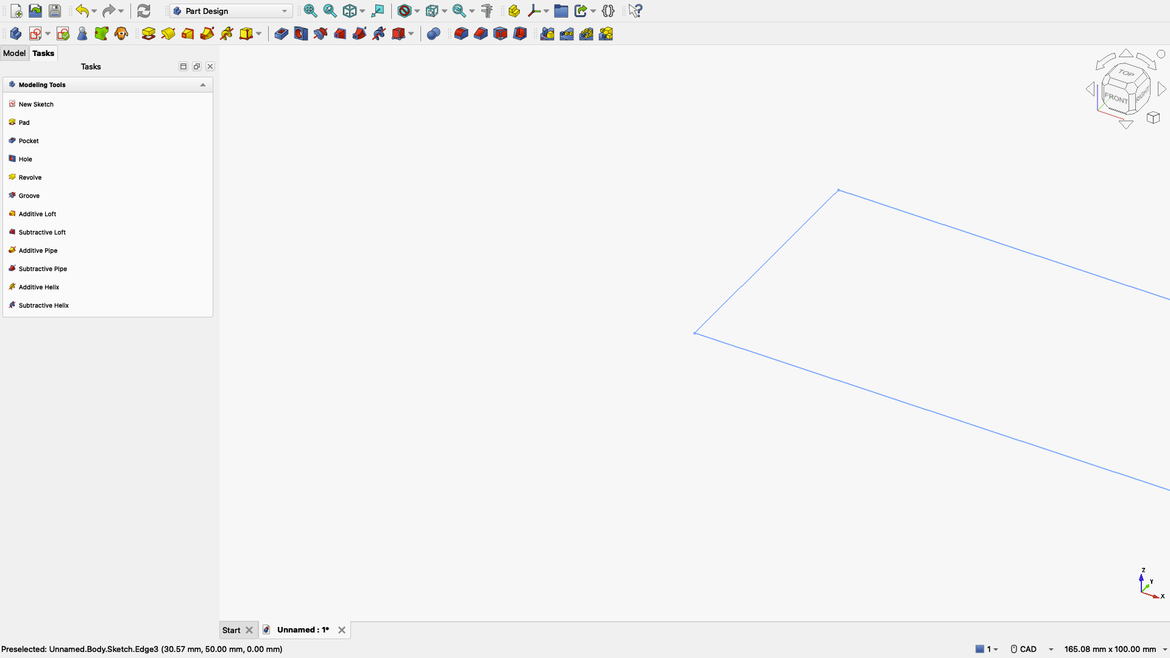
You should now see a rectangle laying down on the XY plane. It's doesn't look 3D at the moment so all we do is add a Pad to the image. Click the Pad button:

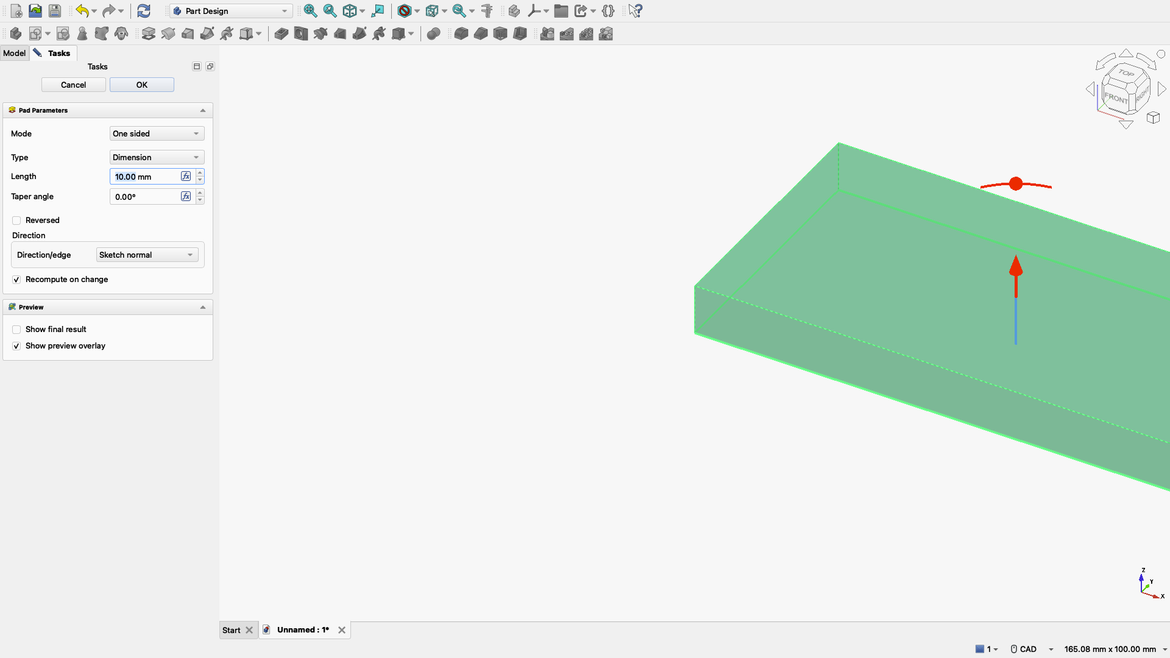
In the Tasks window we'll see the Length of our pad. Leave it at 10 mm for now and click OK.
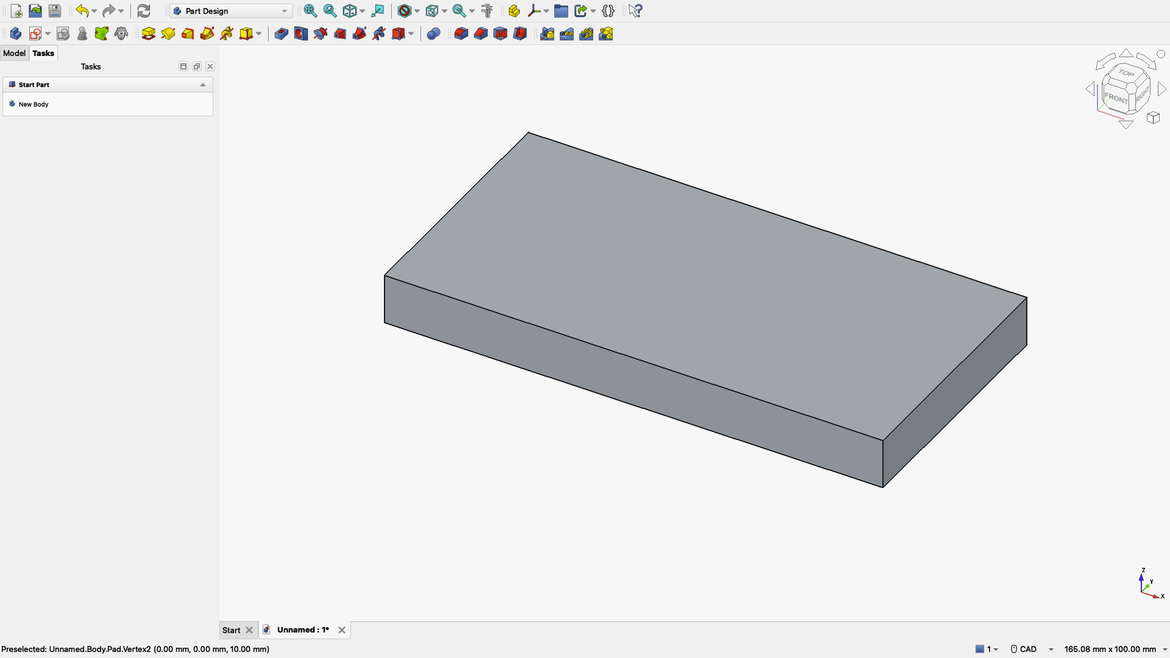
If you've selected CAD for the navigation like I did, then you can move the object around by holding down the Middle mouse button (scroll wheel on most modern mice). Holding Middle and Right mouse buttons together will allow you to rotate the object. If you do and it goes all wonky then simply tap the 0 (zero) key on your keyboard to reset the view to Isometric.
We now have a base for our box.
It's possible to draw on top of this but it's not good practice. So we'll save this.
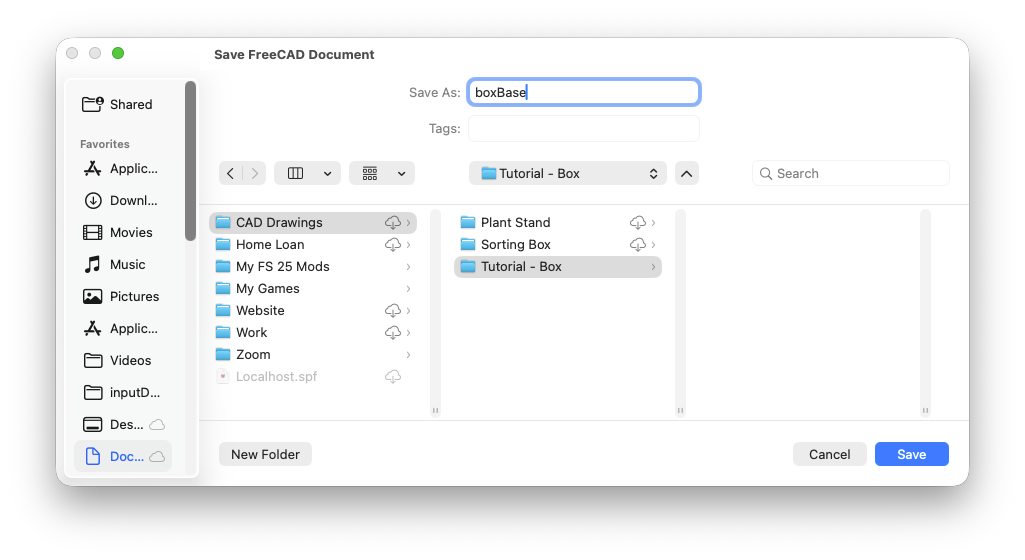
I've called it boxBase and created a folder for our tutorial project. Please note, Windows and Linux will have a different looking Save dialog box. I'm using macOS 26 so that's why my dialog box looks like this.
The name I chose might look weird. Its naming convention is called CamelCode and it's used by programmers to make reading code easier. I'll stick to this format through the whole tutorial including what we're going to look at in our next step.
Step 4
If you've used Fusion360 then you'll know about parametric editing. It allows you to see a history of what you've done, but the parametric part refers to the ability to define parameters to control dimensions etc.
In this step we're going to use the Spreadsheet function to define these parameters. Then we'll explain the benefits of this method of drawing.
Let's create a new file by clicking the New Document button.

You could also use the File / New Document option from the menu.
Once again we default to a window where the left window is set to Models. This time you'll notice that we have both the boxBase and a drawing called Untitled.
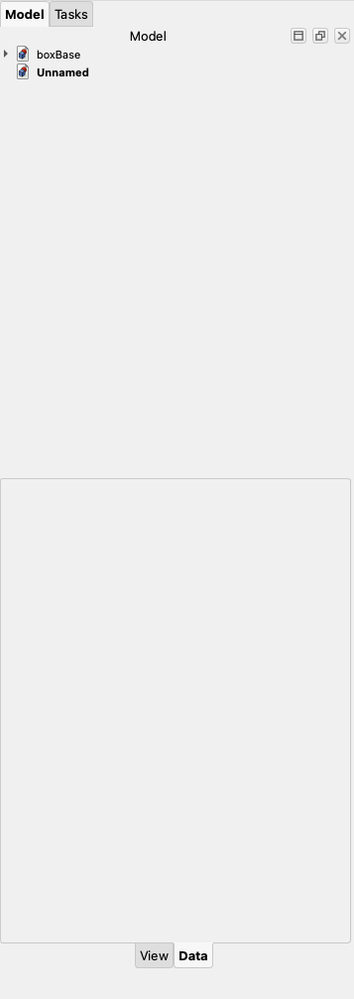
Let's just save this drawing now. I've called mine boxTutorial.
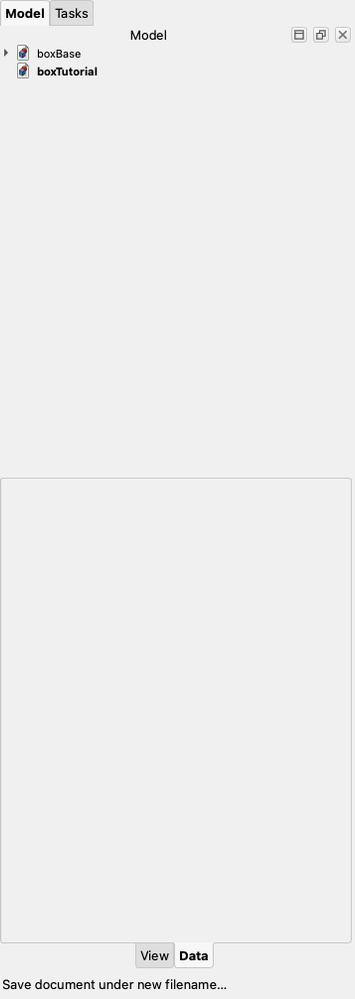
Models now shows the two drawings with the names we've given them.
boxTutorial is going to become the drawing that brings everything together so we're not going to actually draw in this document. It'll make sense as we go along.
Currently we're on the Part Design workbench so let's change to the Spreadsheet workbench in the dropdown menu.
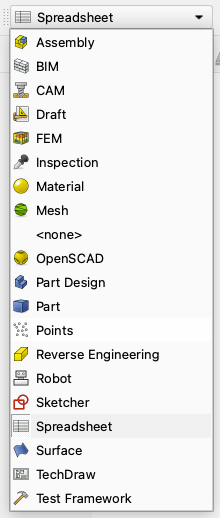
You'll notice that all our toolbars change accordingly.
Click the New Spreadsheet button to make a new document.

You should see your screen change to a grid exactly like Excel, Numbers, Google Docs, etc.
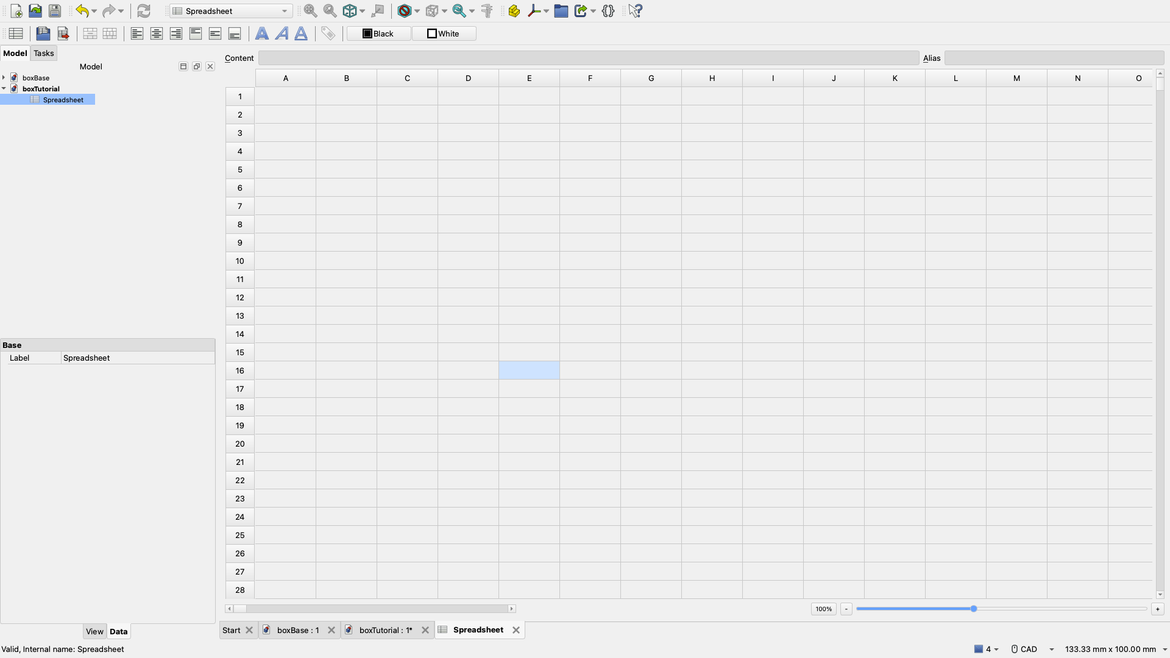
It is for all intents and purposes exactly that.
So let's set some parameters. You can call them variables if it helps you to visualise that. Basically they are settings that we can set for our drawings that automatically size our parts.
So let's add some parameters. I'm going to add the following:
- baseLength: 100
- baseWidth: 50
- thickness: 10
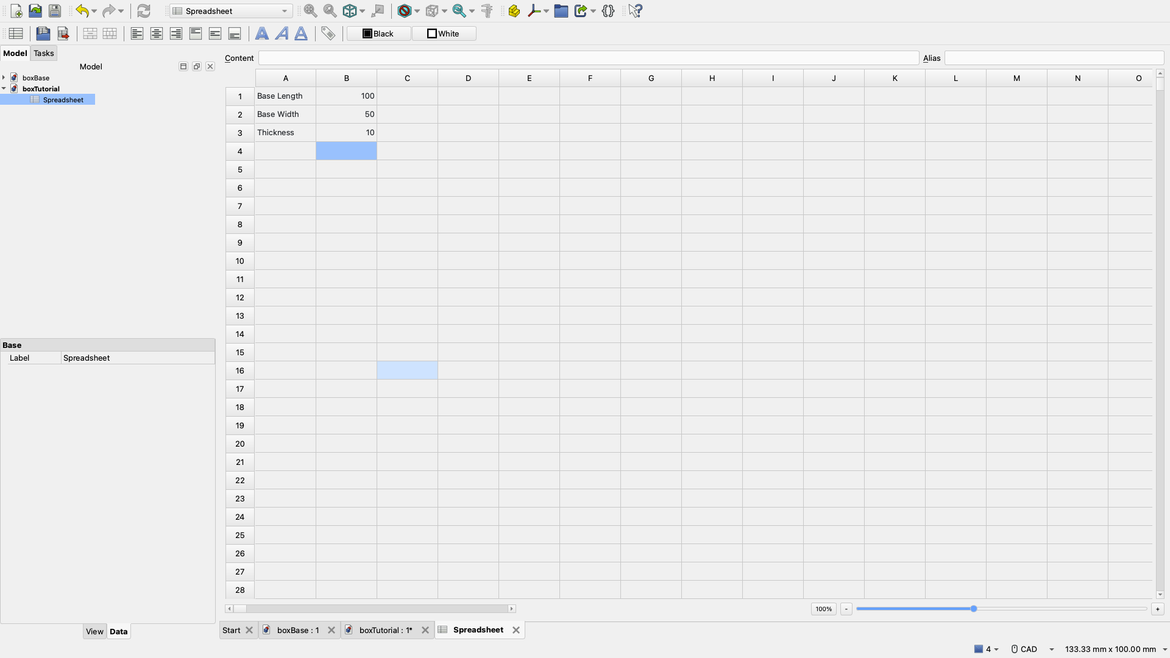
You'll notice that when I entered the labels I didn't name them like I just had in the list. That's because these are just human readable labels. They're not parameter names. To set the parameters, click on the cell that reads 100.
Just above the cells you'll see two text boxes labelled Content and Alias. In the Alias field type in baseLength.

Once you do this you'll notice that the 100 cell now turns blue. Now do the same to the 50 and 10, giving them the respective names. You CANNOT use spaces in the Alias field, hence the reason I use CamelCode conventions as they are descriptive.
With all these set all our values should be blue, indicating we have given each of these fields an alias.
So to recap here because this section can be confusing. We've created a spreadsheet inside our drawing. We've added human readable labels to make it easier for US to read what's going on. However, we've assigned descriptive aliases to each of the valued cells which now become the parameters for our drawings as we go along.
Let's put those aliases to good use. But first, Save.
Step 5
Go back to our boxBase drawing by clicking on boxBase in the Models window.
You should see our previous object.
In Model window look for Pad and click the dropdown to reveal Sketch.
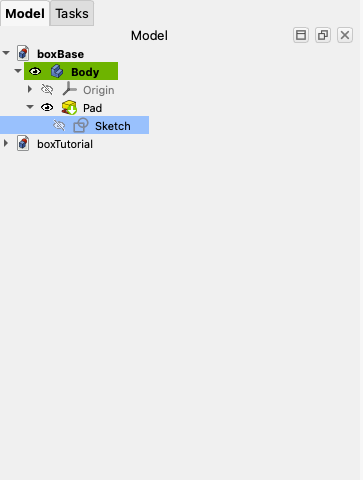
Double click Sketch to reopen the sketch.
You'll be taken back to the 2D drawing of our object.
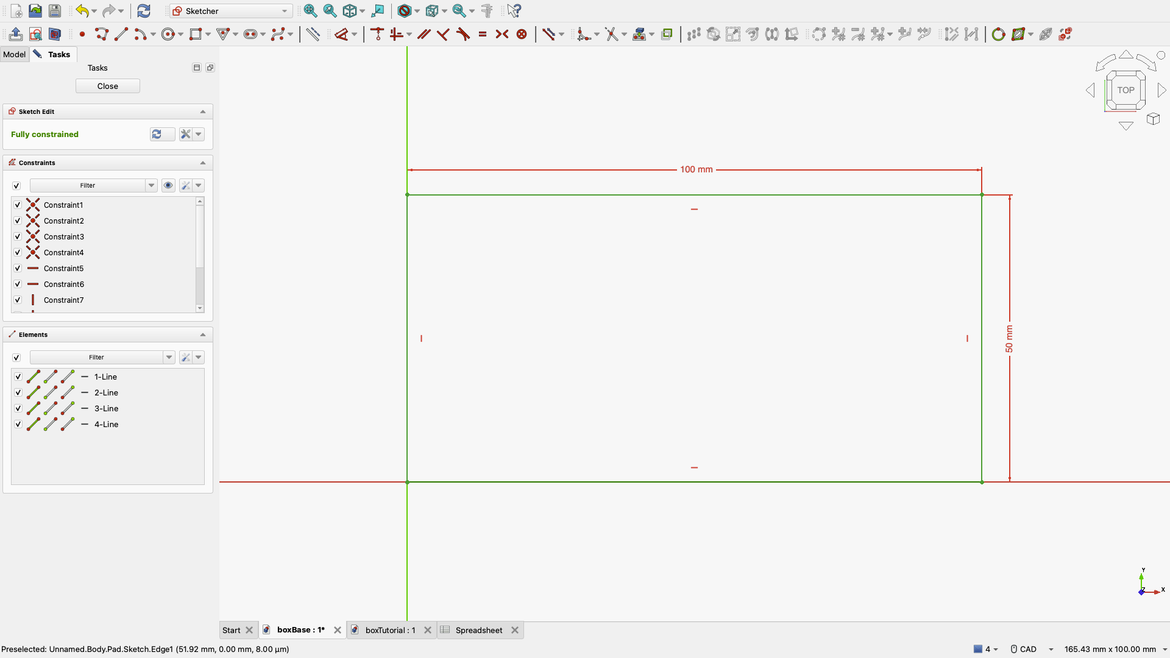
Double click the 100 mm label representing the long dimension of our drawing. You'll get the dimension setting dialog again.
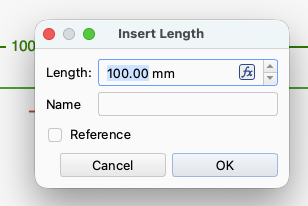
Note the fx at the right of the Length text field? Click it.
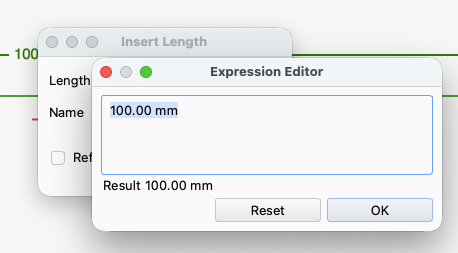
This brings up the Expression Editor window with the value we've already entered in it. Start typing the following:
boxTutorial
You'll notice that as soon as you typed b a dropdown showed up with a bunch of entries in it.
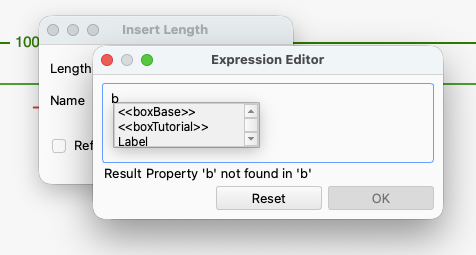
Either click on <<boxTutorial>> or press the down arrow on your keyboard until you get to <<boxTutorial>>.
The expression editor should look like this.
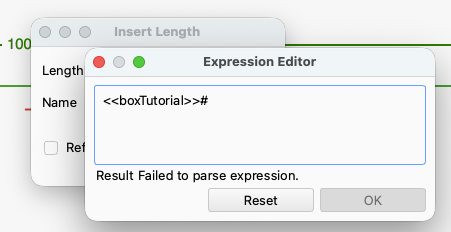
Keep typing this time typing in:
spreadsheet
The same thing will happen however you'll see Spreadsheet and <<Spreadsheet>>. Choose the latter. It doesn't actually matter but it makes it safer to choose this option for reasons we won't go into in this tutorial.
You should now be reading:
<<boxTutorial>>#<<Spreadsheet>>.
Now for our alias. Start typing baseLength and choose that from the dropdown menu that shows up.
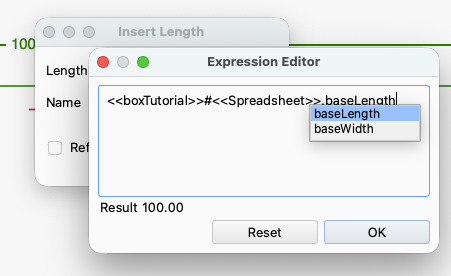
Do you notice how when you select baseLength the Result changed to 100.00? If you selected baseWidth from the menu it should read 50. Make sure you've got baseLength selected and click OK.
You'll go back to the Insert Length box and you'll notice that the dimension looks different now. Before it was 100 mm but now it's 100 mm (fx). This shows that it has been dimensioned using an expression. As we go forward you will see we can make these expressions quite complex. Click OK.
Double click 50 mm the click the fx button. You can copy and paste this into the Expression Editor to make life simpler for you:
<<boxTutorial>>#<<Spreadsheet>>.baseWidth
Click OK then click OK again and you'll return to the drawing.
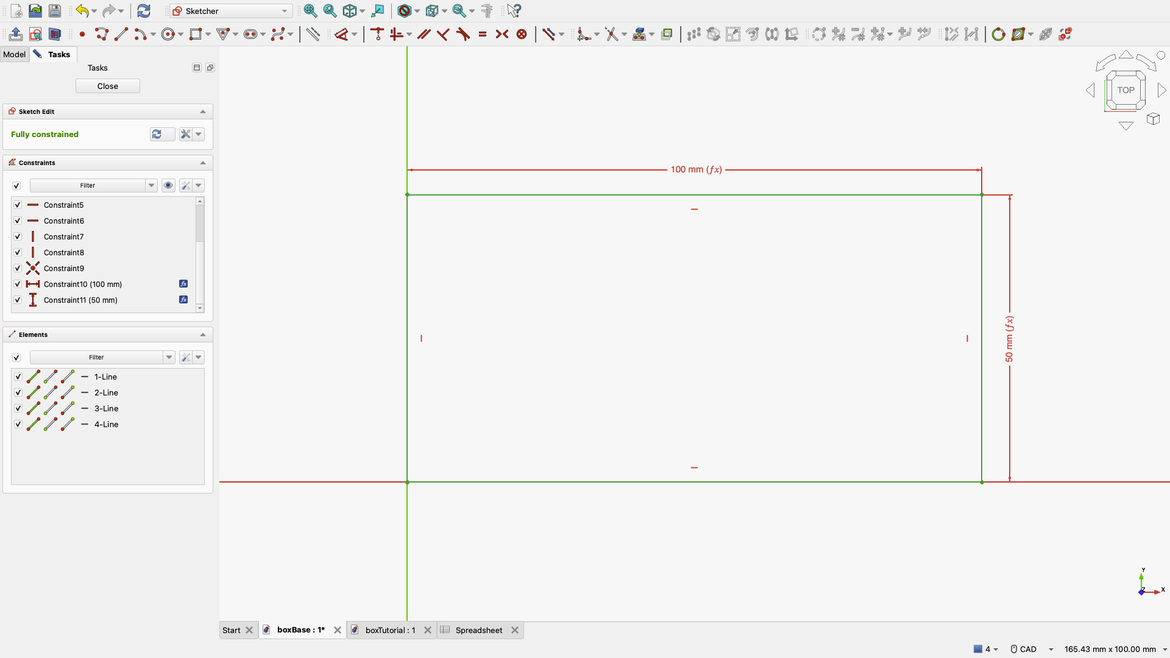
Both should have fx the end of the numbers now.
Let's quickly explain what's going on here.
<<boxTutorial>>#<<Spreadsheet>>.baseWidth
<<boxTutorial>># refers to the document we are referencing. Incidentally, if this doesn't show while you're typing it's because the document isn't open and you should get errors. Just simply open it and it should appear in the Models window as before.
<<Spreadsheet>>. refers to the model inside that document. In this case it's the Spreadsheet we created before.
baseWidth refers to the alias we set. That last part has to be in the spreadsheet or it's not going to work at all and your drawing will break.
Now in the Tasks window click Close to get back to our 3D object.
In the Model window double click Pad to bring up the padding dimensions.
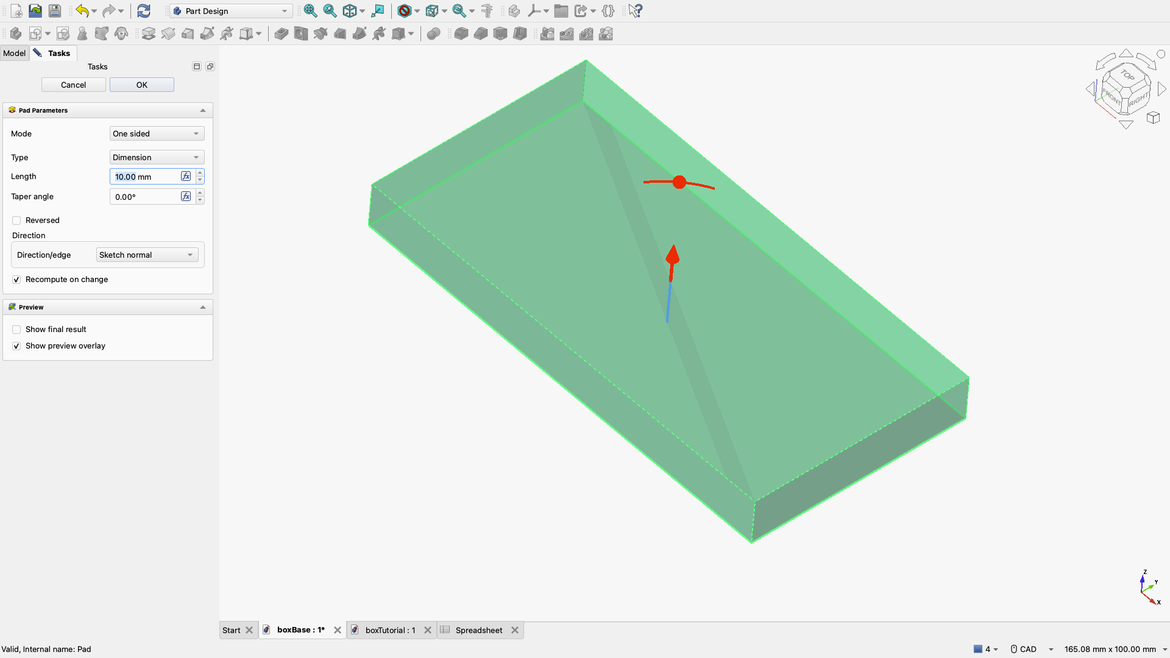
Click the fx beside the Length field. For expediency copy and paste this into the Expression Editor.
<<boxTutorial>>#<<Spreadsheet>>.thickness
Click OK. Then click OK in the Tasks window.
If all went well then nothing looks different with our model. Save the drawing.
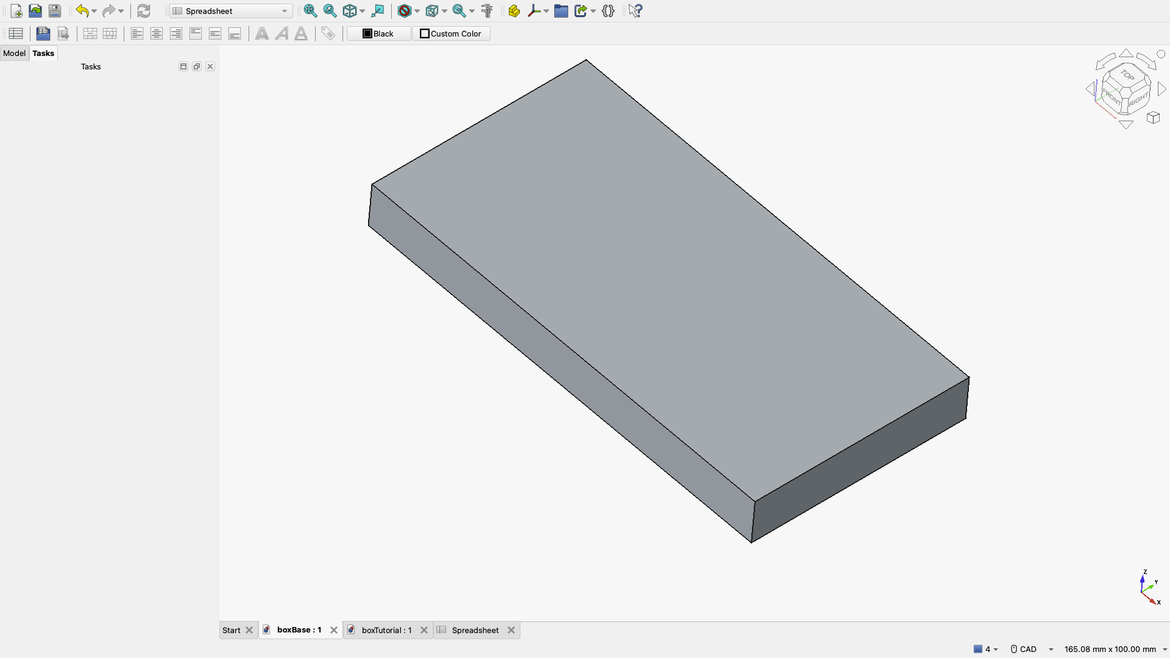
You'll notice at the bottom of our object there are tabs. Click the one that reads Spreadsheet and you'll return to the spreadsheet. I want you to change the value of thickness by either going greater than 10 or less than 10 but a number that will be noticeable. For example try 25 or 2. Save that and then click back to boxBase. Nothing looks different but the boxBase tab at the bottom does have a * indicating there's an unsaved change. Click the Refresh button on the toolbar.

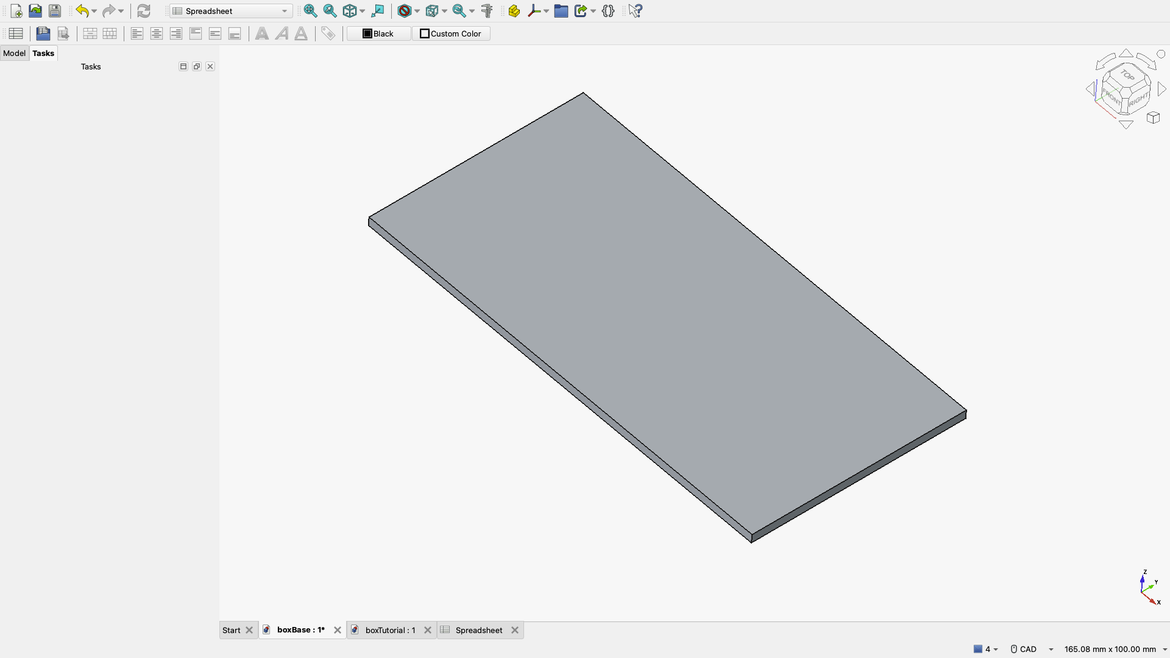
Depending on what value you entered into the thickness alias, your drawing will change automatically. I entered in 2 which changed the thickness to 2 mm. Yours might have gone fatter if you chose a value greater than the original 10.
Go back to the spreadsheet and alter the other values and see what happens to your drawing. Fun right.
Go back to the spreadsheet and we'll create some new values.
Using the method in Step 4 we're going to create the following aliases:
- sideShort
- sideLong
- sideHeight
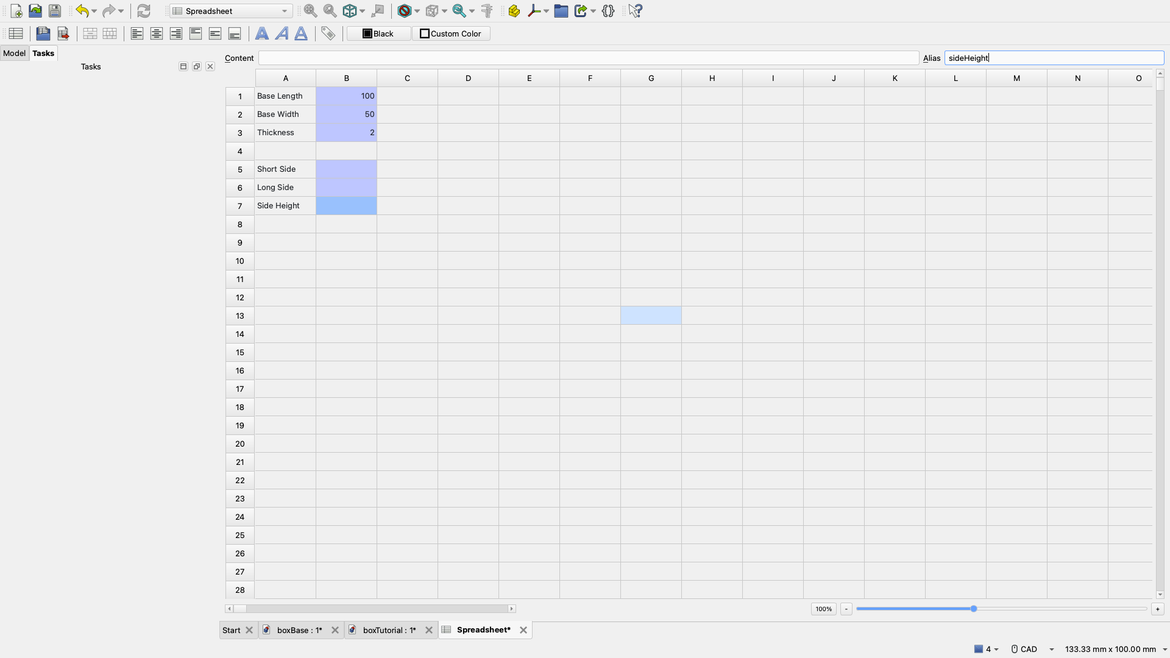
You'll notice that I never assigned any values to these aliases. That's because we're going to create these values based on the dimensions of the base.
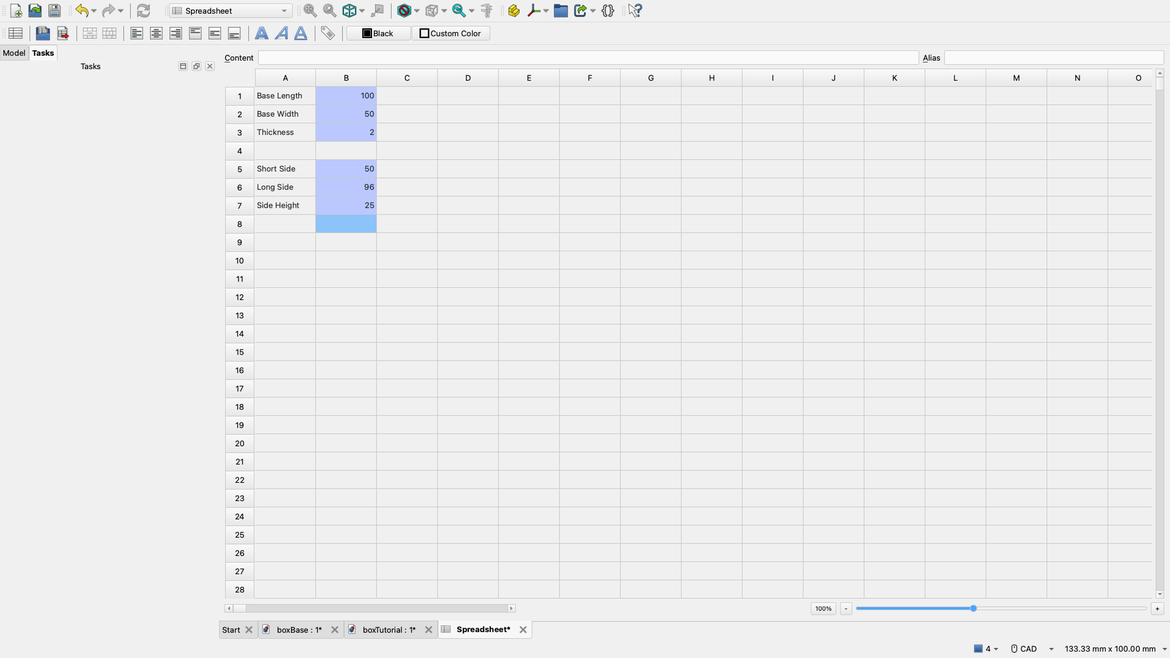
In the sideShort cell enter the following equation:
=baseWidth
This is going to set the length of the short side equal to the width of the base. We could simply use the baseWidth size when we create the part but this way allows us to modify things without affecting the base.
In the sideLong cell enter this equation
=baseLength - thickness * 2
This is going to take the baseLength then shorten the size by 2 thicknesses due to the 2 short sides.
Bear in mind that spreadsheets adhere to BOMDAS so the multiplication will ALWAYS be done first unless you put in brackets.
In the sideHeight cell enter:
=baseWidth/2
This will makes the sides half the height of the length of baseWidth.
Going by our original entries our spreadsheet should now look like this.
Save the document as we're done. However, don't close it because otherwise we can't utilise it.
Step 6
Now that we have all the dimensions, it's time to create two new parts.
Click the New Document button on the toolbar and save it as sideShort. Notice that we're saving as the name of the alias we created in the spreadsheet. You don't have to do this but when you're working with a large number of parts it makes sense to use this format for the sake of your sanity.
Change the workbench to Part Design.

Now you'll see the familiar New Body in the Tasks window. Click it then click New Sketch.
We're going to draw on the YZ plane now so choose that and click OK in the Tasks window.
Draw a new Rectangle and drag to a random size.
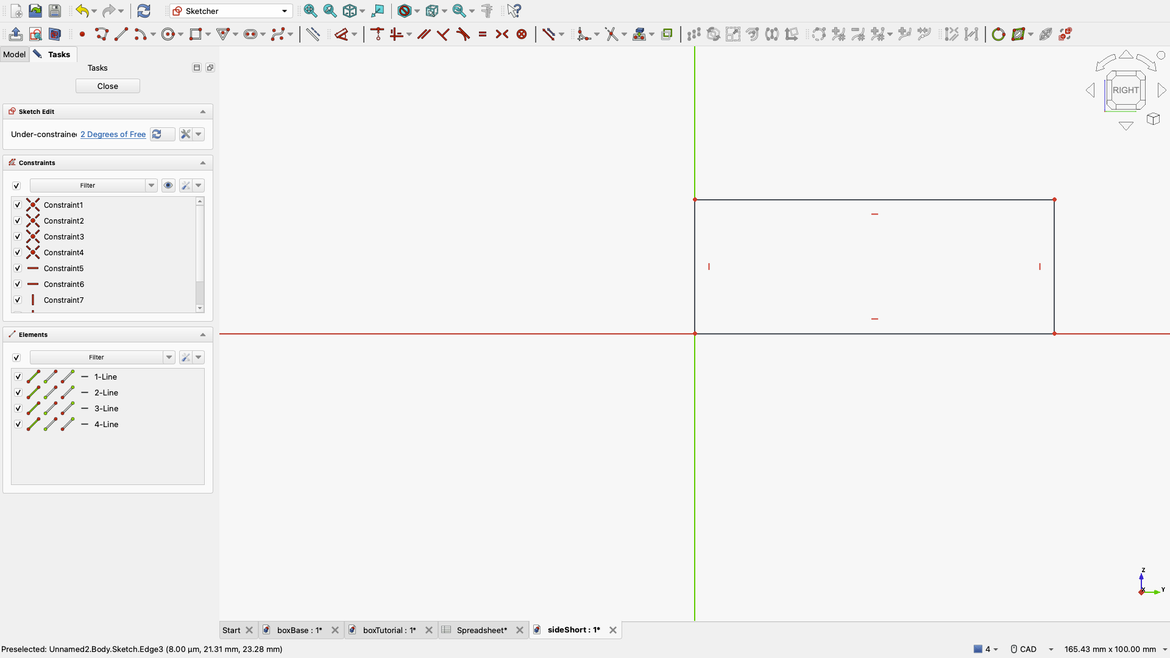
Now all we have to do is use the Dimension tool to resize everything. Click the top line and click the fx button to open the Expression Editor.
Copy and paste this:
<<boxTutorial>>#<<Spreadsheet>>.sideShort
Now do the same thing to the right side but enter this into the Expression Editor.
<<boxTutorial>>#<<Spreadsheet>>.sideHeight
Right mouse click to cancel the Dimension tool and you should now have a drawing 50 mm by 25 mm.
Click Close in the Tasks window to see the object.
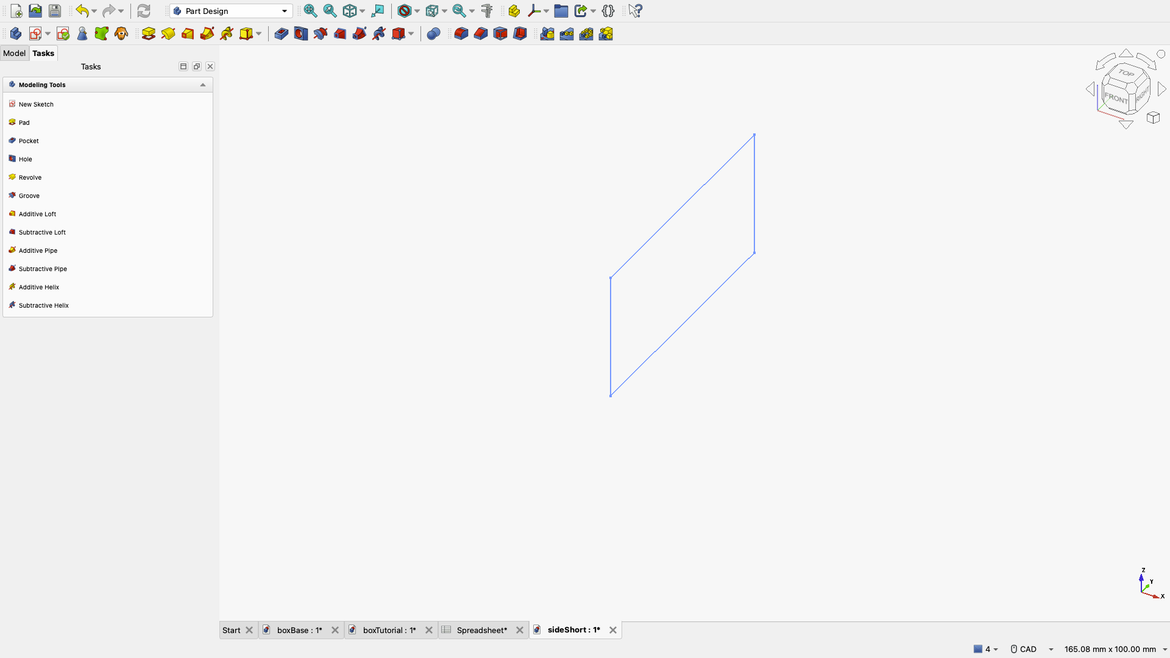
Notice how the drawing looks upright? If it does you chose the correct plane.
Add a Pad and under Length click the fx button to open the Expression Editor and type:
<<boxTutorial>>#<<Spreadsheet>>.thickness
Click OK in the Tasks window and you'll now have your second part.
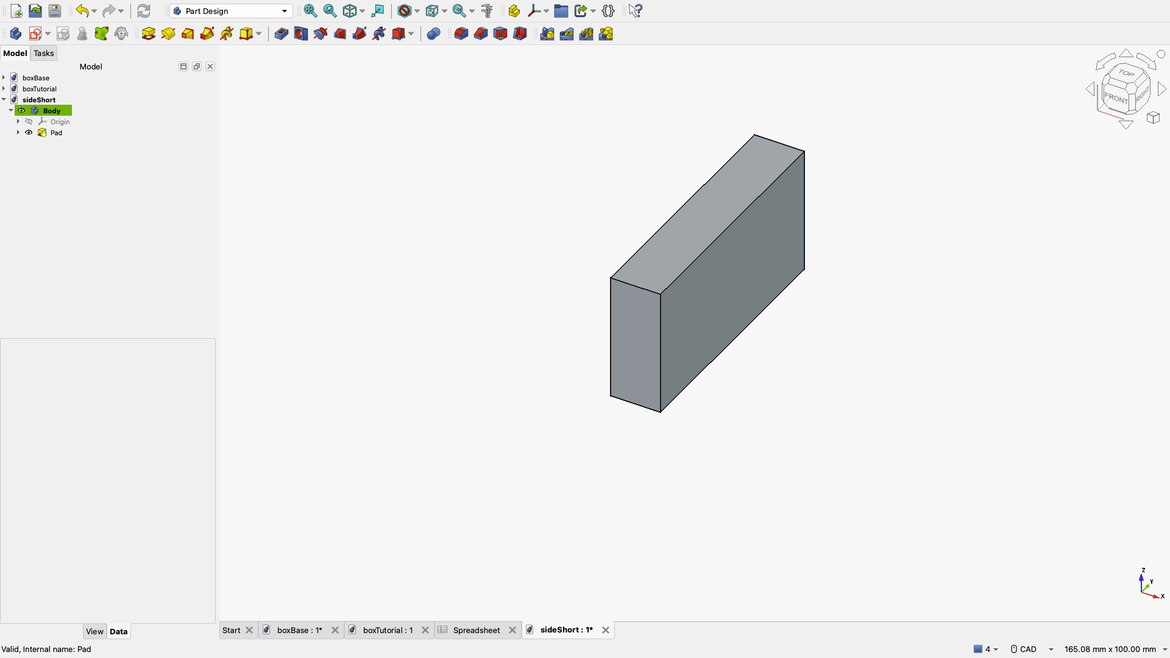
Now for our final part.
New Document, save as sideLong. New Body, New Sketch, and choose the XZ plane. Draw a new Rectangle any size then use the Dimension tool to set the long edge to:
<<boxTutorial>>#<<Spreadsheet>>.sideLong
in the Expression Editor.
Make the right side:
<<boxTutorial>>#<<Spreadsheet>>.sideHeight
Now OK then Close in the Tasks window.
Give the drawing a Pad using:
<<boxTutorial>>#<<Spreadsheet>>.thickness
Like we've done the whole process.
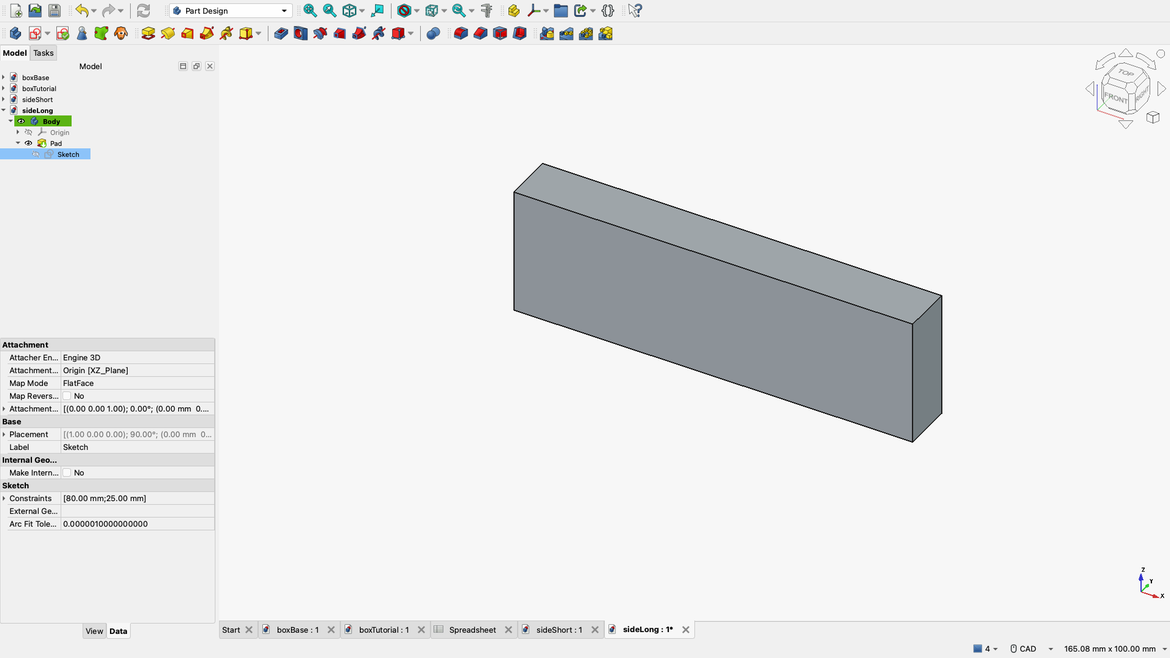
Once again the rotation has changed but this now gives us everything for our little box.
Save the drawing.
Step 7
If we look at our Model window now, we'll see we have four documents.
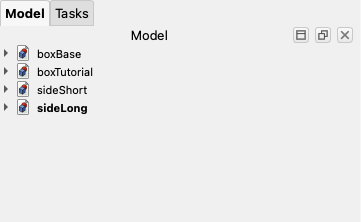
We have a base drawing, a short side, and a long side. We also have the drawing that's going to bring everything together.
Create a New Document and save as boxAssembly. Change the workbench to Assembly.

Once again our toolbar changes to suit the operations.
Click the New Assembly button in the toolbar.

Now click the Insert Component button.

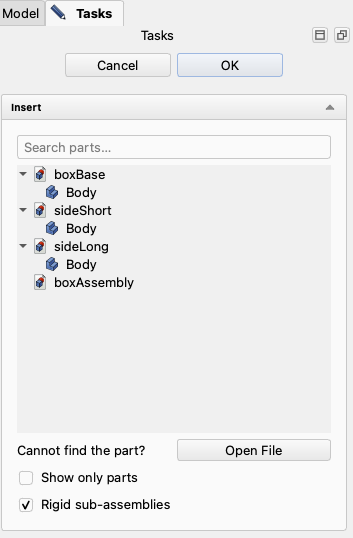
Click Body on the boxBase and you'll see a copy added to the screen.
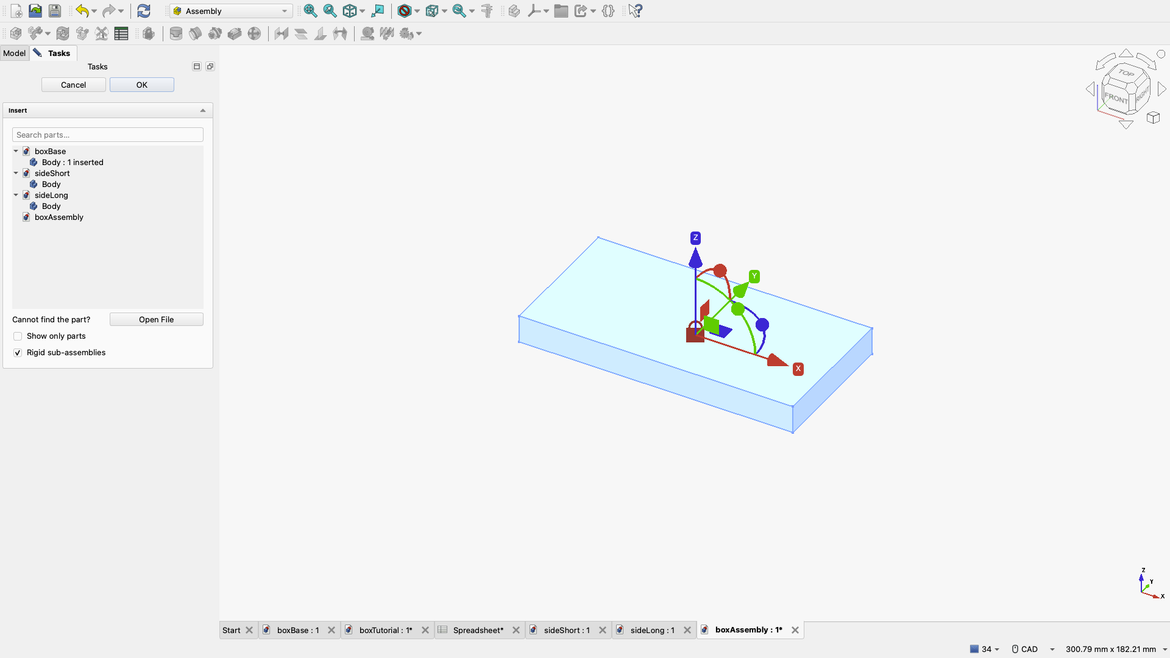
Notice the red Padlock icon? As this is the first part we are adding it will be the anchor for every part we add from now on.
Now click on Body for the sideShort.
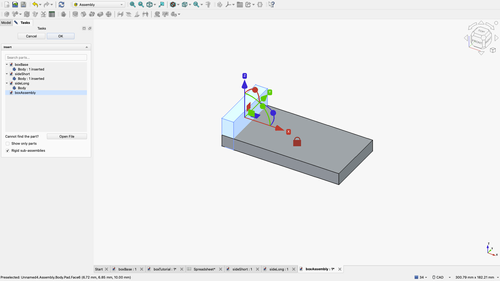
Click and hold the red Arrow and drag it to the left. Click on Body for the sideShort again and this time drag it to the right.
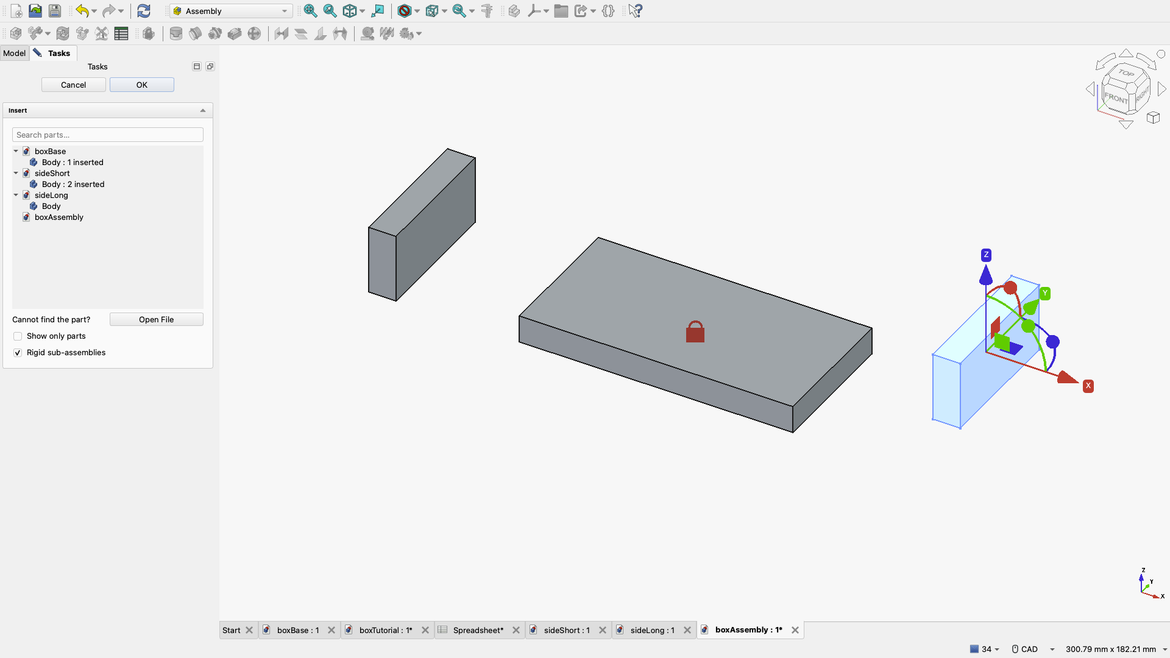
Do the same thing for sideLong but use the green Arrow to drag one forward and the other back.
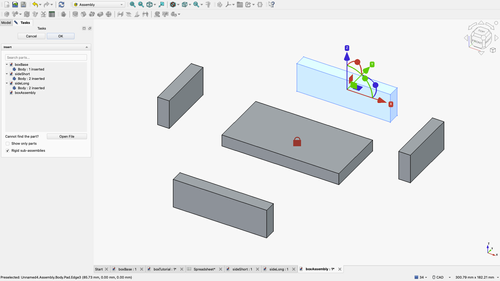
Click anywhere to deselect the last object.
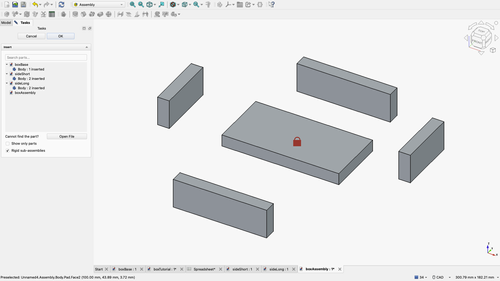
Now comes the fun part. Putting all the pieces together.
Step 8
You'll want to zoom in for this part as it's very finicky and you need precision.
Zoom into the left side and click the Fixed Joint button.

Now click the bottom left corner of the left short side.
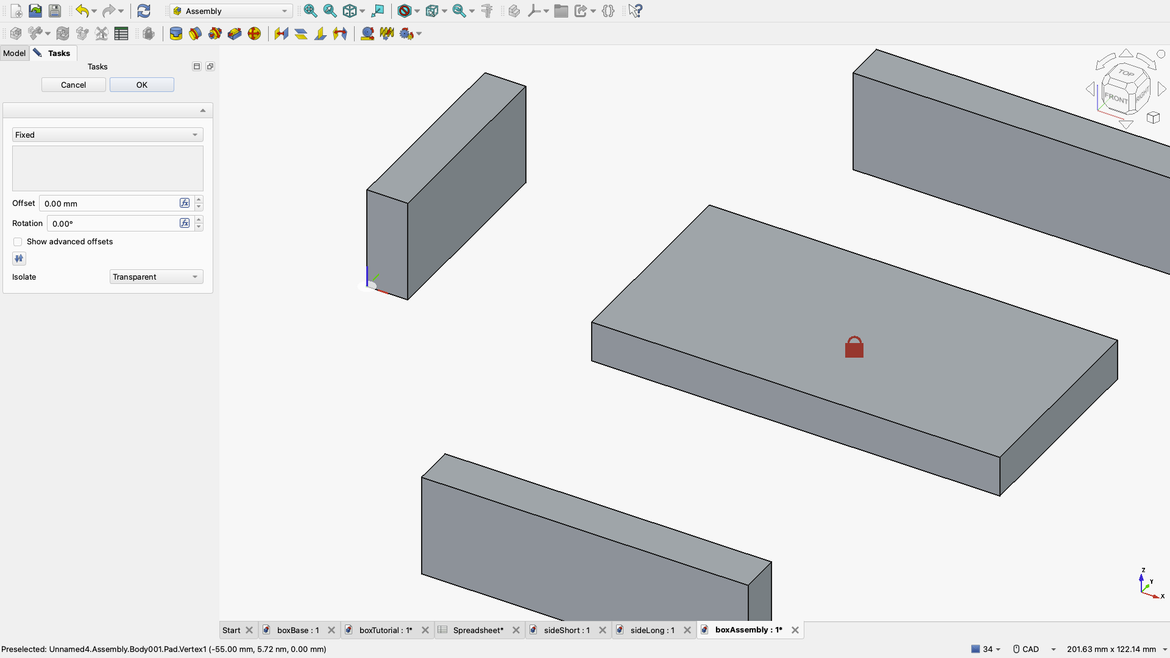
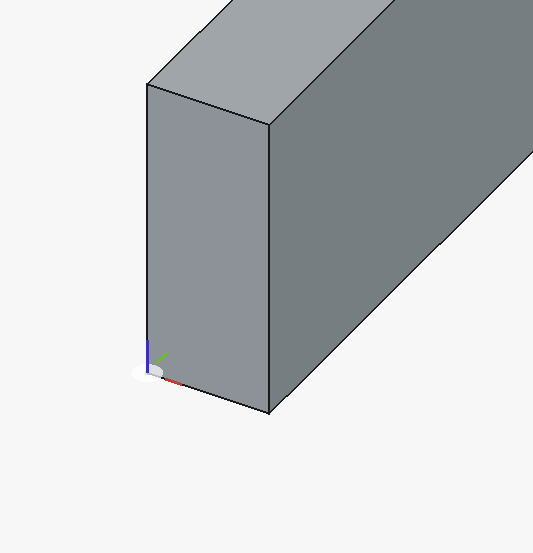
It's very important to note the direction of each of the colours. In this case it's Blue = Up, Red = Right, Green = Into. Now click the top left corner of the boxBase making sure that before you click, the orientation of the colours is EXACTLY the same.
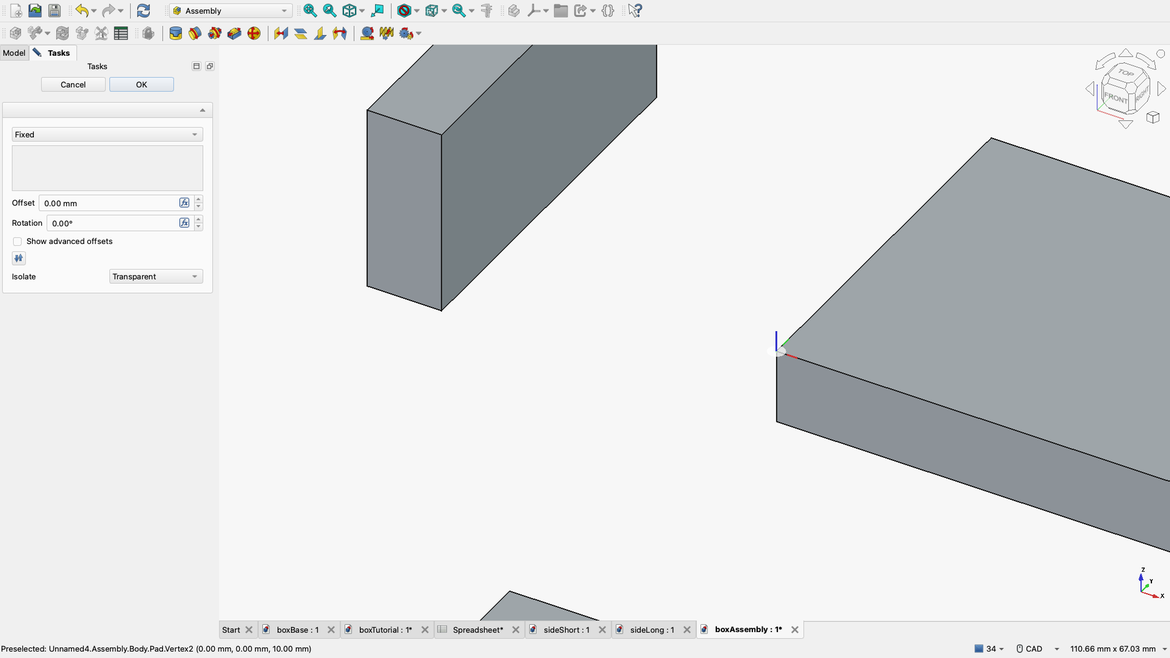
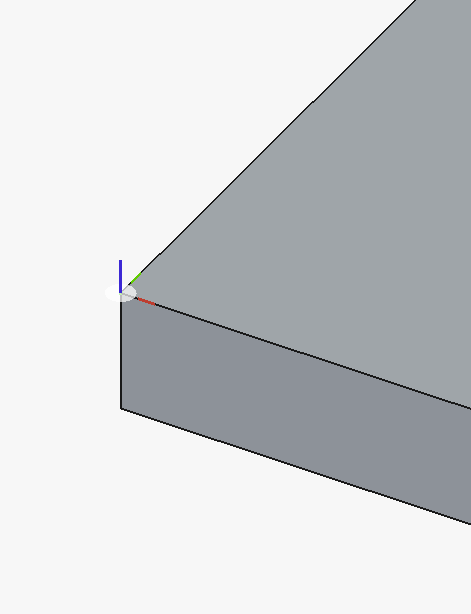
If all went well then the two parts will join exactly where they are needed.
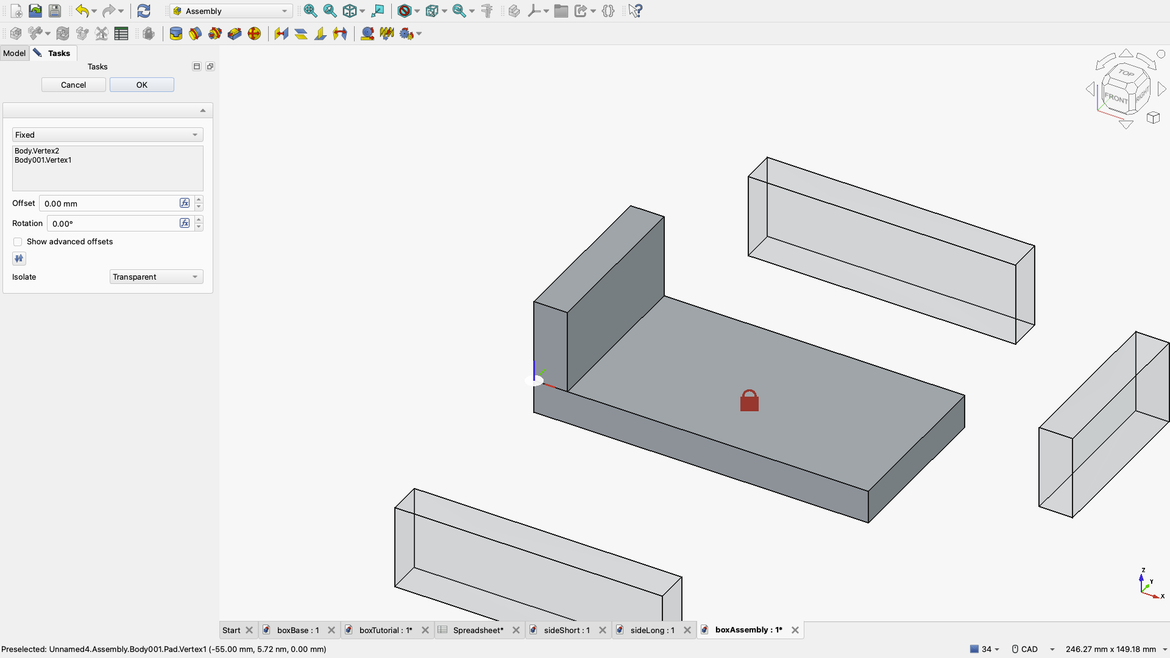
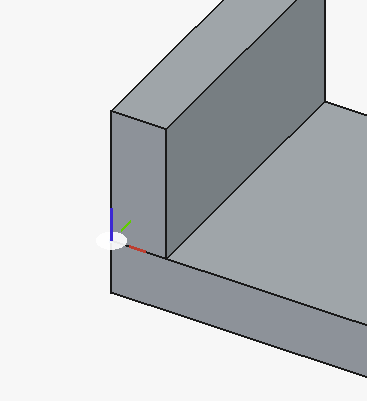
If you got the colours the wrong way around then the part will go off on all sorts of tangents. If this is the case then simply click Cancel in the Tasks window. If it's all good then click OK.
Now repeat this process with the front face. However, once you click the bottom left corner of the front face you need to click the corner of the newly seated left side.
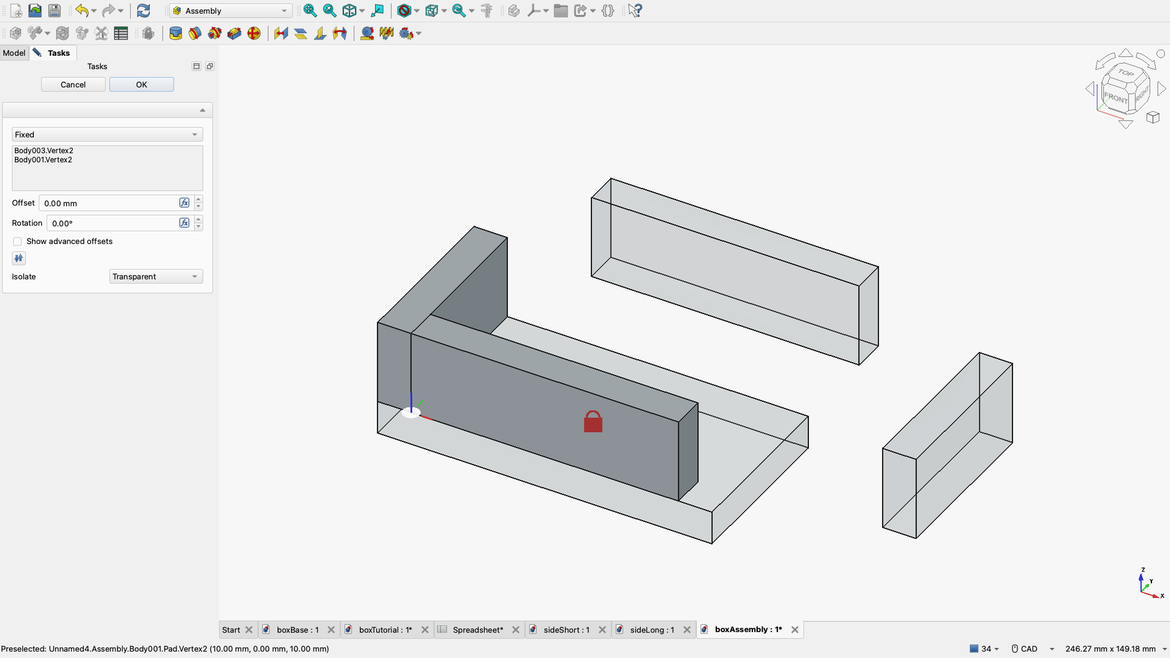
Once it looks like this then click OK in the Tasks window.
Now we do the same with the right side only instead of choosing the bottom left choose the bottom right corner and matching it with the top right corner of the boxBase.
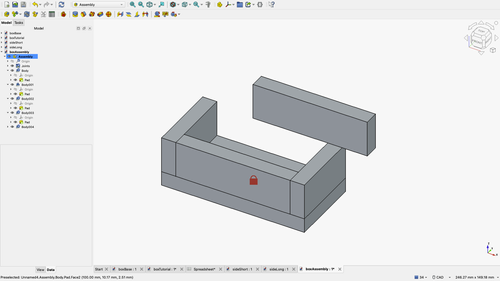
The last side is the hardest. If you've selected the CAD navigation tool then hold down the middle mouse button (scroll wheel) and hold down the right mouse button together. Using gentle movements rotate the image until you can see the back of the box. You can release and rotate again and release and rotate again in order to get the proper view. Each release will make this the new start position.
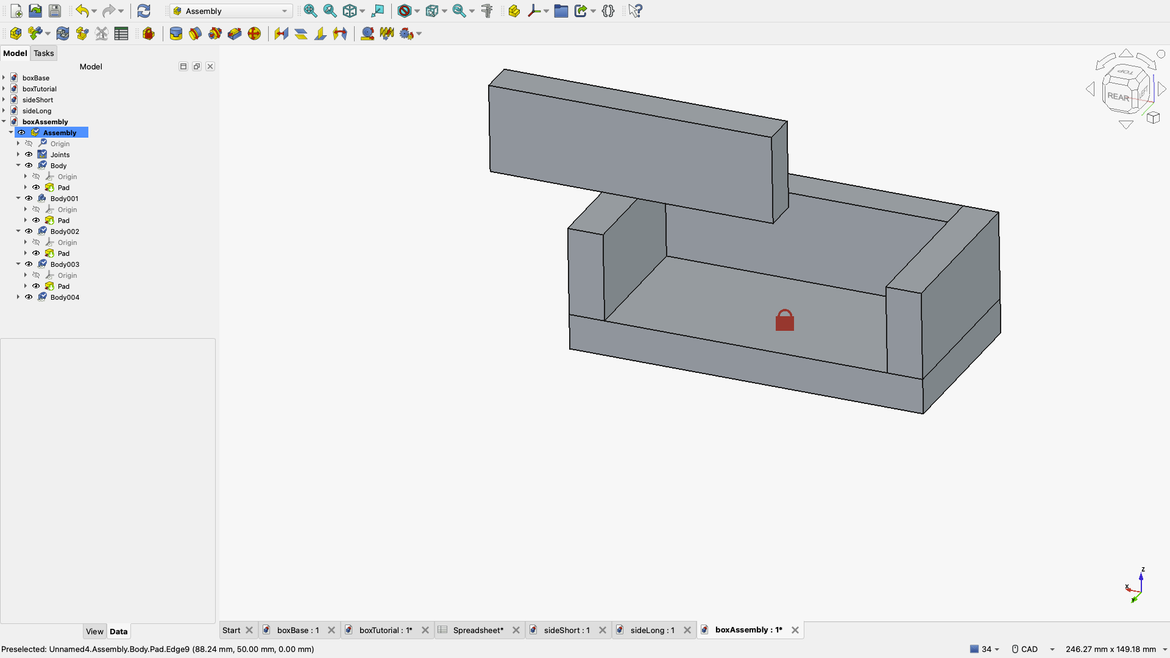
I generally tend to select the bottom right corner then match it to the corresponding corner.

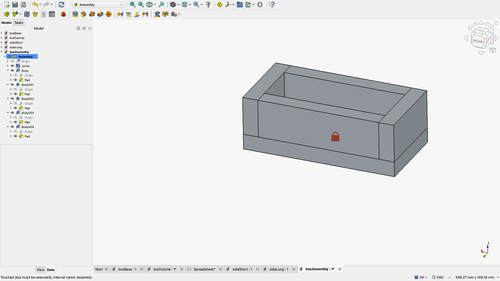
And viola, a completed box.
Step 9
I realise this tutorial was pretty full on. I hope you got the intended drawing at the end. If not please comment below and I'll see if I can work out where you went wrong.
I made this tutorial quite wordy in order to get you into a workflow that can be used on any drawing you do from this point on.
In my future tutorials I will show you how to do things like cutouts and holes. I will use this tutorial as my base and we'll build on it.
In my next tutorial though, I will show you how to make a technical drawing so you can make printed plans.
Please note that FreeCAD can allow you to 3D print, use CNC or laser cutters, and also has BIM tools for architecture professionals.
It's hard to believe this is all for free but as this is open source and there is continued development, you're going to get a lot more for your money.
And unlike Fusion360 or SketchUp, you can do anything you like with your drawings. You can sell them if you so desire. There is literally no restrictions on how you use this software.