The Bunnings Workshop community can help with your home improvement projects.
- Bunnings Workshop
- >
- Featured Projects
- >
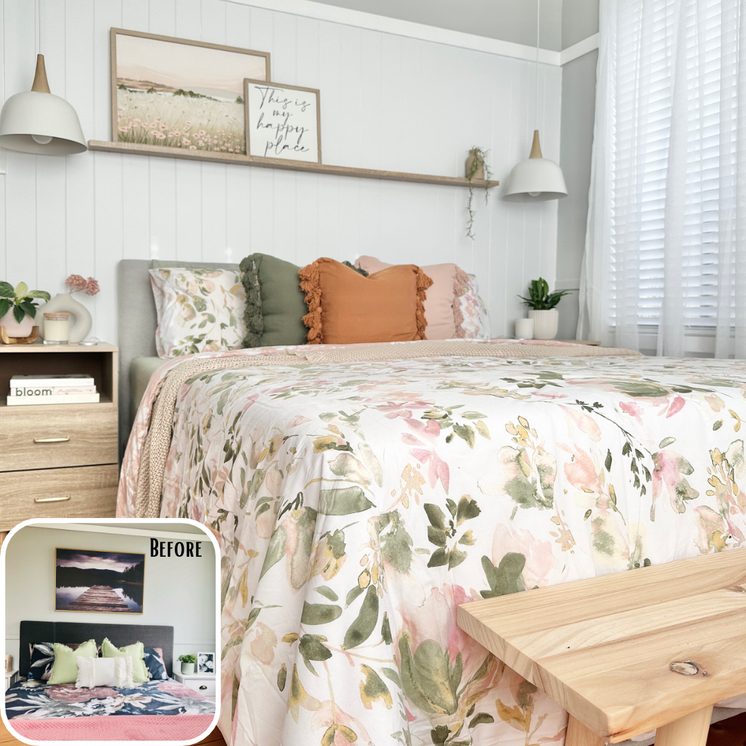
- Master bedroom revamp with VJ panels
Master bedroom revamp with VJ panels
- Subscribe to RSS Feed
- Mark as New
- Mark as Read
- Bookmark
- Subscribe
- Printer Friendly Page
- Report Inappropriate Content
Painted VJ panels plus Flexi Storage photo shelves used in this bedroom makeover.

The project
People say the kitchen is the heart of the home so maybe the bedroom is the soul. Light and airy vibes bringing sweet dreams in this master bedroom revamp.
Tools and materials
Materials used in the project:
- Easycraft EasyVJ panels
- Dulux Wash & Wear Lexicon 1/4
- Selleys Liquid Nails
- No More Gaps
- Flexi Storage photo shelves (3 x 600 x 35 x 90mm used here) - range of sizes available.
Tools used in the project:
Steps
Step 1
Make sure you measure up the space. We used 2.5 boards here, so we needed to cut one panel down (with the circular saw) to fit the space.
Step 2
These boards will hold with Selleys Liquid Nails. We have a nail gun, so we did tack in a few places as our walls, being very old, are not a smooth/straight surface. Don’t forget to use No More Gaps on the joins.
Step 3
Time to paint. Using the corner pad applicator will make painting in the grooves so much easier and gets much better coverage than a paint brush. Make sure your roller isn’t too overloaded with paint. There is no need for primer on these boards but to get a crisp white, a coat of primer will prevent you needing additional top coats.
Step 4
Time to add a shelf. Flexi Storage photo shelves are so easy to install and come with instructions. Just make sure you have a spirit level to ensure the shelves are level.
Before and after
More inspiration for your bedroom makeover
Workshop community member Leanne used Yacht Race and Rubble by Porter's Paints in her VJ panelling bedroom makeover.
Community member TheRenoDad built a bedroom picture ledge with a VJ panel wall, giving the room a whole new feel.
Check out our 10 ways to update your bedroom and the Top 10 most popular VJ panelling projects for more great ideas from our community members.
Why join the Bunnings Workshop community?
Workshop is a friendly place to learn, get ideas and find inspiration for your home improvement projects


