Difficulty: Beginner
Let your plants be the centre of attention with these stylish, industrial-looking cement planter pots. They can be made in many different sizes to suit your decor and taste.
The planter pots make fantastic gifts and are also a fun weekend project to do with kids.
Inspiration for this project comes from the very popular D.I.Y. concrete vase by Bunnings Workshop member @hannah. Many thanks again for sharing your wonderful project with us.
Steps
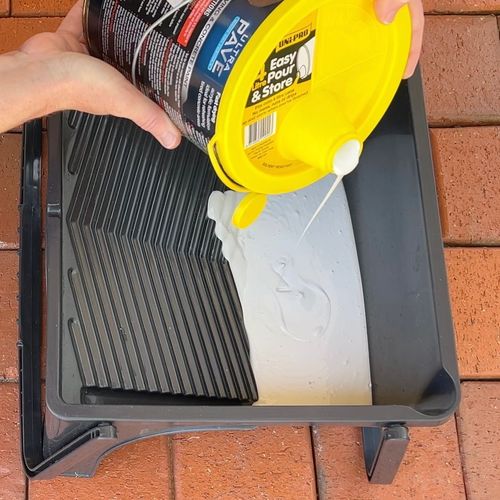
Step 1
Ensure you wear gloves to protect your hands. Take equal parts of your quick-set mortar and cement mix and place them into a plastic container. Combine the dry mixture using the mixing stick. Slowly begin adding water while stirring until you achieve a runny consistency.
 .
.  .
.  .
.  .
. 
Step 2
Take your larger outer mould pot and spray the inside with WD-40 lubricant. Half fill it with your wet cement mix. Spray the outside of your smaller pot. Push the smaller pot down into the mix and use something heavy to weigh it down such as pebbles or stones.
 .
.  .
. 
Step 3
Wait 24 hours for your cement mix to almost fully cure, then remove your weighting material and the small container. Turn the pot upside down and tap it sharply on the ground. A piece of cardboard will help prevent the pot from chipping.
Once the pot is released, drill through the bottom with a 12mm masonry bit. Do not use the hammer function on the drill. Since the cement is not fully cured your drill in normal function mode will grind out a 12mm hole without breaking the pot.
 .
.  .
.  .
.  .
.  .
. 
Step 4
You can leave the pots as they are if you prefer the cement look or for a touch of interest, try spray painting patterns on them. Take the masking tape and apply it to the pot. Spray at least three coats to cover the cement. Once you have finished painting the pots, you can seal the inside with Crommelin ornamental pot sealer.
You’ve now completed your stylish cement pots. We think they are perfect for displaying your succulents and cacti. You might like to try experimenting with different sized and shaped moulds to create unique personalised designs.
 .
.  .
.  .
.  .
. 
Materials
-
1 bag of quick-set mortar
-
1 bag of general purpose cement
-
1 plastic mixing container
-
275g can of WD-40 lubricant
-
750ml spray bottle of Crommelin ornamental pot sealer
-
1 roll of painters’ tape
-
Plastic pots of various sizes
-
Spray paint
Tools
-
Drill driver
-
12mm masonry drill-bit
-
Mixing stick
-
Gloves