Hi guys.
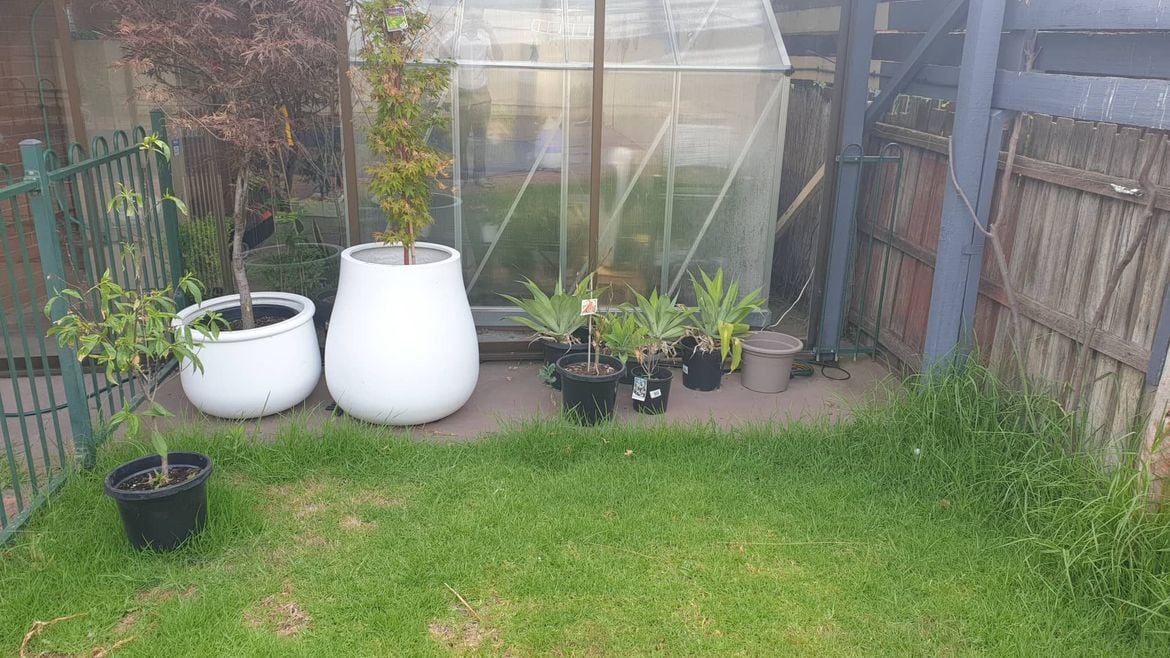
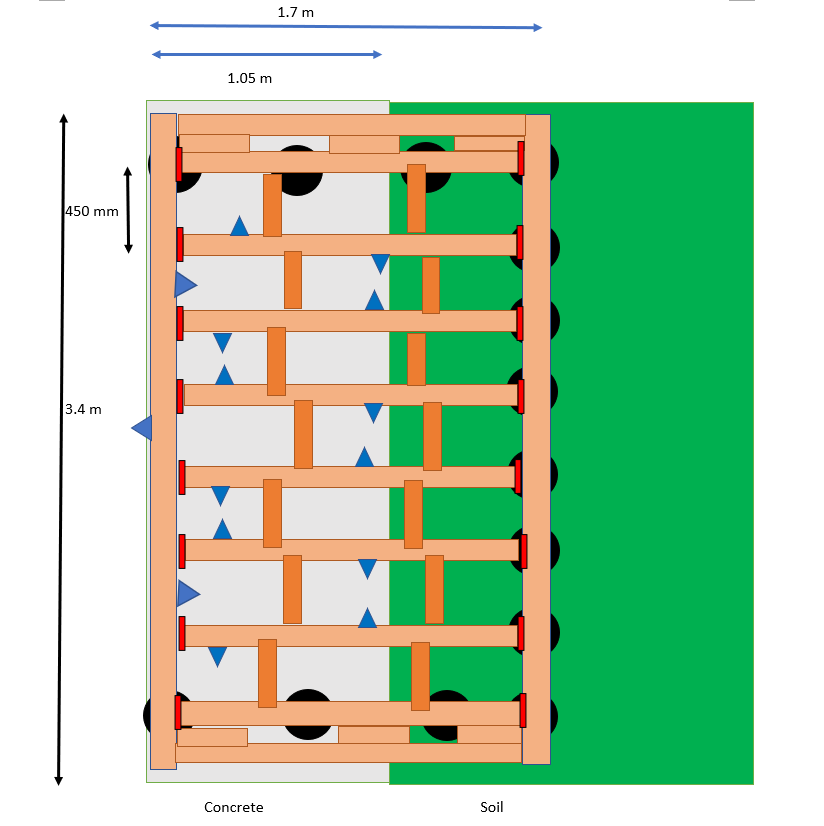
I will be starting to build a small low-level composite deck in my backyard very soon. The deck size is about 3.4 m x 1.7 m, in which a larger part of it stands on the concrete whereas the outer part stands on the garden as illustrated on the image below. I have read through oninpena's Low-level composite deck (which is quite similar to my project), Jithesh's low-level deck with picture framing and low-level deck on concrete slab and Adam_W's How-to-build-a-low-level-deck. These posts/threads are very inspiring and has provided me with fundamental knowledge of building a basic deck and numerous practical tips.


Black dot = Tuff block or minifoot pedestal? (Difference?)
Blue triangle = Angle/L Bracket
Orange rectangle = noggins (required?)
Red rectangle = Pryda Joist hanger
I will be using 90 x 45 mm treated pine for substructure and Ekodeck composite decking in my project. Can anyone review this diagram and enlighten me if it's structurally sound? What are the difference between the tuff block and minifott pedestal? I realise that I will probably need this due to potentially uneven surface going from the concrete to the grass area (I will be putting pavers and concrete on the soil). Would the amount of tuff block in the picture be adequate in supporting my small deck?
I will also be using L-bracket to support the deck off-ground on the concrete. I do not actually have any limits on the height because the deck is not actually going to connect to any door entrance, so what would be the ideal height above ground to provide adequate air circulation and avoid moisture retention. Is the number of L-brackets and noggings in the diagram adequate? The spacing between the L- brackets on the joist is probably about 0.5-0.85 m. I have seen 1 m spacing was suggested in other threads so I presume there was no harm going any lower than 1 m if my deck is small. Not sure if noggings are required in this small little deck?
I have also notice many have used double joists on the 2 sides of decks, so I have included that into my diagram. Just wondering if the double joist at both ends makes it more structurally rigid or is it just for laying the frame/fascia on top of it? Any insights from anybody is much appreciated.
Thank you
Regards
Sky