Workshop
Ask a question

The Bunnings Workshop community can help with your home improvement projects.

Low single layer deck build

melbs
Growing in Experience

Low single layer deck build

20220826_171311.jpg

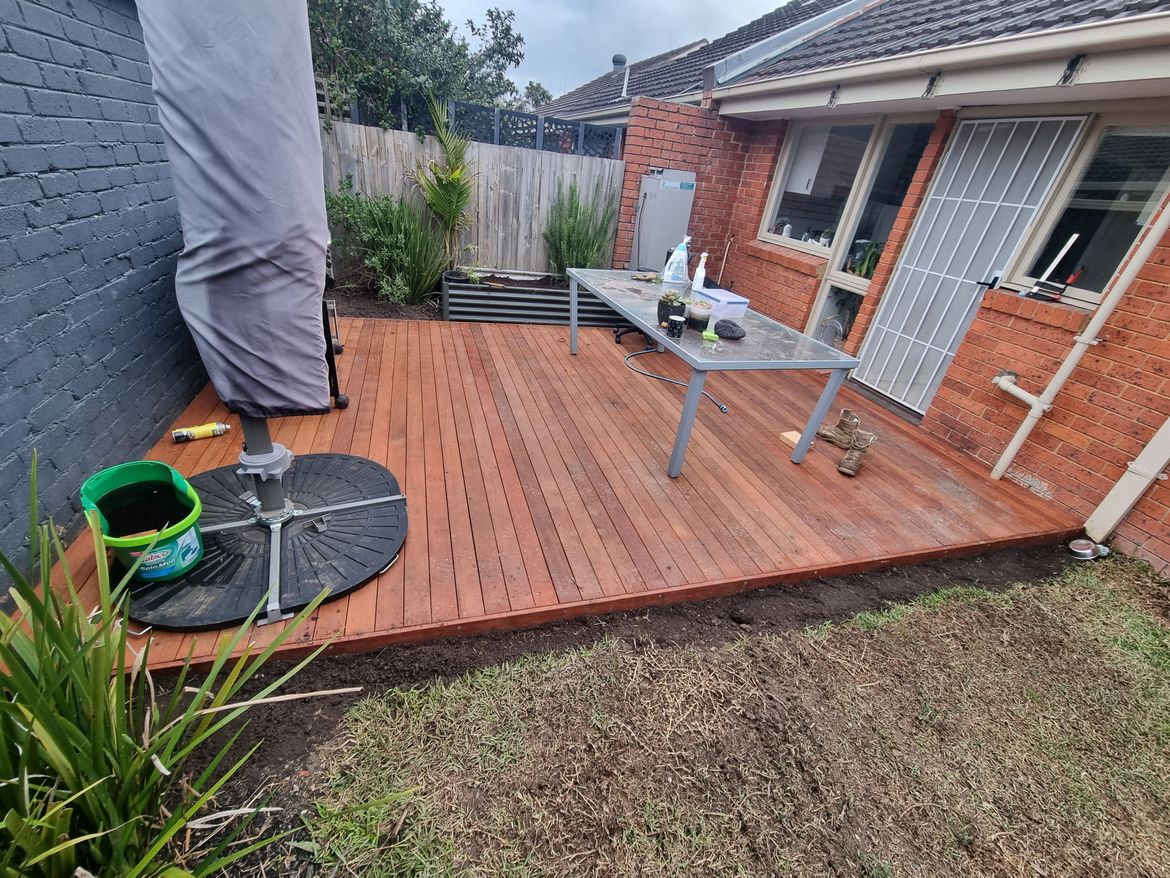
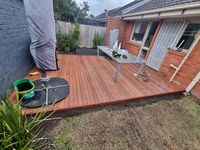
I built a deck that sat flush with my back door, a task made difficult with a clearance of only around 150mm from step to ground. Here is how i did it.


Materials

  • 10mm Dynabolts (galvanised)
  • 10mm Coach Screws (galvanised)
  • 10mm Hex Bolts (galvanised)
  • 100 x 100 x 105mm M10 Galvanised Angle Bracket
  • 200*45 Treated Pine (doubled for frame)
  • 90*45 Treated Pine (joists)
  • Pryda Half Stirrups
  • Pryda Nails (for Joist Hangers)
  • Pryda Joist Hangers
  • Macsim 8G Deck Screws + Macsim Clever Tool (highly recommend)
  • 90mm Merbau
  • 35-40 bags of concrete
  • G-Tape and Protectadeck timber protection tapes
  • Deck Spacers

Total Cost ~$4,500


Before
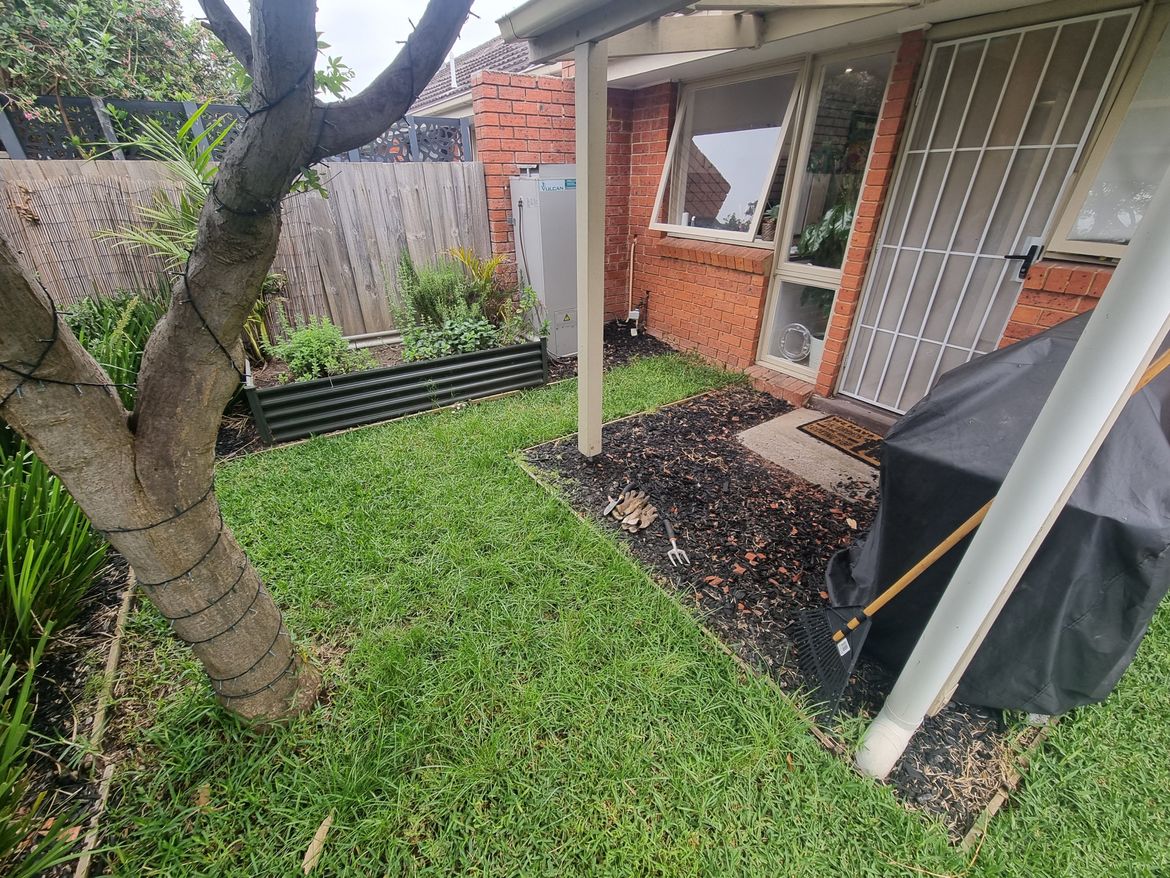
20211107_161022.jpg


After

20220826_171311.jpg


Preparation

  • Removed existing porch cover and cut down tree
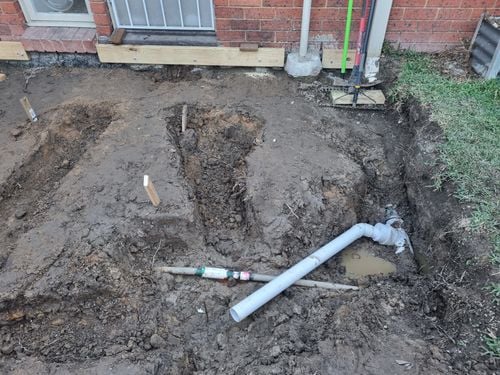
  • Excavated  an additional ~200mm of soil, giving myself ~350mm of total clearance


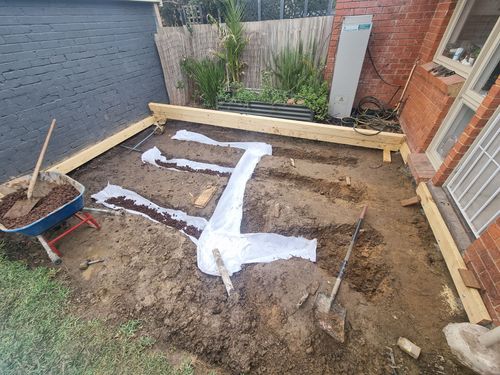
Drainage

  • Dug trenches and installed a french drain, plumbed into an existing storm water connection (lucky)
  • Geo textile fabric helps keep the slots on the Agi Pipe unclogged with dirt
  • A thin layer of Scoria between Geo textile fabric and Agi Pipe also assists in keeping the dirt out

20220314_114006(1).jpg 


20220504_150300.jpg


20220503_154945.jpg


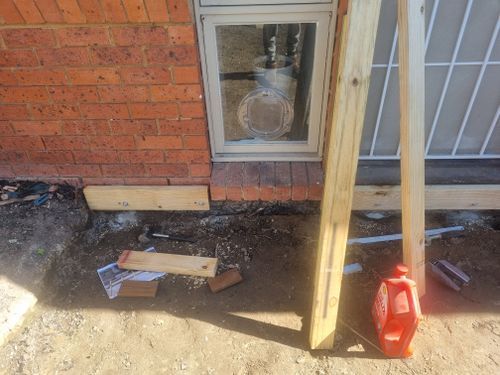
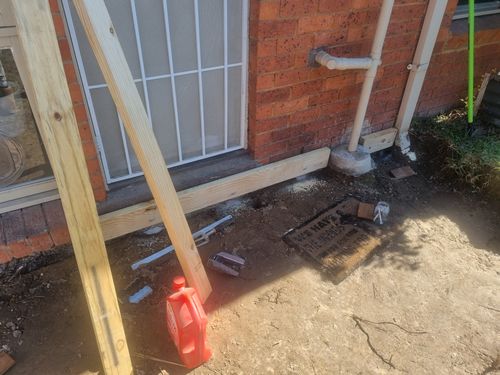
Ledger Board installed

  • Sets the height of the whole deck (deduct the height of the deck boards!)
  • 10mm Dynabolts were a bit overkill
  • Be sure to have already marked where the joist hangers will be so that the bolts don't get in the way
 

20220425_120154.jpg


20220425_120156.jpg


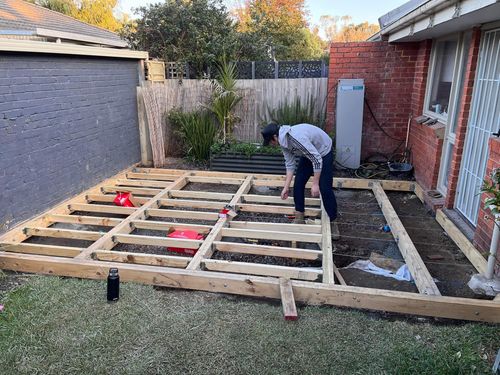
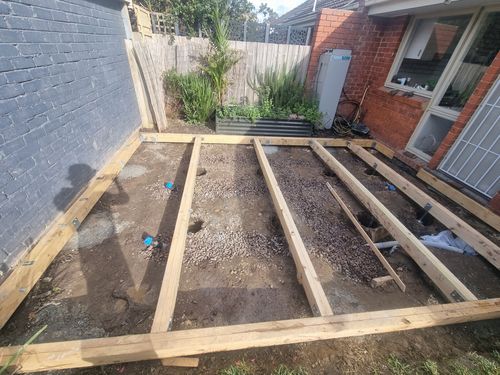
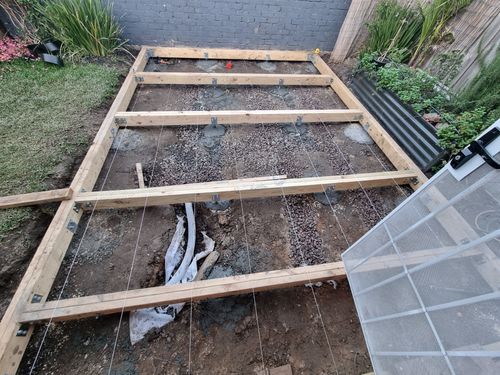
Frame

  • 200*45 Timber for frame. Double thickness (200*90) and joined using timber glue and Batten Screws
  • Dig the holes for the posts/stirrups
  • Dropped the bearers into place and screw together using Galvanised Angle Brackets 
  • Using three Car Jacks, carefully adjust the frame so that it's perfectly level and flush with the ledger board
  • Screw the Stirrups onto the Bearers so that they 'hang' above the post holes using coach screws
  • Screw the frame to the ledger board using coach screws
  • Fill the Holes with concrete and leave to set (make sure the concrete has a slight dome shape to allow water run-off)
20220520_135241.jpg


20220521_163557.jpg


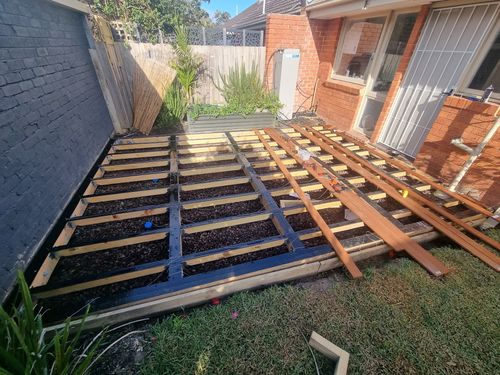
Joists

  • Use string line to mark the position of the Joist Hangers
  • The joist hanger nails are much cheaper than the screws. You must use the special nails/screws from Pryda
  • Clamping the joist hanger onto the joist with a C-Clamp made it a bit easier
  • I used 12 nails per joist hanger


received_530817121864106.jpeg


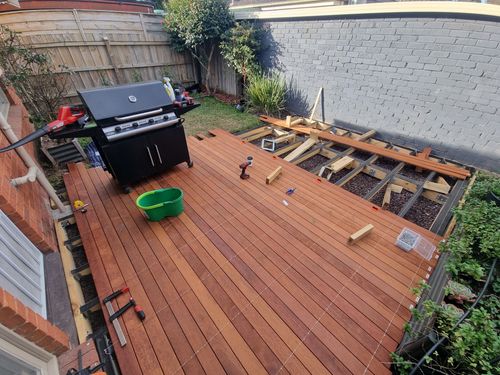
Decking

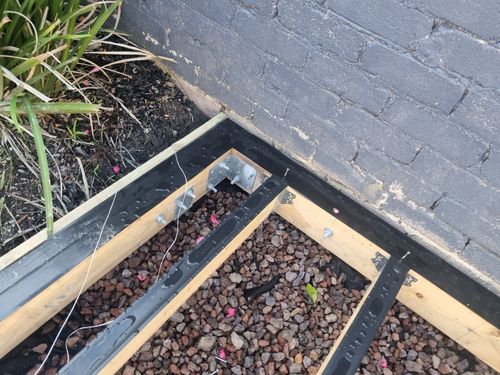
  • Important: Run a belt sander across uneven areas of the deck frame, smoothing them so there won't be any unevenness when walking on the deck
  • If exposed to the elements, use G-Tape and Protectadeck on the frame for protection (Took approx 30 minutes with a staple gun)
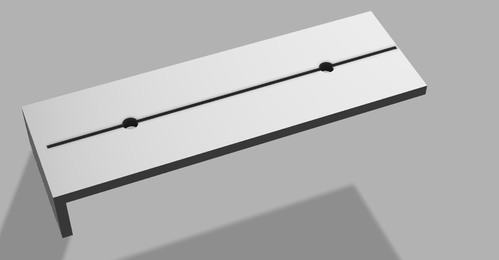
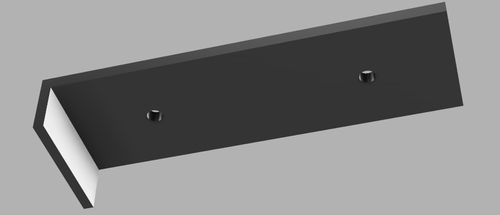
  • 3D printed a jig for guiding placement of deck screws
  • Use Car Jacks to press warped deck boards against deck spacers (see pic)
 

20220625_105414.jpg


20220625_105351.jpg


20220716_150529.jpg


Capture2.PNG


Capture.PNG


Decking Board Installation

  • Best done as 2 person job

Person 1

  • Use centreline of Jig to place directly under string line
  • Predrill pilot hole
  • Remove Jig and use Clever Tool to drill and countersink hole

Person 2
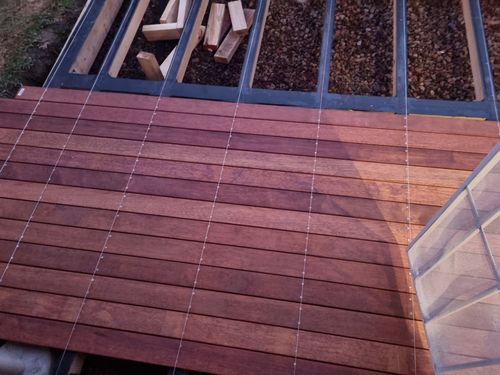
  • Screw in deck screw


20220625_172616.jpg


Completion

  • Carefully trim the excess off the Merbau by running a Circular Saw across either end (I used a clamped piece of timber as a guide)

20220824_112606.jpg

MitchellMc
Bunnings Team Member

Re: Low single layer deck build

Welcome to the Bunnings Workshop community @melbs. It's a pleasure to have you join us, and many thanks for sharing your fabulous deck project.


You've done a fantastic job constructing this deck and have spent the time needed to address many of the issues associated with a low-level deck. The drainage you've installed is excellent, and I even love the more minor details, like doming off the concrete footers. 


Your drilling jig is a stroke of genius and most certainly surpasses the scrap of timber I'd used with my deck. You should also add the spacing for the 140mm decking and start selling them! Not to toot my own horn, but I was pretty chuffed with the device I made for pulling warped boards into shape. I took an IRWIN 455mm Quick-Grip Heavy Duty Bar Clamps and modified one of the pads by attaching a 5mm spacer to it. The side with the spacer is slipped into the gap between the previous two boards for mounting. You're then free to compress the next board into shape whilst the clamp holds it in position as you screw it off. Anyway, I thought I was clever.


I'm sure you are really impressed with the results because I know I am. I'll be sure to point other members looking to build a deck to your post, as it's a really great example of a low-level deck done right. Well done, and I can't wait to see what you take next.


Mitchell


See something interesting? Give it the thumbs up!
Jason
Community Manager
Community Manager

Re: Low single layer deck build

Congratulations @melbs, what a fantastic result. I'm sure you and your family will have many happy times on your new deck.


Low-level decking projects are challenging but extremely popular with our community members, so I'm sure they will take great inspiration and learnings from what you have achieved. Thanks so much for sharing plenty of detail. 


We look forward to seeing what you tackle next. 


Welcome to the community,


Jason


See something interesting? Give it the thumbs up!
Remarka6le
Amassing an Audience

Re: Low single layer deck build

Great result @melbs , love the consistency of the screws and the overall finish. How long did this take you to complete in total?


Remarka6le
EricL
Bunnings Team Member

Re: Low single layer deck build

Hi @Remarka6le


Let me tag @melbs to make them aware of your kind words and question. I totally agree that this is a very well-thought-out and precisely constructed low-level deck.


Eric


See something interesting? Give it the thumbs up!

Why join the Bunnings Workshop community?

Workshop is a friendly place to learn, get ideas and find inspiration for your home improvement projects