
The Bunnings Workshop community can help with your home improvement projects.
- Bunnings Workshop
- >
- Discussion
- >
- Bathroom and Laundry
- >
- How to build T-intersection for new wall...
How to build T-intersection for new wall?
- Subscribe to RSS Feed
- Mark Topic as New
- Mark Topic as Read
- Float this Topic for Current User
- Bookmark
- Subscribe
- Mute
- Printer Friendly Page
Share
- Mark as New
- Bookmark
- Subscribe
- Mute
- Subscribe to RSS Feed
- Highlight
- Report Inappropriate Content
How to build T-intersection for new wall?


Hi - I’m going to be building a new internal wall to partition between two bathrooms.
To the right will be a shower wall, to the left side will be an in wall toilet.
Existing wall has 90x35 studs. My new wall will be 90x45. There would be plumbing (water feed pipes) needing to run through both walls to service the shower/toilet/nearby vanities.
In the images I’ve laid out a demonstration of the exact position for the bottom plate of the new wall. As can be seen, an existing stud lines up slightly off centre to my new bottom plate position.
The additional images show an example of a potential t-intersection connection assembly - with two 90x45 timbers placed flat side outwards, perpendicular to but right up against the existing stud. These would run all the way to the top. This would allow sufficient timber in each corner to attach wall sheeting and also the cavity behind each piece could be insulated.
My solution for fixing would be toenail/pocket screw/nails into the top and bottom plates and also a few angle driven into the existing stud.
I also need to ensure this is compliant with building codes (AS1684).
Would this wall connection be effective and meet building standards, or is there a better way to make the connection?
Particularly, are there any stability/flexing/movement issues to consider with fixing the timbers flat side outwards for wall sheeting attachment (either villa or aquachek) , given at least the right side wall will be tiled nearly to the roof for the shower?
thanks
- Mark as New
- Bookmark
- Subscribe
- Mute
- Subscribe to RSS Feed
- Highlight
- Report Inappropriate Content
Re: T-intersection method for new wall
What you’ve outlined certainly sounds like an effective and practical way to deal with the offset stud and still give yourself solid fixing points for wall linings on both sides @sheldo. You’ve correctly identified the need for additional timber at the T-intersection so that the wall sheeting can be properly fixed, and running those additional members full height is the right approach.
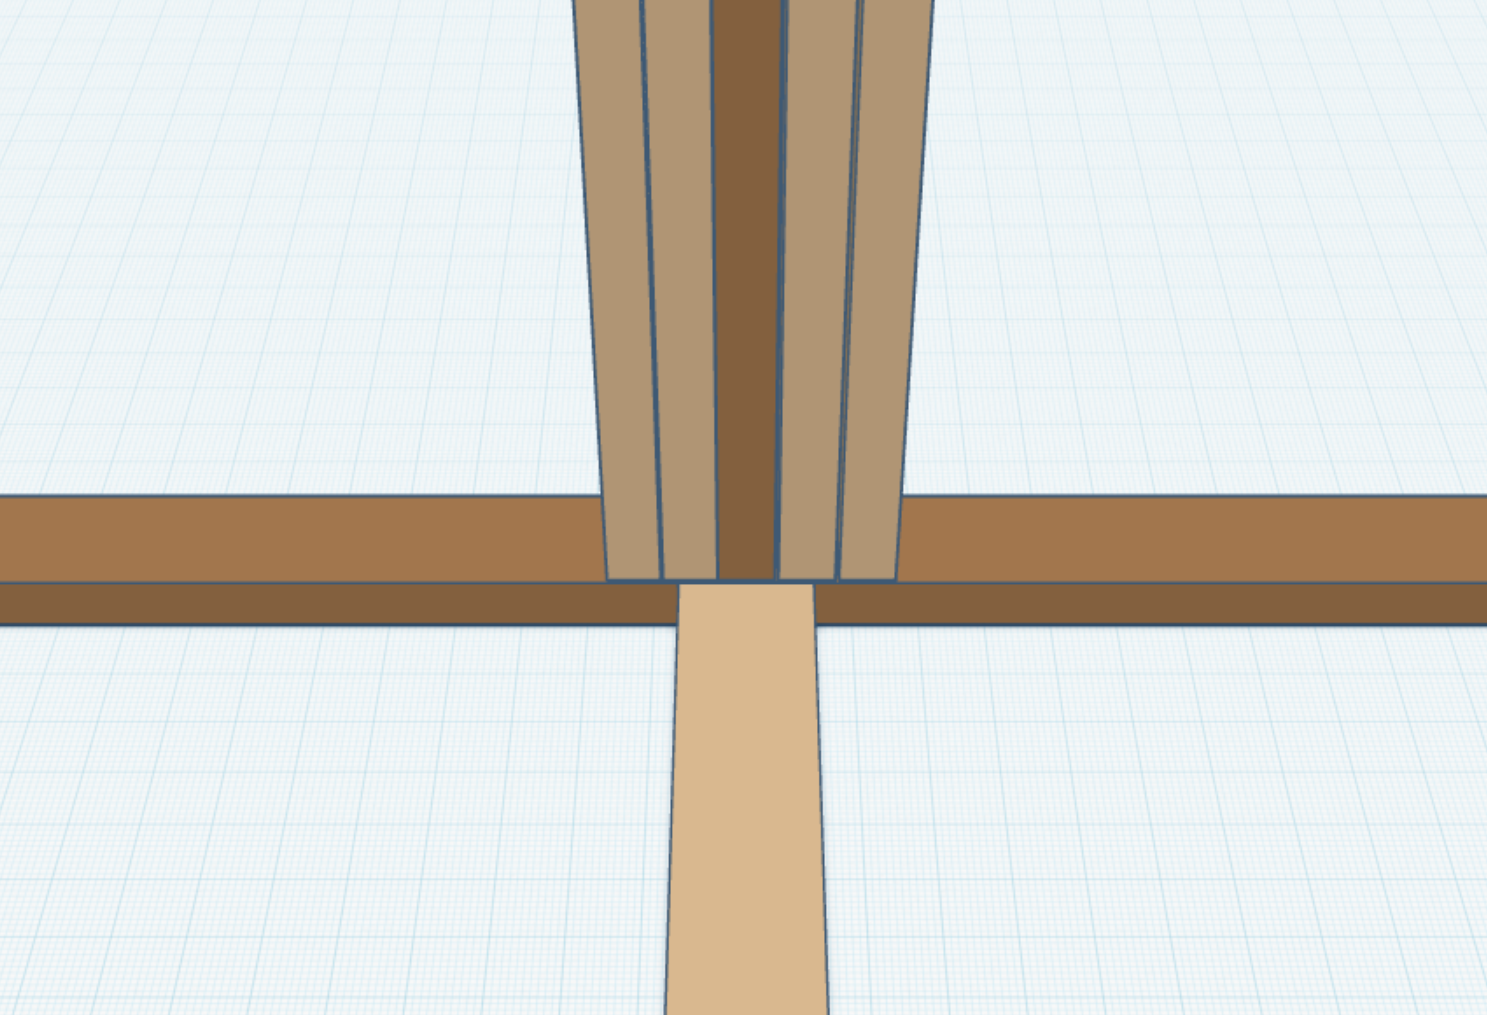
From a general construction point of view, building the new stud wall in that position and adding extra studs flat to create fixing faces for the sheeting is a common solution where walls don’t line up neatly. As long as everything is well fixed into the top and bottom plates and tied back to the existing stud, it should provide adequate rigidity for internal non-load-bearing walls, including areas that will be tiled. The other option is to not have the face of the new timber outwards, but the edge. Instead of positioning the new stud on edge away from the existing stud, you can nail in two new timber on each side of it to give you the required width. Nail the first timber to the existing stud, and then nail the second timber to it as per the rendering I've created below.
Where it becomes harder to give a definitive answer is compliance with AS1684. Whether this exact detail meets the standard can depend on factors like whether the wall is load-bearing, ceiling height, fixing methods, and how services are run through the framing. That level of confirmation is best provided by a licensed builder or carpenter who is familiar with the standard and can assess it on site.
From a DIY perspective, though, you appear to have thought through the key issues, including sheeting fixings, service runs, and stiffness for a tiled shower wall. Provided the wall is non-load-bearing and everything is securely fixed, your approach is sound. If you want absolute certainty for compliance, a quick check with a builder or building surveyor before lining the walls would give you peace of mind.
Please let me know if you have any questions.
Mitchell
- Mark as New
- Bookmark
- Subscribe
- Mute
- Subscribe to RSS Feed
- Highlight
- Report Inappropriate Content
Re: T-intersection method for new wall
Thanks Mitchell that’s useful advice.
Its one of those things that seems pretty straightforward but when one starts perhaps over analysing it, you start doubting various aspects.
I had considered that rendered drawing approach initially, but what I was doubting about it was that say on the right side if it would take 25mm to fill out to make the existing stud flush with the width of my new bottom plate - If I put a 45mm stud against the existing stud I would now be 20mm packed out from flush. Another 45mm stud and I’m a total of 65mm packed out from flush - which is plenty of timber to attach sheets to, but it means that the edges of the 2 new timbers could meet at right about where a nail or screw fixing would go into the sheet..so it might risk nailing right into the edge of either timber rather than nicely in the middle of them. In practice you’d be sure to nail into a meaty part of the studs, but I wondered if a surveyor might not accept it because of the chance of getting an edge and/or the chance it would mean not meeting manufacturer guidelines for fixings at edges of sheets.
Anyhow that’s what made me think the flat side out approach might work and give more certainty of being up to code by providing a big chunk of continuous timber to fix into.
Alternatively I did look for structural timber wider than a 45mm face..seems the next size would be a 90x90 timber, or I noticed you sell on special order LVL timber in say a 90x58 or 90x63 eg https://www.bunnings.com.au/90-x-63mm-l-m-beam-h3-lvl_p0143178
Those sizes would be perfect to fill the gap to flush, plus provide 40mm or more of continuous timber to fix sheets into.
I haven’t used LVL timber before, would it be fair to say it’s ok to use/over exceeding even, as a substitute for regular MGP10 structural pine?
- Mark as New
- Bookmark
- Subscribe
- Mute
- Subscribe to RSS Feed
- Highlight
- Report Inappropriate Content
Re: T-intersection method for new wall
I think there would be more concern about having the timber face out, which is not the correct orientation, than about potentially hitting a fixing between the two edge-out timbers @sheldo. Using an even larger calibre timer is not something I would have thought would be used in the building industry. Though, it is potentially an option.
Let me tag @Nailbag to get his thoughts.
Mitchell
Why join the Bunnings Workshop community?
Workshop is a friendly place to learn, get ideas and find inspiration for your home improvement projects
You might also like


We would love to help with your project.
Join the Bunnings Workshop community today to ask questions and get advice.