Workshop
Ask a question

The Bunnings Workshop community can help with your home improvement projects.

Low-level composite deck over concrete slab

Nat2
Building a Reputation
Nat2
Nat2
Building a Reputation

Ekodeck composite decking boards provide a clean, handsome finish to this low-level deck built around a bay window. No staining or painting was required.


E6DDF43C-B441-4C52-95A9-E0BD91132215.jpeg


The project 


After getting some good advice from EricL and Adam_W in this discussion, we made a start on our low-level Ekodeck project. The advice I got from this forum and also from Ekodeck directly has been invaluable. 


For the substructure we decided to use heavy-duty angle brackets for the bearers and used a combination of blue-tip screw bolts and DynaBolts to secure the brackets to the concrete. We used the screw bolts for all the brackets close to the edges of the concrete and DynaBolts everywhere else. 

We used plastic shims to help with lifting and levelling the substructure and joist tape to help give the timber added protection and hopefully greater longevity. 


7ABBBD7F-80D0-4116-9843-94262944CBA7.jpeg

We did end up modifying our design a little (moving the breaker boards) just to make better use of the Ekodeck boards and to minimise using really small pieces around the bay window. 


As our concrete wasn’t a perfect rectangle and the levels weren’t even (the concrete was slightly higher near the expansion joints) there were definitely some challenging moments. And working in varying temperatures meant we had to be mindful of the expansion and contraction capacity of the Ekodeck product. 

E84337B6-3E14-48A6-934E-36F03DB1897E.jpeg


The first thing we did was complete the perimeter of the substructure. We then attached the joists – for most of the joists we used joist hangers, but some of the angled pieces we just screwed together. We also had to work around the pergola posts and downpipe. 

1547ED49-A8F1-4A45-A911-BDD6E965F617.jpeg

Once the framework was complete we started working on lifting it to achieve the desired level.


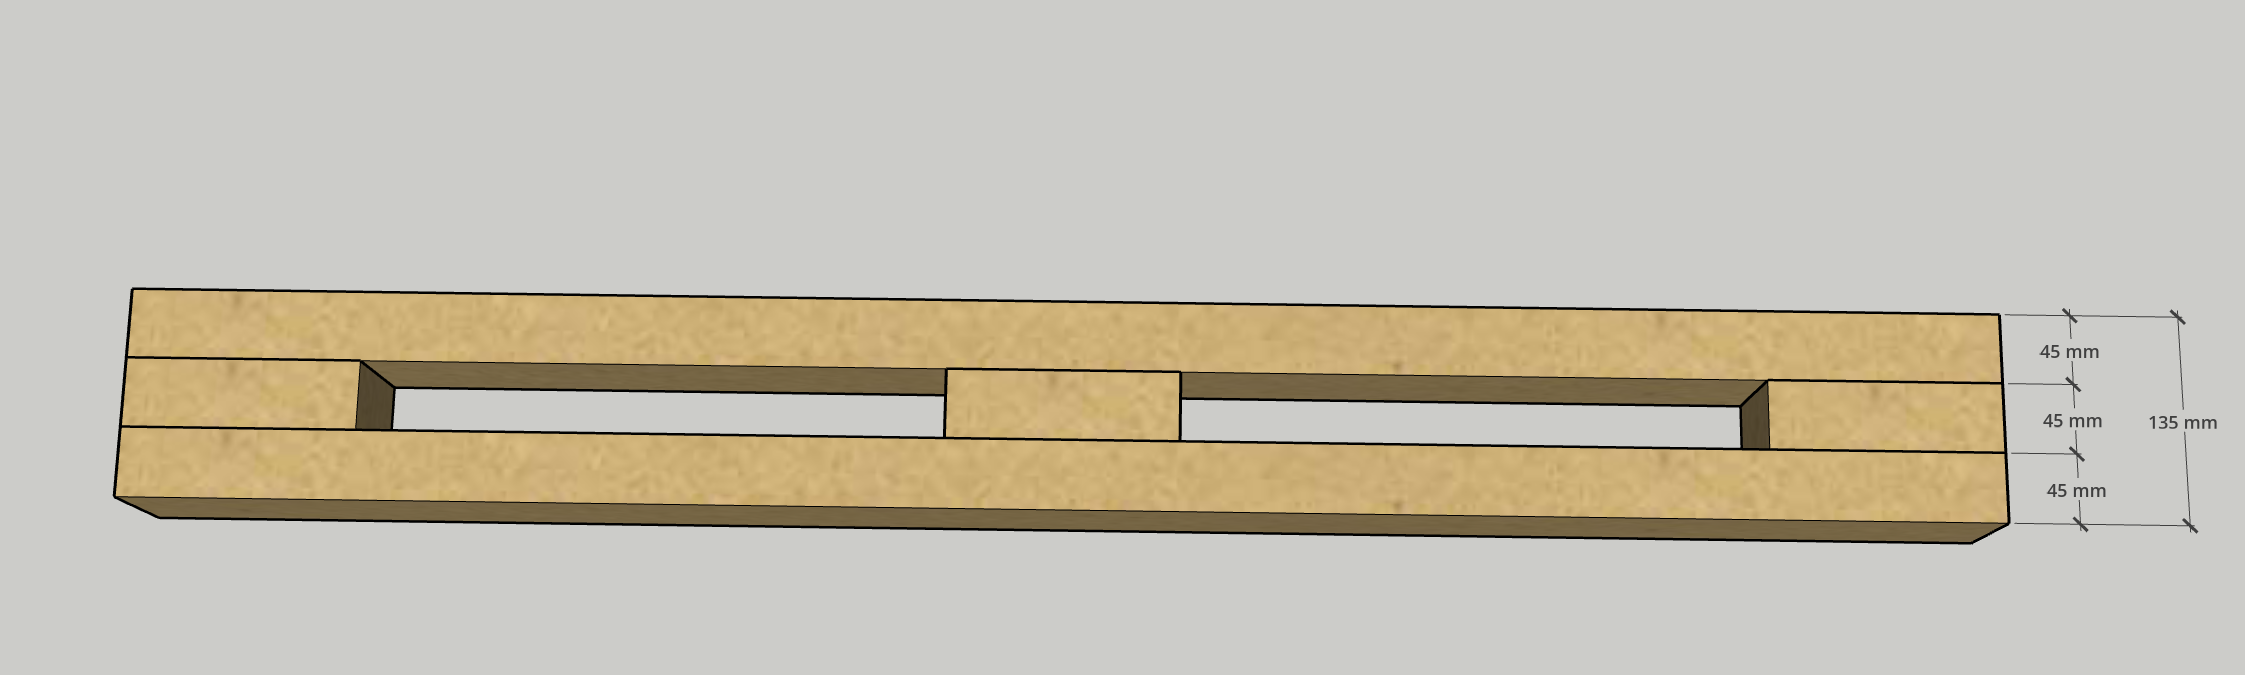
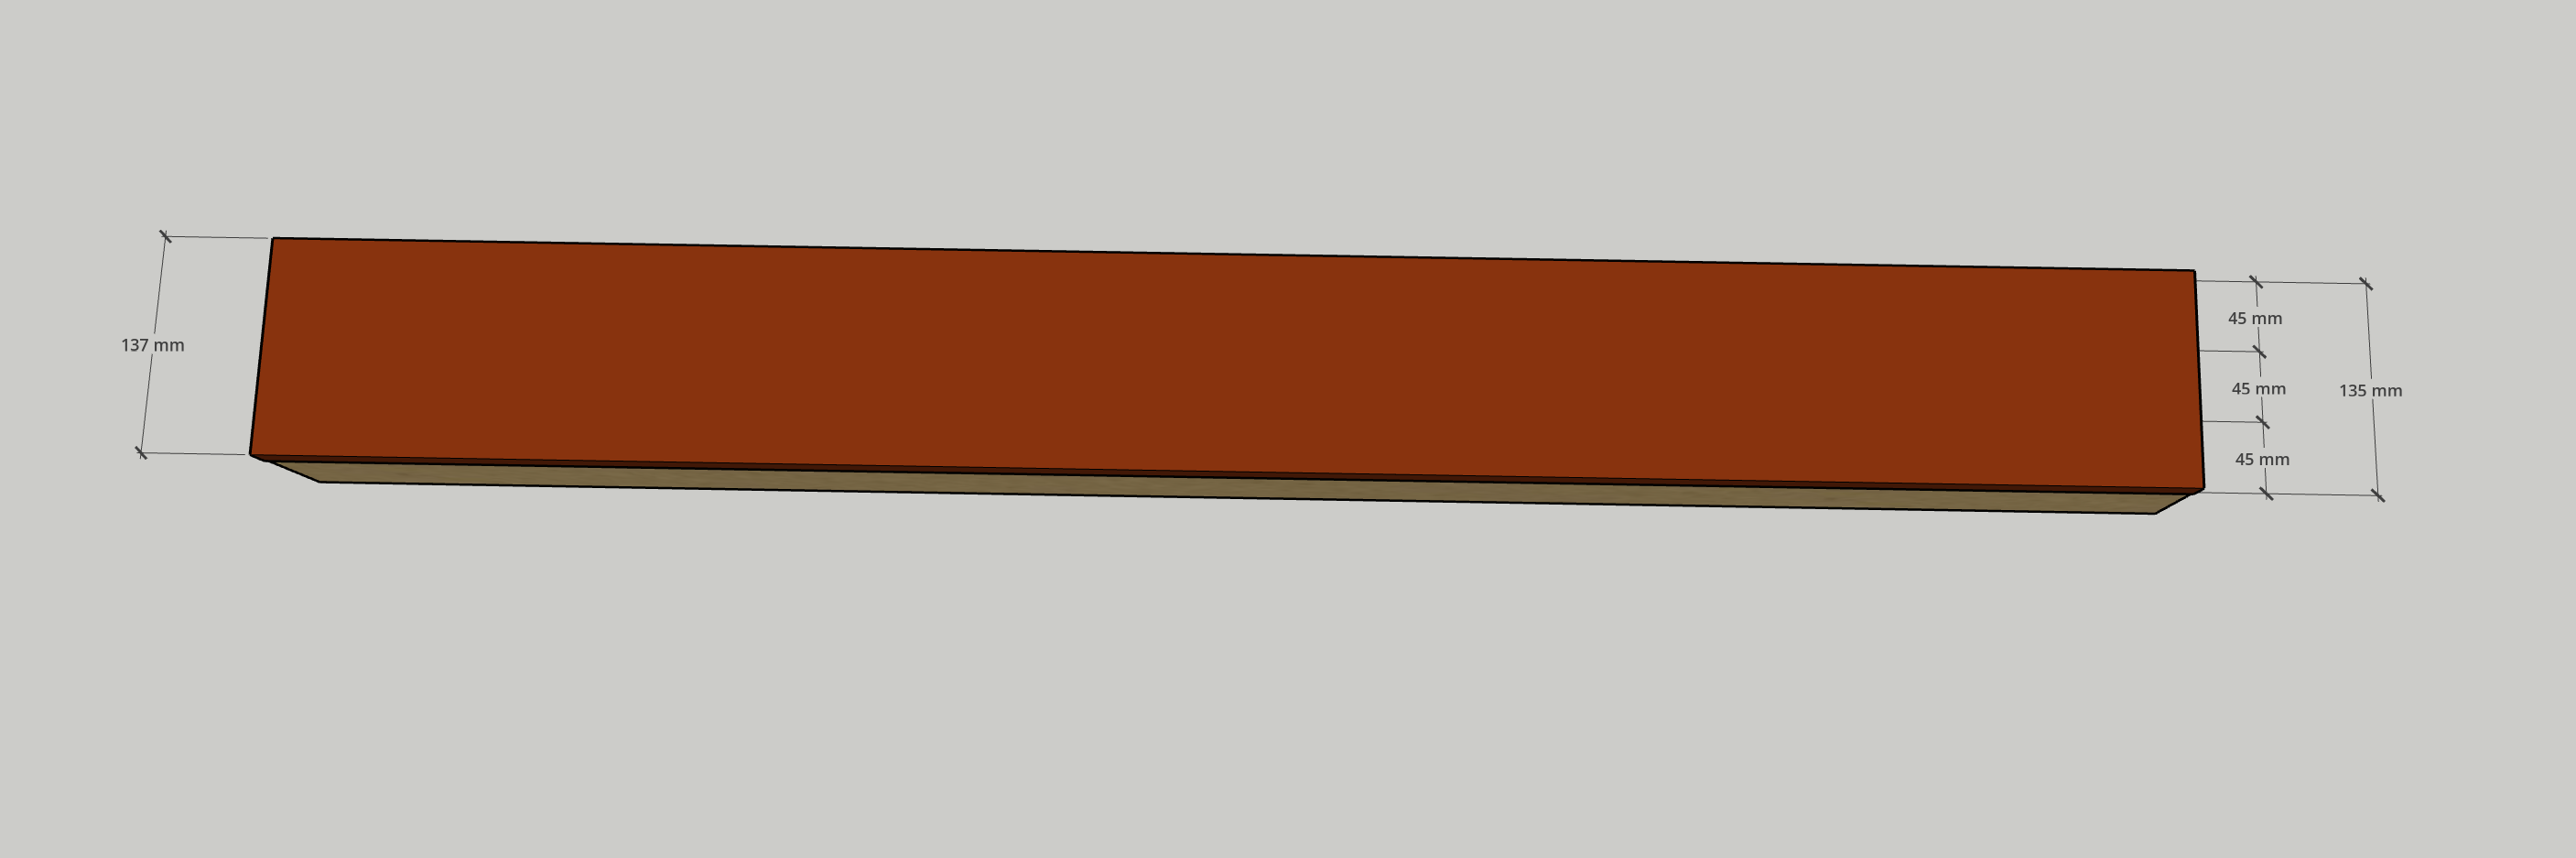
We first placed the angle brackets in the desired location – aiming for approximately 800mm spacing (as we used the 75mm x 45mm H3 treated Pine) and alternating sides where we could. On the perimeter pieces we had to put the angle brackets on the inside, and sometimes where the joist was very close to or over an expansion joint in the concrete we had to put the angle bracket on the other side of the joist.


We attached the angle brackets to the concrete using DynaBolts or connector screws and then packed under the framework to get the desired lift. Once in place we attached the framework to the angle brackets.


As the concrete was sloping away from the house we had to be mindful of lifting it the right amount in the right place. We also siliconed the packers in places just to prevent them from moving over time.


0CE1C8EB-B193-4D92-8674-D4061D697D32.jpeg


Once everything was in place we added the joist tape. 


C998B892-E5EB-4AE1-BCFF-87BAD077A2B9.jpeg

The first step in laying the deck was to do the picture framing and edge boards. We had to mark and cut around the posts and pipes while allowing for expansion and contraction of the decking. 

C4E2AEBA-29F5-4494-A0E6-FD1D5C96F89A.jpeg

2C21758B-EE5F-4D3E-9DA4-CFC61D5C681F.jpeg

72DD06AF-B9F4-42FA-8037-04D10D6D263D.jpeg

Once the edging was done we could start laying the deck in sections.

EA806968-D06E-4DF9-AED8-3DA88411D918.jpeg

9DC56D2A-08D3-47E5-8326-EF225BE50A00.jpeg

F1CFCBD4-2059-40E9-A3FF-844FDED6A910.jpeg

7E5CA095-503E-4793-93EA-F105E467D03F.jpeg


6C33541A-A572-4323-B217-408A7854B30B.jpeg


9D9324F0-5323-460C-B018-258635600864.jpeg


B2C8108D-0AB4-4029-B622-EF75D28B69D9.jpeg


How to build a low-level deck


A low-level deck can pose a range of potential design and installation problems, with challenges around ventilation, drainage, termites and rot. But it doesn't have to be a difficult project once you take the time to understand the basics of how a low-level deck is put together.


Experienced Bunnings Workshop member Adam Woodhams has created a comprehensive guide to building your own low-level deck, which provides an excellent reference for getting started. 


Low level deck.jpg


More inspiration for your decking project


Bunnings Workshop member Backyardtradie used Merbau decking boards to transform their outdoor entertaining area with this solid low-level deck.


StevieB_0-1629354009106.jpeg


Whether you're building a new deck or rejuvenating an existing one, you can get inspired by the clever and creative Bunnings Workshop community in our collection of Top 10 most popular deck projects and inspiring low-level deck builds.


Let us know if you need a hand with your decking project – we're here to help.


Comments
TonyMax
Getting Established

That looks amazing!!

SueC
Just Starting Out

Thanks for sharing. Neat finish.

Great timing to find this

We intalled ekodeck screening down one side, with a small deck 'shelf' for plants lifting to seat storage. It was so easy to use the plan is a lowdeck for the other side to manage a step down between the garaport and the verandah.

MitchellMc
Bunnings Team Member

Welcome to the Bunnings Workshop community @SueC. It's lovely to have you join us, and many thanks for jumping into the discussion.


That sounds like a brilliant project! We encourage you to share it with us by starting a new discussion and adding details and pictures. Any images of the construction stages are always appreciated by our members as it allows them to see how they, too, could create a similar look.


We look forward to hearing all about your projects and plans around the house and garden. Our community is full of helpful and knowledgeable members who are willing to lend a hand, so reach out whenever you need assistance or have something to share.


Mitchell


daisy4
Finding My Feet

did you attach the framework to the concrete slab please

JacobZ
Bunnings Team Member

Hi @daisy4,


You can see that they've used packers to raise the framing and then attached the framing to the concrete using angle brackets.


Let me know if you have any further questions.


Jacob


benetti
Just Starting Out

@JacobZ a few question please sir!


1. Was this deck floating or attached to the house? If floating... is there anything wrong with attaching to the house instead?


2. What packers were used and are they necessary? (could I have the wood directly on our pavers instead?) Reason I ask is because we only have about 70mm of clearance before we meet the door height and 57mm if you include the Ekodeck height.


3. Would we need to secure to the pavers with angle brackets if we secured to the house instead?


4. What did you use to attched the joists to the outside frame? Joist hangers?

5. Do you need Edge boards for all picture-frame sides?


6. What's the distance between the joists under the picture-frame boards? If using 45mm wide joists and 6mm spacing, would it be 137mm (for the board width) + 22mm either side (joist width divided by 2) + 6mm for the spacing between the boards? Would love a simple calculation for this haha.

JacobZ
Bunnings Team Member

Hi @benetti,


A warm welcome to the Bunnings Workshop community, it is great to have you with us.


Just to clarify, I did not build this deck, @Nat2 did. I can answer based on what I can see, but as I didn't build it, I don't know all the details.


  1. This deck does not appear to be connected to the house, but it is not floating per se, as it is attached to the concrete beneath. 

    I would usually recommend decks are only attached to a concrete foundation. This is because the concrete is supporting the deck vertically, whereas attaching to a wall, the deck would be supported laterally, placing the load of the deck entirely on the fixings used to attach it to the wall.
     
  2. The packers that were used are known as window packers and yes they are necessary. Decks need to be raised from the ground as they require airflow beneath them to dry out moisture and prevent timber rot. 

    Unfortunately, the reality with low lying decks, is that they are more susceptible to rot and premature failure because they don't have much room for airflow and in your case, 70mm is simply not enough height to build a deck. 
     
  3. The purpose of the angle brackets is more about stabilising the joist over the packers, so they should be used wherever packers are to ensure the joists don't shift and fall off the packers.
     
  4. They have used joist hangers with connector screws to attach the joists to the border framing.
     
  5. Yes, you need edge boards for all picture frame sides. This is because standard EkoDeck has a groove on both sides of the board that connects with their Quickfix Clips. The Ekodeck Edge Boards only have this groove on one side which gives a much nicer finish to the outside edge.
     
  6. I wouldn't even worry about calculating this. Using 45mm timbers, 3 wide, you get 135mm. Overhanging by 1mm on each side is not going to cause any issues at all. As long as the blocks in between the two full length pieces are no more than 450mm apart, then this is the easiest way to do it.


If you are planning a deck build, it is worth creating your own discussion so you can upload some photos and plans, and our members can offer their assistance.


This would be worthwhile, as right now, I'm not sure a deck is going to be possible considering the 70mm height you've mentioned.


Seeing what you're working with would definitely help us offer advice.


Let me know what you think.


Jacob


benetti
Just Starting Out

@JacobZ thanks for you comprehensive response mate!

If the 70mm isn't going to work we'll just need to rip up our pavers in preparation.

I will certainly make my own post, just poking around and asking questions about what I am unsure of right now.


For the foundations, could we get away with these Concrete foundation blocks? (instead of pouring our own)


And if yes, how many would you suggest we use and where should we place them (based on the Joist plan from Ekodeck)?


Our deck is rectangle 5.41m x 4.44m

Deck w_ wall.png2025-06-29_20-46-05.png

JacobZ
Bunnings Team Member

Hi @benetti,


I'll just start by saying that a deck of this size can sometimes have implications in terms of building approval. Make sure you check in with your local council to see what rules apply during the planning process. A quick phone call or email could save you some heartache in the future if it turns out they aren't happy with your deck.


Yes, unfortunately, 70mm is not enough space, so you'll have to rip out the pavers and potentially do some digging to reduce the grade. Taking the steps now to make sure it is done right will give you peace of mind that your investment is going to last as long as it should.


The smallest timbers that most timber suppliers are comfortable using in decks are 90x45. So, with your 23 mm-thick decking boards, you have 113mm. This is before you take into consideration an air gap beneath and vertical support from posts, pedestals or foundation blocks.


You can certainly use the DEKO Concrete Foundation Blocks, but you'd need to account for their height in the design of your deck. They sit the bottom of the joists 100mm off the ground, so they will require a fair bit of digging. You could consider using a lower profile pedestal, such as these Builders Edge 35 - 60mm Smallfoot Pedestal Feet to reduce the amount of digging.


The number of foundation blocks or pedestals will be relative to the size of the timber used. I'd suggest you have a read of How to understand deck components and How to understand deck span tables for some guidance.


The EkoDeck planner has produced a "joist-only" deck. If you used this exact design with 90 x 45mm H3 Treated Pine, you would need to use a Joist Span Table to work out the distance between your pedestals. Using 90x45, you would need a pedestal spaced at a maximum of 1400mm under every single joist.


If you increased the size of the timbers used, you could reduce the number of pedestals required. For example, if you used 140 x 45mm H3 Treated Pine, they need to be supported every 2600mm.


Have a look through the articles I mentioned so you can get your head around things and let me know what you think. I am more than happy to keep assisting with any questions.


I can't wait to see what you come up with and see this deck become a reality.


Jacob


AlexX
Just Starting Out

Hi @JacobZ  ,

Thanks for your answers to other questions — they’ve been really helpful to me as well. In my case, the space is also quite limited — the height from my door to the ground is about 130mm. After allowing for a 90mm joist and 20mm decking, there's only around 20mm of clearance left. How much clearance is usually needed under a low-level deck to prevent rot? Do you think it's still feasible to build a deck in my situation?

JacobZ
Bunnings Team Member

Hi @AlexX,


Welcome to the Bunnings Workshop community, it is fantastic to have you with us.


The official recommendation from the National Construction Code Part 3.4.1 Subfloor ventilation is that a subfloor should have a minimum of 150mm of clearance from the ground beneath to allow for airflow. 


The reality with a lot of newly built homes with concrete patios is that this is not possible, so we try to help out with a solution, but still advise people that there is an increased risk of rot due to the lack of ventilation.


There are plenty of examples of people building low-level decks with as little as 20mm clearance, and I'm sure they will stay strong for years to come, but with limited airflow, there will always be an increased risk of rot. I couldn't tell you a specific height that would prevent rot, but the more airflow you can have, the better and if you are concerned about the potential for rot, consider using the H4 framing from Woodhouse TerraFrame, which is treated for close or direct contact with the ground.


Let me know if you have any further questions.


Jacob


Why join the Bunnings Workshop community?

Workshop is a friendly place to learn, get ideas and find inspiration for your home improvement projects