
The Bunnings Workshop community can help with your home improvement projects.
- Bunnings Workshop
- >
- Discussion
- >
- Garage and Shed
- >
- Re: Garage lining for stud walls stage 2...
Garage lining for stud walls stage 2 (Cornice and skirting boards)
- Subscribe to RSS Feed
- Mark Topic as New
- Mark Topic as Read
- Float this Topic for Current User
- Bookmark
- Subscribe
- Mute
- Printer Friendly Page
Share
- Mark as New
- Bookmark
- Subscribe
- Mute
- Subscribe to RSS Feed
- Highlight
- Report Inappropriate Content
Garage lining for stud walls stage 2 (Cornice and skirting boards)

When I was deciding what I wanted from the garage and what would showcase the best features I was sitting in the garage looking at the roof. I really liked the colour of timber supports and the way it warmed the room. I wanted to have a LED strip style light shine up into the rafters/floorboards without being able to see the strip itself.
I looked at Bunnings and online but nothingreally caught my attention. So I came up with making my own from a combination of two pieces. Since then I have seen similar ones that would have saved me a bunch of time.But I must admit making them yourself was a lot of fun.
Materials
Porta 42 x 11mm 2.7m Moulding White Pine FJ Primed Colonial
Porta 66 x 18mm 2.7m Moulding White Pine FJ Primed Bullnose
Skirting Boards
Tools
Drop saw Makita
Hammer
Caulking Gun
Coping saw
Spirit Level
Steps
Step 1
Before I could paint the room I realised I should do the cornice and skirting boards. The steps to go through a project always seem to have other bits to be done before you can move on.
The electrical cables had to be put in place and the bookcases I placed in the locations they would end up in.

As usual I find it best to draw up my ideas. It brings it into focus of what it should look like.

In the end I went with a type of option "B" as giving the most height behind the cornice and the largest flat attaching point to the wall.

The prices reflect The begining of 2020  Now its $9.40ea

The price is now $18.90ea

Showcasing the room without cornice

The bookcases are also standing where they would in the end.

You can see the "step" in the plaster sheeting above the second bookcase that I also wanted to cover with the cornice shape.

Because I didn't trim down the plaster sheet I was a little hesitant at first to continue the cornice across the top of the window area.
Step 2
Making up the Cornice was an interesting process but once I had figured out how to consistently put the two strips together I rolled through the pieces fairly easily.

The profile I wanted.

Front on profile

Getting things sorted to put it together. I was lucky I had a water damaged bookcase to lean on as it turned out to be the perfect height and length.

The scary part. I ran a bead of liquid nails down the length of the two moldings and figured less is more as I had to clamp the two pieces together to form what I wanted.

Clamping them was surprisingly easy. They didnt drift too far out and I could push them back inline before I clamped it again. You can see the ledge the LED strips will sit on facing upwards.

I used small pieces of plaster on the foot of the clamps so as to not make an impression on the timber. (Btw does bunnings sell spare feet for clamps?)

I made sure I cleaned off any of the glue straight away but really there wasnt a lot of runoff.

A few clamps yes but needed to keep the timber from wanting to slide out from underneath.

Just enough bench space
Step 3
Now came the scary part, cutting it to fit. I have done skirting boards awhile ago and figured "yeah why not cornice"... Needless to say it wasnt as smooth sailing as skirting boards.
Getting the engles right was interesting. I had presumed all corners were square... Well they almost were but lets say 85deg or 95deg isnt really square is it lol... Must say I loved the laser cutting line on my Makita drop saw tho! Made life a LOT easier.

Working out the angle of the cuts in my head first... So many times I stopped myself and said "think it through" and then changed the angle of cutting.

First piece up! I was very happy with it.

Time to continue along. Now I had done an angled cut on the left hand end thinking thats what the professionals do... I am not so sure tho as it really made it hard to make sure it was straight to continue with the next piece... I wonder if it should have just been a butt end?

Shading out the area I had to remove made it easier for me to get it right.

That light made it so much easier to understand where to cut.

Got it right every time this way.

Making up a small section between corners.. Headache plus is the only way to describe it.

I am not showing the several other "pieces" that didnt make it... The right angle wasnt a true right angle so the cuts were out.

Just to give a profile of what I wanted and how it turned out. It eventually turned out perfect. lol

Just further back to show how it looks overall.

Slowly working my way around the room. It would go easy until it wouldnt. Mostly it was easy.

Fixing up one of those "angle" problems with a coping saw.
Issues that could cause the problem are the wall itself, the cornice itself and the end user... Prob is I am the installer lol So I could really only blame myself.

Join fixed... but shhhhh

Extremely happy when it went this smoothly.

The bottom of the cornice was level, my joining ability was to blame for the small discrepancy but in reality you cant see it from the floor. It sanded out and yeah I am not making fun of that line lol

Working out how to go around the door that already had its edge done was a little hard. Do-able but messed with my head.

After puttying up the gaps.

All done (Bookshelves corralled in the middle for now as painting should start soon)
Step 4
The second last step was the skirting board. I was looking forward to getting this stage done so i could paint the room.

The skirting board went in so easily. Most angles were square or had tollerance in them...

Other side of the room. The long straight pieces just made it easy.

The only corner that I had to "jig" and then smooth with plaster later. The brick walls are not square and because I meausured off the brick walls thinking that they were straight and put the stud walls in going off the brickwork. The problem was just transferred.

The coping saw I used to adjust that angle.

Happier but still a bit of a gap. Silastic is my friend....

All the corners being knocked over resonably fast. Surprisingly square.

Finally gettingto paint the walls!

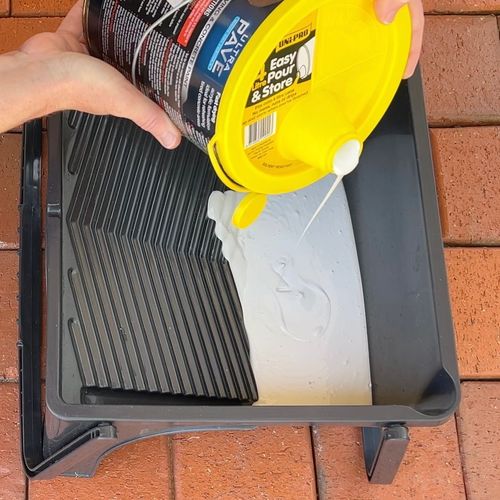
Just so I know the colour of the walls, the reason it is so messy is that the can of paint was sitting next to a bookcase. Then the wind knocked over the book case near the door and they went like dominos... True story. The can of course was next to the last bookcase.
Step 5
Last section! I finally get to paint the room. I have been wanting to do so since I put the plaster up!

First coat all done

Was working into the evening to get it done.

So glad to get it finished.

Now to let it dry before the last coat is applied.

Final coat done.

The place feels so bright!

Next stage is fitting out the room
Still have to source the carpet tiles at this point. I Needed to decide on what power points/plates to put in also. The lighting I will get from Ikea for the bookshelves.
- Mark as New
- Bookmark
- Subscribe
- Mute
- Subscribe to RSS Feed
- Highlight
- Report Inappropriate Content
Re: Garage lining for stud walls stage 2 (Cornice and skirting boards)
Hi @Dave-1
The cornice trims just make the walls look so much classier. It looks so much more formal and gives it a nice, finished look.
Eric
Why join the Bunnings Workshop community?
Workshop is a friendly place to learn, get ideas and find inspiration for your home improvement projects
You might also like

We would love to help with your project.
Join the Bunnings Workshop community today to ask questions and get advice.