
The Bunnings Workshop community can help with your home improvement projects.
- Bunnings Workshop
- >
- Discussion
- >
- Whole of House
- >
- How to remove excess black knot filler f...
How to remove excess black knot filler from timber mantle?
- Subscribe to RSS Feed
- Mark Topic as New
- Mark Topic as Read
- Float this Topic for Current User
- Bookmark
- Subscribe
- Mute
- Printer Friendly Page
Share
- Mark as New
- Bookmark
- Subscribe
- Mute
- Subscribe to RSS Feed
- Highlight
- Report Inappropriate Content
How to remove excess black knot filler from timber mantle?
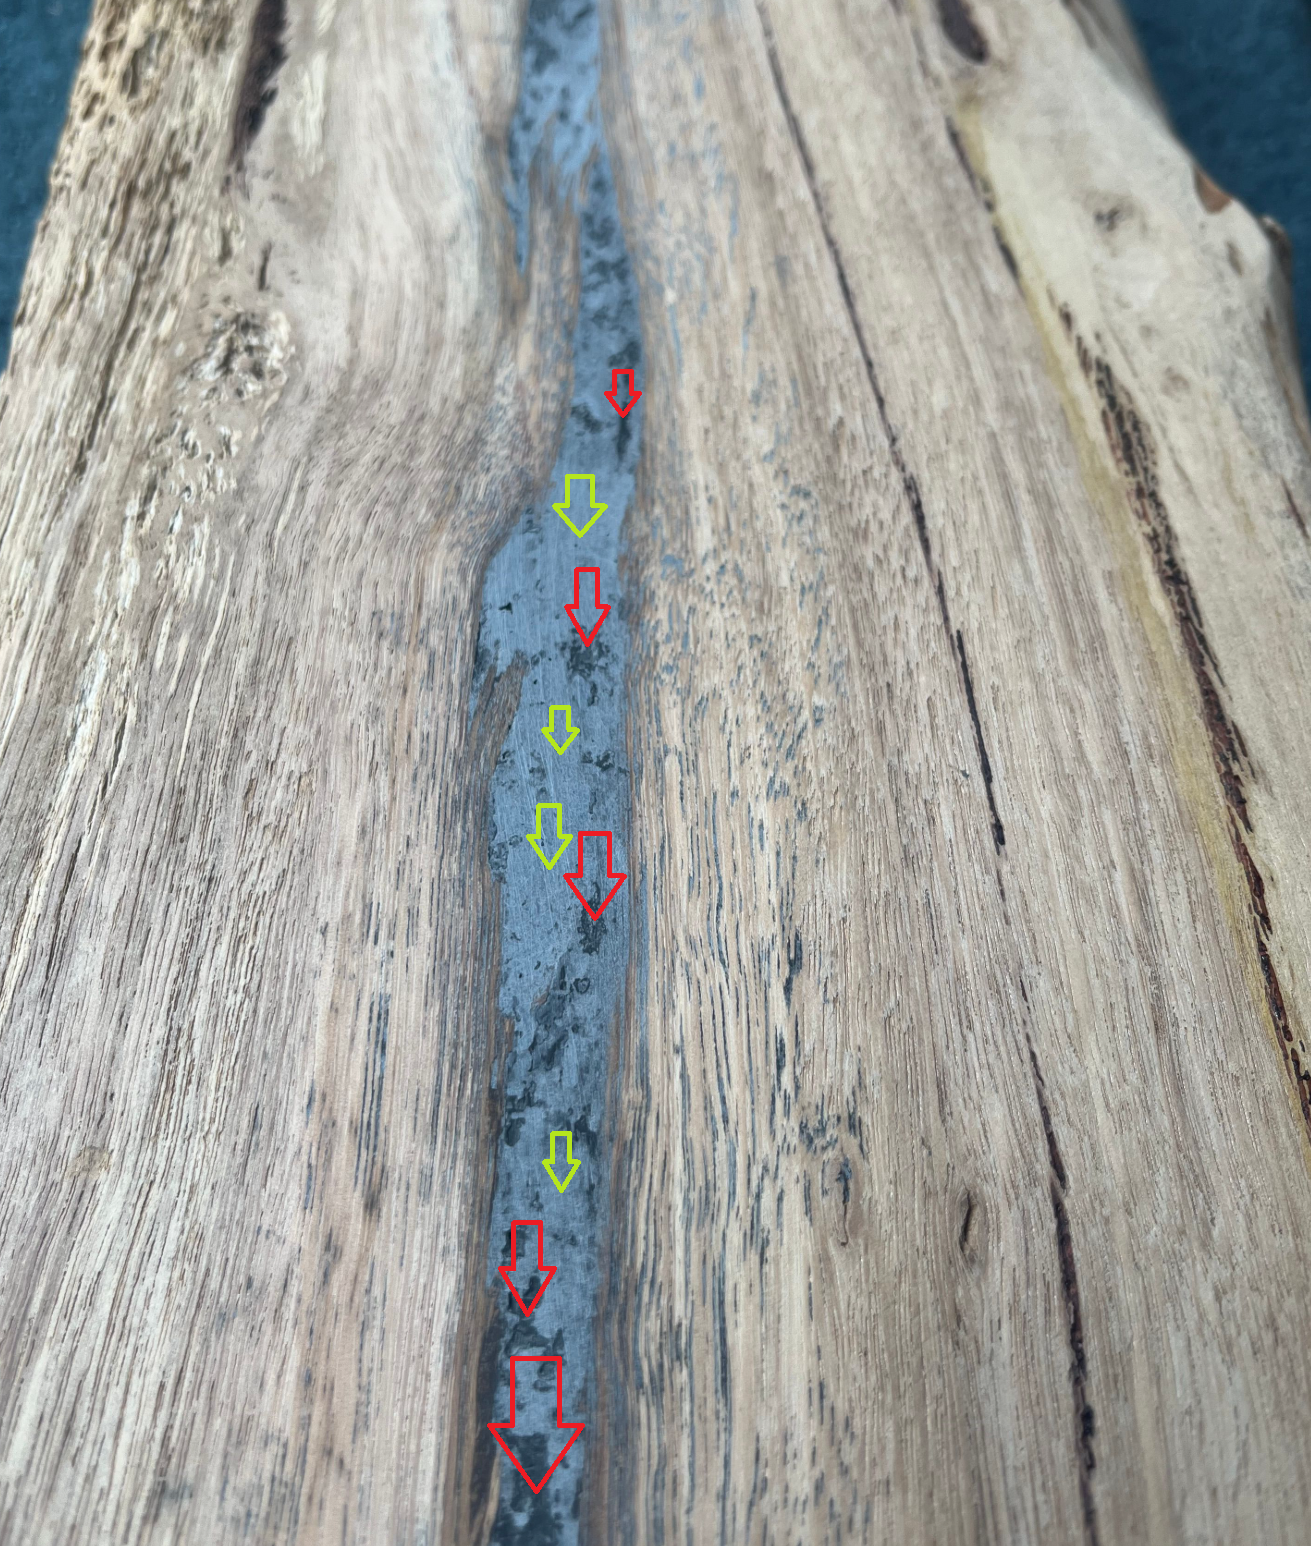
We used black knot filler to fill in deep cracks and gaps on the face of this hardwood timber (stringybark) we’re using for a mantle piece. We filled in some gaps, then began sanding (60g, 80g, 120g). After sanding the whole surface, we decided to fill another gap. After sanding that one down we noticed (see image) that some of the filler overflowed into wood veins either side of the gap. I’ve tried sanding down these overflow areas but it’s not really coming out. I’d like to know how I can go about removing the small specs of filler in these veins? I’m conscious that I’ve already sanded this section of the surface a fair bit and want to keep the look as even as possible. Thank you!

- Mark as New
- Bookmark
- Subscribe
- Mute
- Subscribe to RSS Feed
- Highlight
- Report Inappropriate Content
Re: How to remove excess black knot filler from timber mantle
Welcome to the Bunnings Workshop community @Plantos. It's fantastic to have you join us, and many thanks for your question about removing filler.
Unfortunately, once a dark filler has been applied to the open grain of a timber like stringybark, there is no chemical or spot treatment that will selectively remove it. The only reliable way to get those fine specs out of the grain is to sand past them.
The key is to avoid concentrating your sanding in just that one spot, as that will leave a hollow or dip in the mantle. Instead, drop back to your coarser grit, around 60 grit, and sand across the full width of the mantle in that area so you are lowering the entire surface evenly. You are only trying to remove a very small amount of material, often a fraction of a millimetre, but it needs to be done uniformly.
Looking at the surface, the filler itself is not completely flush. There are slight depressions where the filler has not quite come up to the same level as the surrounding timber, which I've marked in red. If you sand the whole surface down to the depth of those lowest areas, you will both flatten the filler repair and remove the filler that has caught in the surrounding grain. Depending on how deep those low spots are, this may mean removing a millimetre or two from the overall surface, so take your time and check progress regularly.
Once the filler marks are gone, work back up through your grits again to refine the finish. It is a bit frustrating, but with hardwoods like this, careful, even sanding is really the only way to restore a consistent, natural-looking surface.
Please let me know if you have any questions.
Mitchell
Why join the Bunnings Workshop community?
Workshop is a friendly place to learn, get ideas and find inspiration for your home improvement projects
You might also like


We would love to help with your project.
Join the Bunnings Workshop community today to ask questions and get advice.