The Bunnings Workshop community can help with your home improvement projects.
- Bunnings Workshop
- >
- Discussion
- >
- Living and Bedroom
- >
- Bookshelf upcycle project
Bookshelf upcycle project
- Subscribe to RSS Feed
- Mark Topic as New
- Mark Topic as Read
- Float this Topic for Current User
- Bookmark
- Subscribe
- Mute
- Printer Friendly Page
- Mark as New
- Bookmark
- Subscribe
- Mute
- Subscribe to RSS Feed
- Highlight
- Report Inappropriate Content
Bookshelf upcycle project
A few weeks ago on our family outing to Bunnings I picked up the July issue of the Bunnings Magazine, a magazine I have seen on display many times but never perused, maybe it was the dog on the front cover that caught my eye or the colour of the desk that I am currently obsessed with, so while the kidlets made use of the indoor playground I flicked through the mag and was inspired by so much of the content that I went home and made a plan.
I have approx 987 unfinished projects at home and I made a promise to my husband not to start another project until these current ones were finished, we laughed.
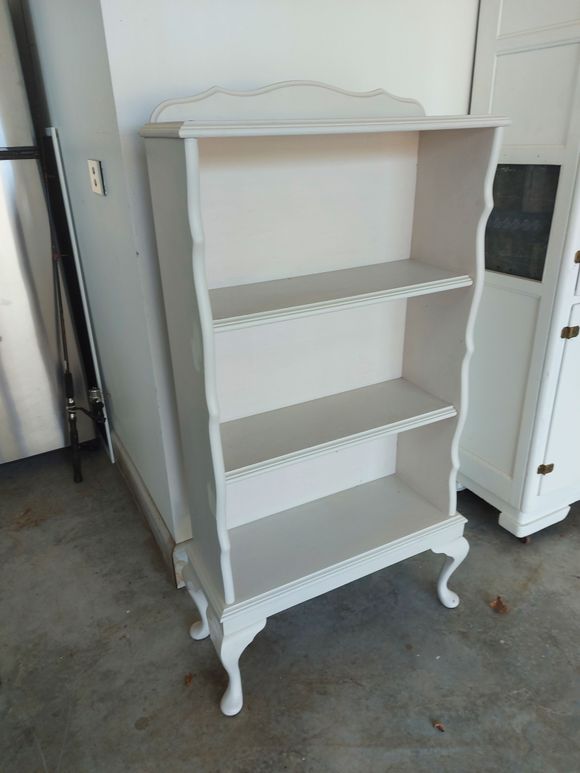
Task 1 - The thrifted book shelf I saved from the tip shop in Mornington. For $25 the piece was sturdy with lovely curves a few cracks and roughly painted.
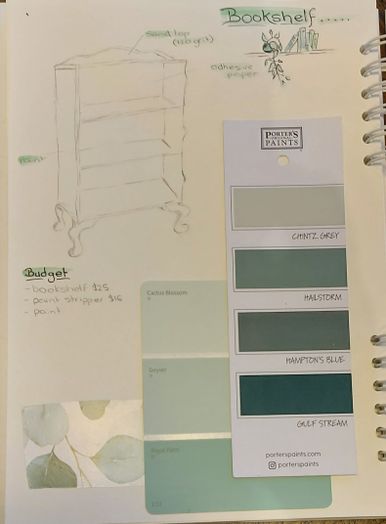
Firstly I removed all the ideas from my brain and dumped them on paper, a nice little visual that brings out my creative side, a place I need to visit more often.
I filled all the cracks with Selley's spakfiller, most cracks were around the base and the legs and not too bad, just obvious to my eye. Next I decided to paint strip the top of the book case with bondall. After an hour I tested the stripping process and the layer of paint and hidden layer of varnish was easily coming off. For all the bits missed I scrubbed with a scourer until all the sticky was gone. I have heard horror stories about paint stripper but this process went quite smoothly.
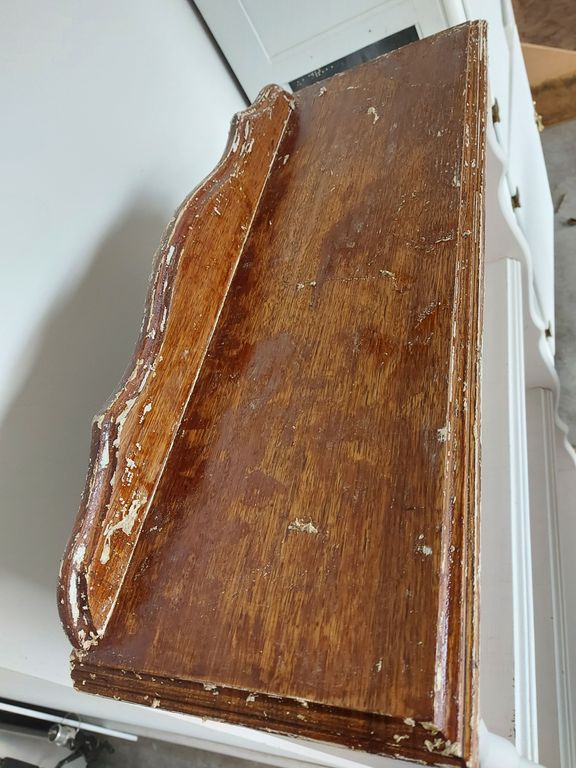
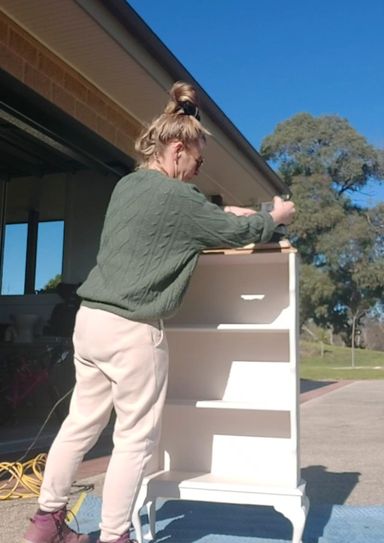
The look I was aiming for with the bookshelf was a raw timber top and a pop of colour with a feature in the shelves, I engaged the trusty belt sander to help me achieve this look with 120 grit sandpaper. Golly I love sanding, I did forget my mask and after I took this pic I popped it on. At this stage I also hand sanded the spakfiller to a smooth touch.
The top wasnt quite the shade I was looking for, after I cleaned off all the dust I applied a coat of Feast Watson liming white. Paint on and wipe off after about 30 seconds. Perfect. After the liming white dried I taped up the top shelf to protect it from the painting.
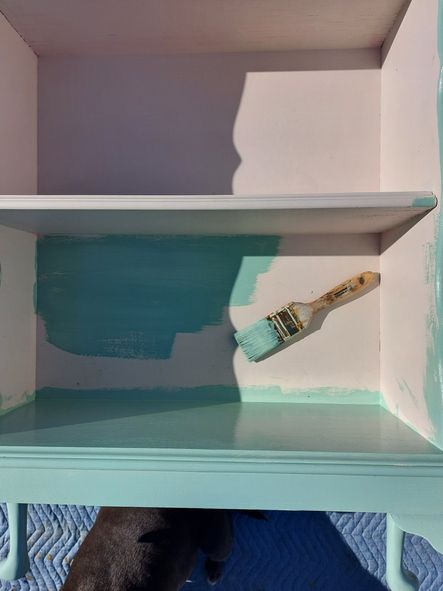
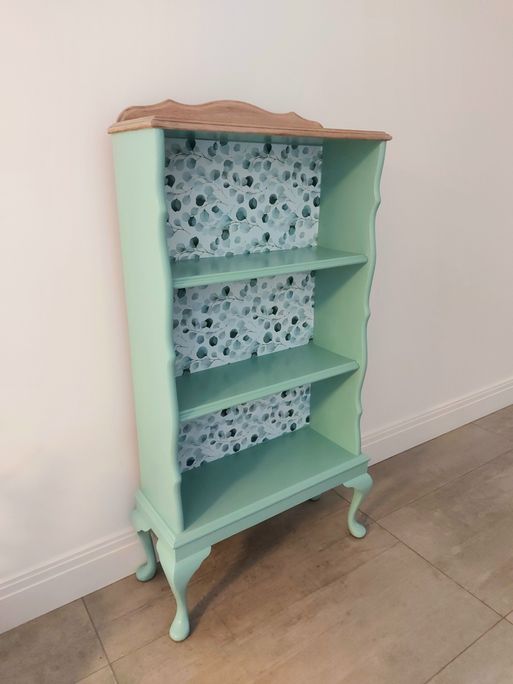
Next stage - painting - Saturday just gone was a sunny 18c here in Melbourne, all week I had planned this as a painting day and I wasn't going to procrastinate any further. I found some adhesive printed paper in the op shop and took this to Bunnings to match up a colour from the print, Taubmans royal palm was the winner. Two coats over two hours as touch dry was achieved very easily in the warm sun.
Laying down the bookcase and applying the adhesive paper was relatively easy, however I did forget to measure twice which left me 10mm out, luckily I had enough paper to finish the project.
24 hours later the bookshelf was brought inside, styled and ready for the kidlets bedroom.
- Mark as New
- Bookmark
- Subscribe
- Mute
- Subscribe to RSS Feed
- Highlight
- Report Inappropriate Content
Re: Bookshelf upcycle project
Hi @pipchalkz,
First, let me extend a warm welcome from the Bunnings Workshop community! It is wonderful you have decided to join and share your upcycle project with us. You'll find Workshop to be a great source of inspiration and advice as you need it for your remaining 986 unfinished projects 😉. I am sure your bookshelf will be inspirational to other members and may even make it into our Top Ideas page one day.
I really like how you sketched your design and made a mood board. Do you do that for all your projects? Do you find it is easier to complete when you have the plan visually laid out?
Katie
- Mark as New
- Bookmark
- Subscribe
- Mute
- Subscribe to RSS Feed
- Highlight
- Report Inappropriate Content
Re: Bookshelf upcycle project
Hello @pipchalkz
Welcome to the Bunnings Workshop community. It's sensational to have you join us, and thank you for sharing your bookshelf upcycling project.
Thank you very much for sharing your upcycling plan for your bookshelf. It's great to see how you drew out a plan and an image of how you wanted the cabinet to look like in the end. I sometimes wonder if other upcycling enthusiasts plan their painting jobs as well as you do or do they just wing it? The final result looks fantastic and the colour you've chosen is relaxing to the eye. The adhesive paper looks great and blends in very well with the paint you've put on.
Again, thank you for sharing your excellent bookshelf upcycling project.
Eric
- Mark as New
- Bookmark
- Subscribe
- Mute
- Subscribe to RSS Feed
- Highlight
- Report Inappropriate Content
Re: Bookshelf upcycle project
Thanks @KatieC - I have started sketching all my projects as previously I was leaving bits n pieces all over the house or getting overwhelmed with choices (or changing my mind half way through), it is now much easier to complete the projects when I can refer back to the visual - The mood board is fun to put together too.
- Mark as New
- Bookmark
- Subscribe
- Mute
- Subscribe to RSS Feed
- Highlight
- Report Inappropriate Content
Re: Bookshelf upcycle project
Thanks @EricL I have only recently started sketching my plans, I used to wing it but this left me with all the unfinished projects and overwhelm. I now look forward to collating the mood board.
Why join the Bunnings Workshop community?
Workshop is a friendly place to learn, get ideas and find inspiration for your home improvement projects
You might also like
We would love to help with your project.
Join the Bunnings Workshop community today to ask questions and get advice.


