
The Bunnings Workshop community can help with your home improvement projects.
- Bunnings Workshop
- >
- Discussion
- >
- Outdoor
- >
- Re: How to build low-level deck framing?
How to build low-level deck framing?
- Subscribe to RSS Feed
- Mark Topic as New
- Mark Topic as Read
- Float this Topic for Current User
- Bookmark
- Subscribe
- Mute
- Printer Friendly Page
Share
- Mark as New
- Bookmark
- Subscribe
- Mute
- Subscribe to RSS Feed
- Highlight
- Report Inappropriate Content
How to build low-level deck framing?
Hi we're planning on building a deck under our patio using the Ekodeck products, 90x45 H3 and the Builder's Edge pedestal feet.
Right now I'm just planning out the framing and have done some preliminary plans in SketchUp. The overall dimensions of the planned framing are 5.4x 6.09
My current questions are:
1. Do I fix the framing to the house, or just have it sitting on the pedestal feet (seems odd to not anchor it to the house but from other projects I've read about on here, it seems that the advice is just to have it float - you can see that there's also. pillar in the middle of the proposed deck that could provide more anchoring if the answer is yes)
2. Do I need to include noggins in the framing?
3. Currently, the patio is paved, but there is only about 85mm of clearance to the top of the future deck so those pavers are coming out. Am I right in my understanding that the pedestal feet just sit on the ground underneath the pavers or should I lower the ground some and add pavers beneath where the pedestal feet will sit to make it a little more solid?
I've attached a screenshot of my sketchup plan so far and a photo of the area.


- Mark as New
- Bookmark
- Subscribe
- Mute
- Subscribe to RSS Feed
- Highlight
- Report Inappropriate Content
Re: How to build low-level deck framing?
Welcome to the Bunnings Workshop community @bradg. It's sensational to have you join us, and many thanks for your question about building a deck.
There’s usually no need to anchor a low-level deck like this to the house unless you're in a cyclonic or high-wind area. A floating deck is generally the simpler route and avoids triggering more complex structural requirements. That said, it’s best to check with your local council, as rules can vary depending on location and deck height.
Given the size of your frame, adding noggins would definitely help with rigidity. They’ll reduce the chance of joists twisting over time, especially across that 6-metre span. Even just a couple spaced along the length of each joist will make a difference.
As for the pedestal feet, they’re usually designed to sit on firm, level, compacted ground, but placing them on pavers is a good idea. It gives them a more stable base and helps distribute the load, particularly once the existing pavers are removed.
You might like to check out these helpful guides: How to build a low-level deck and How to build a deck.
Please let me know if you have any questions.
Mitchell
- Mark as New
- Bookmark
- Subscribe
- Mute
- Subscribe to RSS Feed
- Highlight
- Report Inappropriate Content
Re: How to build low-level deck framing?
Thanks Mitchell!
That's all super helpful 
Would you also recommend adding some weed mat or similar under the feet and pavers to prevent shifting of the ground underneath?
Also, do you have a recommended space between noggins?
Thanks so much
- Mark as New
- Bookmark
- Subscribe
- Mute
- Subscribe to RSS Feed
- Highlight
- Report Inappropriate Content
Re: How to build low-level deck framing?
Hello @bradg
Putting in weedmat along with drainage gravel will help facilitate water drainage under your deck. Noggin spacing will depend on the length of your joist, I would probably suggest a spacing of 600mm minimum and offset the next set of noggins so that the deck will have a stiffer assembly. Have a look at this example - Low-level composite deck over concrete and soil by @oninpena. It's a good example of how the noggins can be installed, but I would probably increase the offset distance so that they are not so close to each other.
If you need further assistance, please let us know.
Eric
- Mark as New
- Bookmark
- Subscribe
- Mute
- Subscribe to RSS Feed
- Highlight
- Report Inappropriate Content
Re: How to build low-level deck framing?
HI again, thanks for all your help so far!
Planning on doing this project in the upcoming school holidays.
I have another question. I'm planning on adding a concrete bench between the limestone wall and the deck, like the images attached.
Essentially, it's a 2500mm x 490mm x ~500mm concrete box, and most of the info I find online is for pads or small concrete forms...
I had a few questions:
- Forms - I plan on using Formply and then stake around it with 2x4s pounded into the ground - is there a better way of doing this?
- Do I need a pad?
- What kind of reinforcement does this need?
- Could I stick a bunch of Styrofoam in the middle to use less concrete? I plan on just using bags of concrete and mixing on site in a wheelbarrow
- The bench will be next to the limestone wall (green on the SketchUp screenshot) Do I need an expansion gap, or should I place some thin foam between the concrete and the limestone?
Sorry for all the questions, but I'd love to get this in the ground first, then bulid the deck up to it.
Thanks in advance!


- Mark as New
- Bookmark
- Subscribe
- Mute
- Subscribe to RSS Feed
- Highlight
- Report Inappropriate Content
Re: How to build low-level deck framing?
Hello @bradg
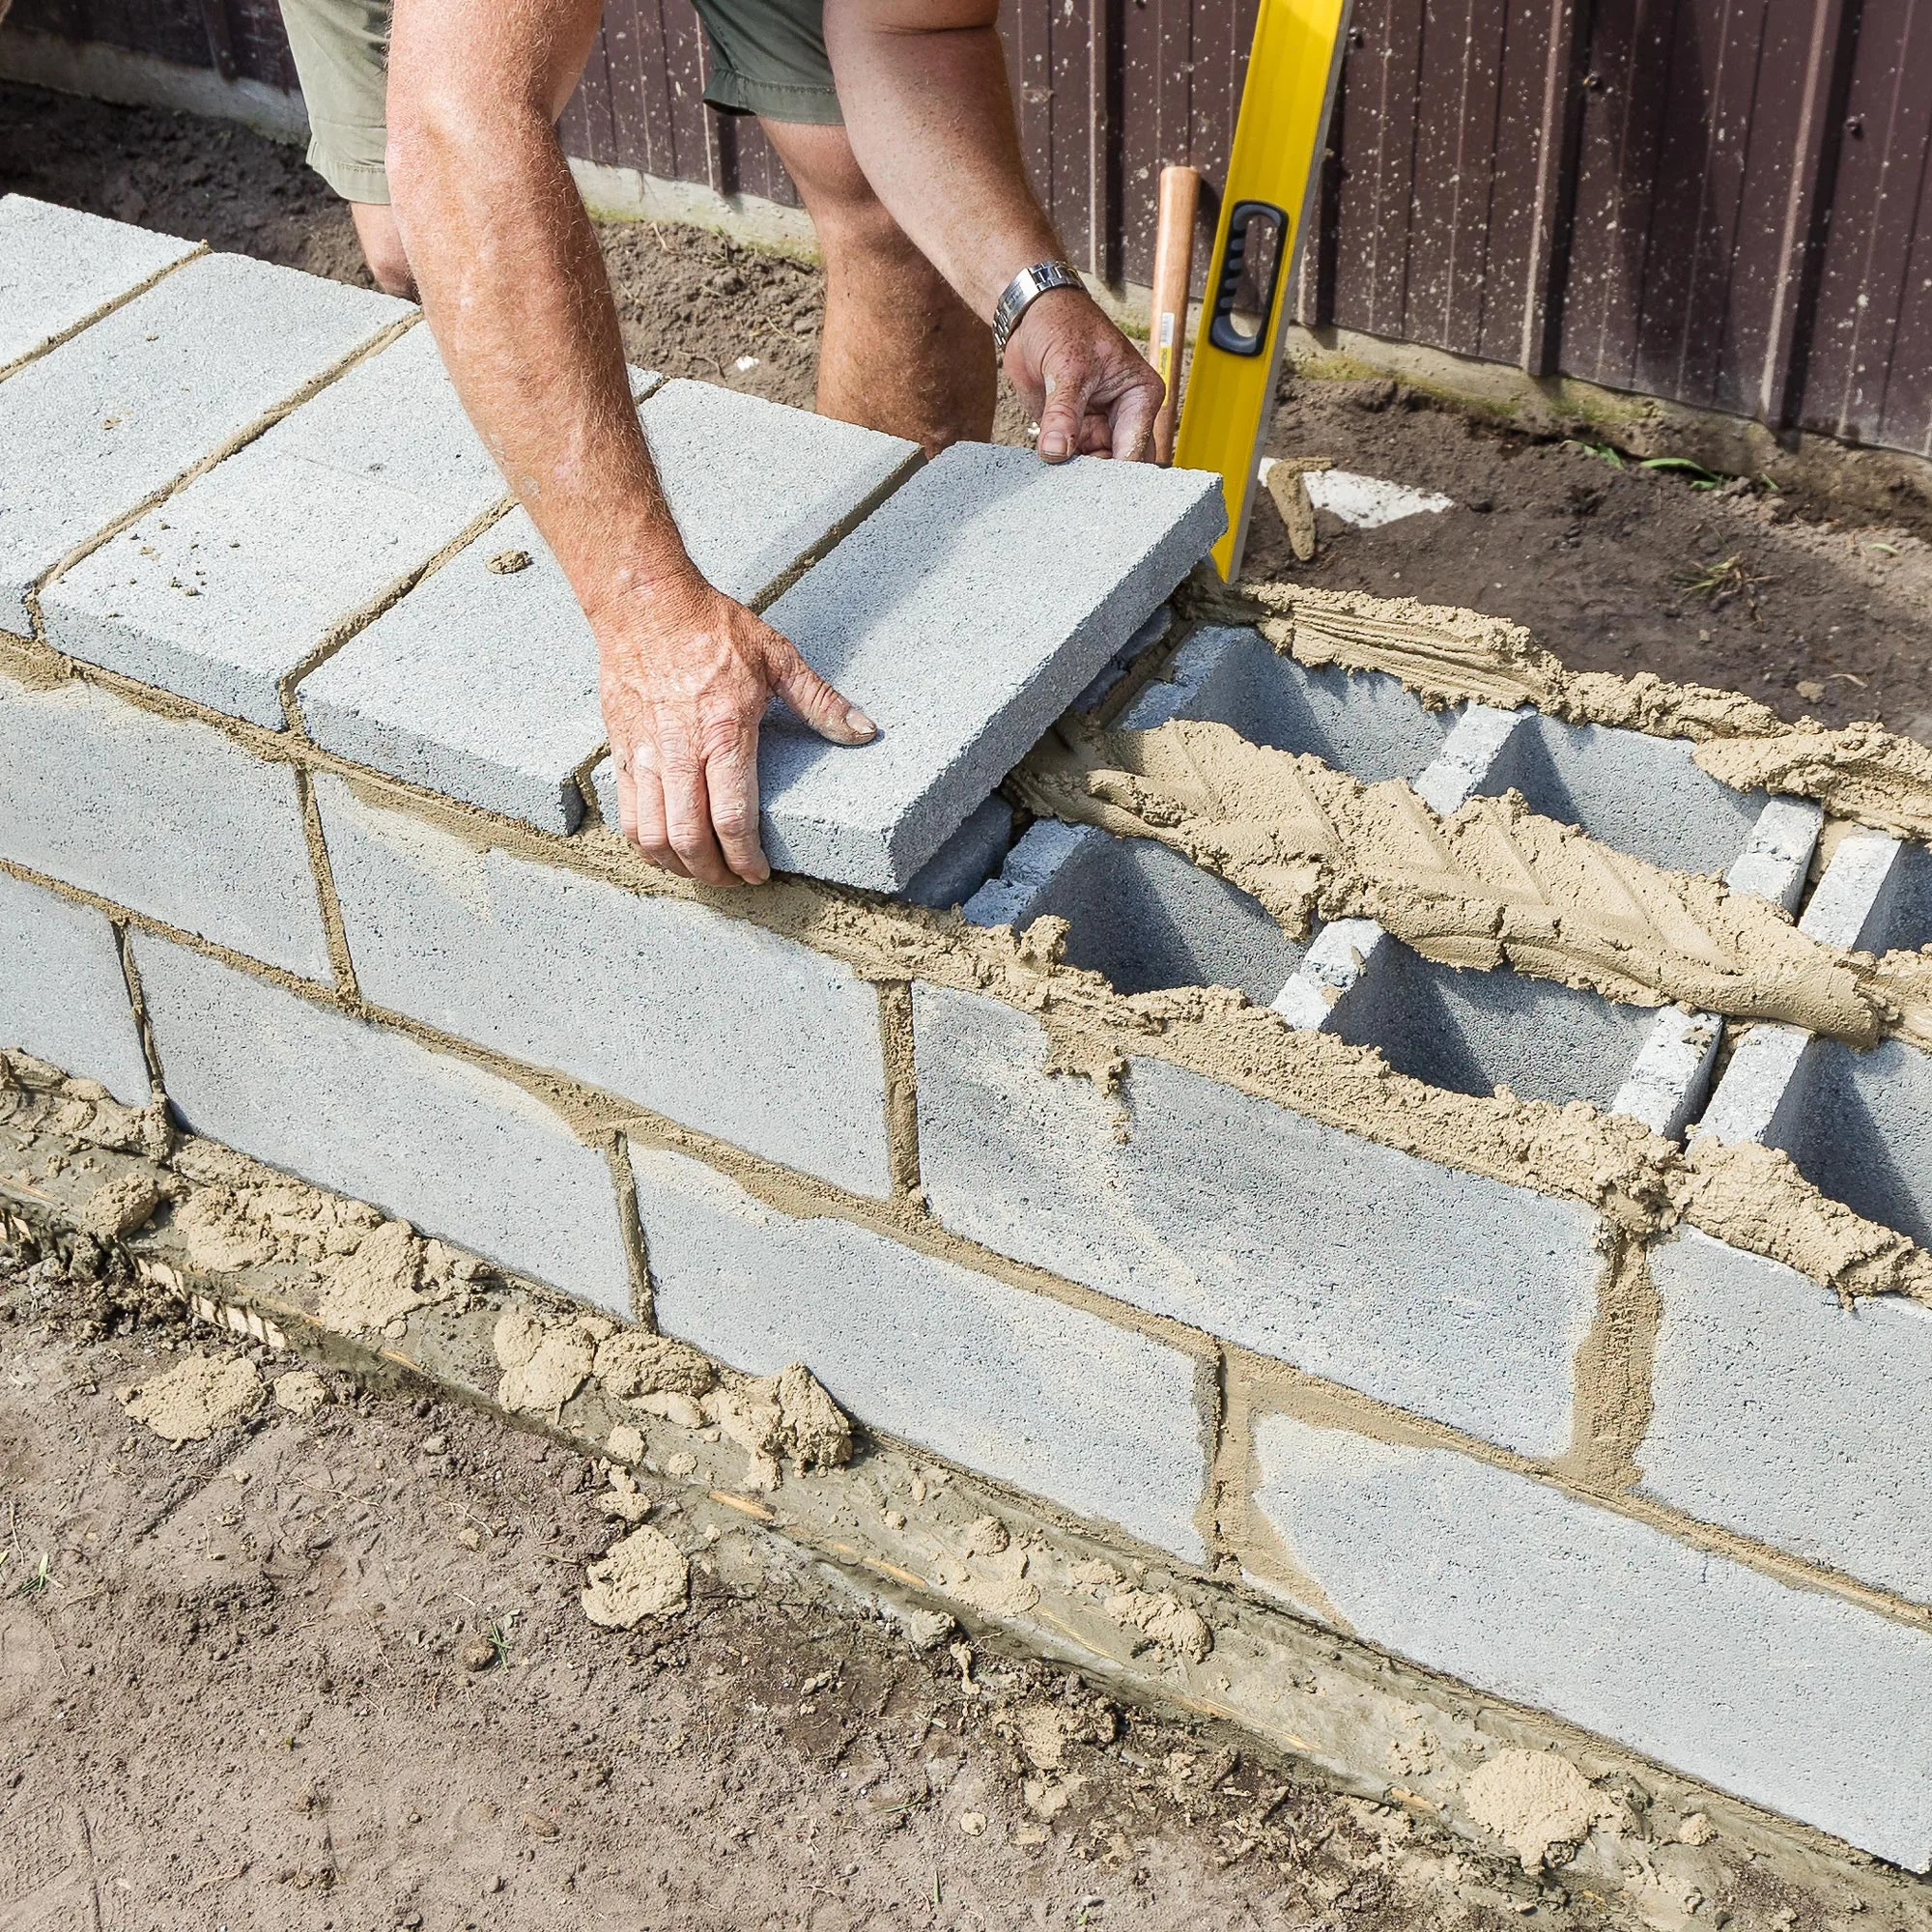
Thanks for sharing that extra project with us. Let me try and answer your question in the proper sequence. Yes, you'll need a pad also known as a base or foundation. The purpose of the foundation is to prevent your seat from sinking into the ground and creating a tilt. I suggest having a look at this discussion - Solved: How to lay bricks for raised flower bed? by @Brunnie Rich. This discussion will give you a general idea of how to prepare the base for your concrete seat.
For easier assembly I suggest using Brighton Masonry 390 x 190 x 190mm Full Besser Block and creating a rectangular shape. The top can be covered with Brighton Masonry 390 x 190 x 40mm Cap Besser Block and the entire structure rendered to give the look and feel of a solid concrete structure. This will save you from having to build formwork and waiting a long time for the concrete structure to cure.
However, if you wish to build it using your method, using 90x45 and form ply will be enough to hold the structure together. You'll need to use standard Rio mesh on the walls and top structure of the seat. Yes, you can use foam and other debris to use as filler for the center of the seat. I suggest leaving a full gap of at least 100mm so that you can access the back of the seat.
Here is a link to our top ideas: 10 ways to build a bench seat | Bunnings Workshop community
Here are some other ideas in regards to building a concrete bench:
- Poolside timber cabana with concrete bench by @ProjectPete
- Gabion wall bench seats by @Dave-1
- How to build a Besser block bench seat by @sandy_d
If you need further assistance, please let us know.
Eric
- Mark as New
- Bookmark
- Subscribe
- Mute
- Subscribe to RSS Feed
- Highlight
- Report Inappropriate Content
Re: How to build low-level deck framing?
Afternoon @bradg
I do have a weakness for the gabion styled walls and I really like the gabion bench seat I built (Its still going strong with no issues)
However here is an alternative I have seen at work, the chunky end is half filled with stryofoam so the bench dosnt weight what you would expect. They were built on site so i would still think they are heavy. The timber has been re-oiled but easy 5 years old.

From memory they had formwork around it and then removed it after the concrete had cured.

I really dont remember them putting in a concrete slab for them to sit on, next time I walk past i will have a look.

I like how the timber slats are off teh slab, much like my gabion walls it allows air to freely circulate and dry out the timber.
Dave
Why join the Bunnings Workshop community?
Workshop is a friendly place to learn, get ideas and find inspiration for your home improvement projects
You might also like


We would love to help with your project.
Join the Bunnings Workshop community today to ask questions and get advice.