
The Bunnings Workshop community can help with your home improvement projects.
- Bunnings Workshop
- >
- Discussion
- >
- Garage and Shed
- >
- Re: Making an anvil base
Making an anvil base
- Subscribe to RSS Feed
- Mark Topic as New
- Mark Topic as Read
- Float this Topic for Current User
- Bookmark
- Subscribe
- Mute
- Printer Friendly Page
Share
- Mark as New
- Bookmark
- Subscribe
- Mute
- Subscribe to RSS Feed
- Highlight
- Report Inappropriate Content
Making an anvil base


Naturally an anvil needs to sit on a sturdy base and I didn't just want to settle for the old tree stump solution. I wanted something epic, preferably medieval looking with a mix of charred wood and bare steel.
So I started off with a 100x100x2400 timber post that I cut in 4 and glued together to create the 200x200x600 blank to work from. I used a power planer to get the sides relatively flush without completely ruining it's rugged looks, and also threw a bevel on the edges while I was at it. I traced the anvil's footprint and used my router to drop it by about 10mm so that the anvil sat nice and snug and couldn't slide around. I also used the router to create 2x 25x3mm channels around the base, 150mm from the top and bottom ends.


Once I was happy with the shape and size, I used a blowtorch to char the exterior and really bring out the wood grain, followed by a quick Scotchbrite scuffing to blend it nicely. I sealed the charred base with two layers of boiled Linseed oil.


Finally, I created the 2x metal straps that fit snugly in the channels I had milled, welded the ends and drove 16x 45mm coach screws through it to bring it all together. Overall, I'm super happy with the outcome. The last step will be to add the tool holder to the top and secure the anvil with some brackets that I'm yet to make

PS: Below you will see the welds I did where the ends of the flatbar met. I welded this in place because the strap sits in a channel and could not be fitted over otherwise. I did these with a little Ozito gasless MIG I bought last week: The new one, where the feed and voltage are both adjustable rather than just the feed rate. It works like a charm 

Happy building!
- Mark as New
- Bookmark
- Subscribe
- Mute
- Subscribe to RSS Feed
- Highlight
- Report Inappropriate Content
Re: Making an anvil base
Having a look at a homemade metal twister video his uploads included this.
I think it could be improved by adding a tilting table and a platten on top wouldn't hurt either.
- Mark as New
- Bookmark
- Subscribe
- Mute
- Subscribe to RSS Feed
- Highlight
- Report Inappropriate Content
Re: Making an anvil base
@Brad Yeah some of those DIY belt grinders are so epic. There's a German guy who has one complete with parts list that can reconfigure in all kinds of ways.
And for the rest of ye, I'm sorry that I have kept you all waiting but I have finally finished the Battlefield 4 knife!

There's SO much to say about the process but in the interest of not plaguing this thread with continued straying off topic, you may read more about it on my blog at martipedia.org 👍🏻
- Mark as New
- Bookmark
- Subscribe
- Mute
- Subscribe to RSS Feed
- Highlight
- Report Inappropriate Content
Re: Making an anvil base
Hi @MartiPedia
That Battlefield 4 knife is just epic in its construction. Can you please tell us the highlights of the construction process? Where was the metal sourced, what are the dimensions of the knife and how long did the entire process take? I take it that this was based on the ABC-90 knife in the game.
Thank you very much for sharing this amazing knife project.
Eric
- Mark as New
- Bookmark
- Subscribe
- Mute
- Subscribe to RSS Feed
- Highlight
- Report Inappropriate Content
Re: Making an anvil base
Hi @EricL
The knife is around 28cm in total length, with the blade accounting for slightly more than half of that. I sized the profile to my own hand during the mock-up process in order to come up with something that would be comfortable for me to use. I've got two kids and a day job in IT so unfortunately, my time to work on my knives is short and sweet, often with a week or more in between where I just get absolutely nothing done. If I could work on it continuously though, I'm confident that I could make it in 5-6 hours (excluding curing, cooling and tempering times).
As for the ingredients and process, well here's a little rundown:
BLADE
The blade is made from an old farrier's rasp: A very popular carbon steel for knife making among beginners and enthusiasts as they are relatively easy to come by and also don't cost much, affording the little mistakes that comes with taking on knife making as a hobby without much of a financial risk. The profile in question has a full tang so it's nice and sturdy and well balanced without the need of a hefty pommel.
HANDLE
The handle is made from Acacia which is an abundant, cheap hardwood that still offers a relatively sleek finish, especially if you're willing to take the time to pick out a piece with an interesting pattern like burls etc. A little birdy told me that Bunnings sells hardwood garden stakes from time to time that also makes great handle blanks
PINS
I made the effort to construct what is known as "mosaic pins". In short, they are the metal equivalent of that hard candy with the picture that runs the length of the blank i.e. regardless of where you cut it, it will have the same pattern. I made this by combining tubes of various alloys nested inside each other with a rod in the centre, When cold blued afterwards, the brass takes on a dark bronze finish whilst the aluminium remains unaffected, creating the prominent rings you can see in the image.
MICARTA LINERS
These aren't visible in the picture above but I made some orange micarta substitute (hereafter known as "DIY-carta") liners that sit between the handles and the blade. These were made by taking some orange pages from my son's drawing pad, soaking them in epoxy, laying them 5 layers high and then clamping them down between two thick pieces of clingwrap-covered MDF to cure. The slow curing epoxy completely impregnates the paper making it sturdy much like carbon fibre, also meaning that it can be machined and polished afterwards.
PROCESS
- The rasp is annealed in the forge and left in vermiculite to cool down overnight. This softens the brittle rasp metal to prep it for machining
- An appropriately sized paper cut-out of the blade profile is temporarily stuck to the rasp and I use a chalk liner to draw the outline
- Using a combination of my angle grinder, dremel and belt grinder, I machine out the profile's outline, then grind the various bevels. On this knife, there are 3 in total thanks to the tanto-like design. As I get closer to the final profile, I progress up the grit ladder to 400 grit ceramic belts of which the finish is so good, a quick buff with a green rouge on a stitched wheel leaves a mirror finish.
- The blade goes back into the forge, gets a oil quench (hardening) and then spends 2 hours at 200 degrees in the oven (tempering)
- When the blade emerges, the finish is tarnished from the hardening process. I use the 400 grit belt on a low speed, keeping an eye on the temperature as to not ruin the temper. This is especially difficult towards the tip of the blade and gut hook. At this point the blade has a brushed finish.
- I whip out my favourite acid in the world (G96 cold blueing liquid) and go over the entire blade, making the whole thing black.
- I then mask the blade along the bevel line and polish up the cutting edge, leaving the remainder black. This obviously serves no purpose other than looking cool, matching the one from the game.
- For the handle, I cut the chosen piece of Acacia into 2x 8mm scales and glue them to my DIY carta liners. I then trace the blade onto them and use the bandsaw to cut the shape close to the blade profile and drill the pin holes.
- The handle scales get glued to the blade, pins in place and micarta sides towards the blade. This gets clamped down and spends the next day curing properly.
- Finally, the handle gets ground down to the blade profile first, then thinned and rounded out whilst continuously feeling how it feels in my hand. I stop when it's comfortable. The handle then gets buffed and receives a couple of coats of boiled flaxseed oil.
- When all this is done and I'm confident that there's no more grinding, sanding or other finishing required, I throw the knife on the Lansky and take it through the stones up to 1000 grit where it's able to shave the hair off the back of my hand.
And that's that! It's so much fun. I really can't wait to make the next one which is already annealed, this time a Viking Seax, complete with an 8mm brass bolster and pommel sandwiching a leather stack handle. It's going to be pretty nice I reckon.
I do recommend that you visit THIS blog post and have a look at some pics of the process mentioned above, which may add some much needed context in some cases
- Mark as New
- Bookmark
- Subscribe
- Mute
- Subscribe to RSS Feed
- Highlight
- Report Inappropriate Content
Re: Making an anvil base
Hey Martin @MartiPedia
I just looked at your blog - so that was never the real you in your previous avatar? 😁
- Mark as New
- Bookmark
- Subscribe
- Mute
- Subscribe to RSS Feed
- Highlight
- Report Inappropriate Content
Re: Making an anvil base
- Mark as New
- Bookmark
- Subscribe
- Mute
- Subscribe to RSS Feed
- Highlight
- Report Inappropriate Content
Re: Making an anvil base
Okay. Sorry. You're still a handsome man. 😁
- Mark as New
- Bookmark
- Subscribe
- Mute
- Subscribe to RSS Feed
- Highlight
- Report Inappropriate Content
Re: Making an anvil base
Wow @MartiPedia that is such a great write up thank you for sharing. I had a look and you are right, Bunnings does sell hardwood garden stakes, I could see how that would be a good starting point for a handle.
Really looking forward to seeing your Viking Seax, the handle sounds wicked!
Katie
- Mark as New
- Bookmark
- Subscribe
- Mute
- Subscribe to RSS Feed
- Highlight
- Report Inappropriate Content
Re: Making an anvil base
Thanks @KatieC , I'm also super excited to see it take form. I bought some offcuts from a leather belt maker in NSW which I will cut into rectangles first, punch a slot into the centre of each and then stack them over the spike tang of the seax once it's completed. Once it's all set, it will go to the belt grinder for forming and then it's a matter of melting beeswax onto the leather edges until it's saturated, finished by buffing and oiling.
Simple enough on paper, but we'll see how it goes in practice 
- Mark as New
- Bookmark
- Subscribe
- Mute
- Subscribe to RSS Feed
- Highlight
- Report Inappropriate Content
Re: Making an anvil base
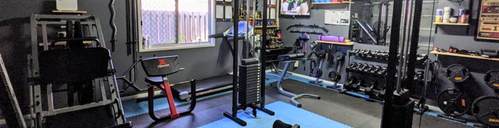
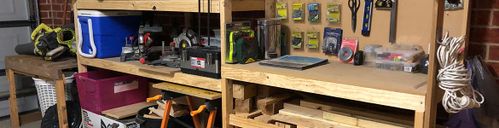
Finally got around to building my forge trolley today from some scrap metal and wood I had laying around the garage. Also finished the spool of wire that came with my little Ozito gasless mig. That thing is such a joy to use.

Why join the Bunnings Workshop community?
Workshop is a friendly place to learn, get ideas and find inspiration for your home improvement projects
You might also like

We would love to help with your project.
Join the Bunnings Workshop community today to ask questions and get advice.