
The Bunnings Workshop community can help with your home improvement projects.
- Bunnings Workshop
- >
- Discussion
- >
- Whole of House
- >
- Re: How to join this cornice?
How to join this cornice?
- Subscribe to RSS Feed
- Mark Topic as New
- Mark Topic as Read
- Float this Topic for Current User
- Bookmark
- Subscribe
- Mute
- Printer Friendly Page
Share
- Mark as New
- Bookmark
- Subscribe
- Mute
- Subscribe to RSS Feed
- Highlight
- Report Inappropriate Content
How to join this cornice?
This is started to fry my brain a bit
I am having trouble working out how to join these cornices. As you can see the existing cornice is not cut on an angle. We had cabinets installed by a cabinet makeer and he put bulk heads up against the existing cornice which isnt cut at all it just runs behind the cornice. This has made adding another cornice a bit confusing for me ( I thought it would be easy )
I Understand the method of doing corners of 2 angled cut cornices that is pretty straight forward. But I got an existing cornice thats not cut
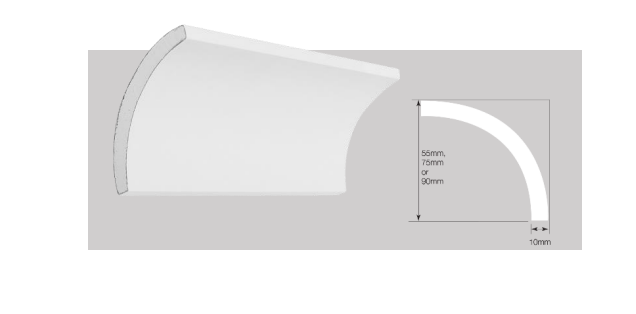
Also the 2nd problem is I bought the same type of cornice from bunnings (75mm cove ) as this is what it says on my house's spec sheet from the builder
But the bunnings one looks bigger. Unless I am comparing the sizes wrong? Is the top size always bigger then the bottom? I cant obviously take the existing cornice off to compare side by side..
Check the photos I took
Would appreciate any help


- Mark as New
- Bookmark
- Subscribe
- Mute
- Subscribe to RSS Feed
- Highlight
- Report Inappropriate Content
Re: How to join this cornice?
Hi @pat83
Ok so the first time you have to do this, it takes some getting your head round it! I would draw a pencil line along the wall the new cornice is going on extending the line of the bottom of the existing cornice. I would then cut the new cornice at about 45 degrees and then offer it up to the corner and run a pencil down the existing cornice to get the shape and cut to suit . If there were too many large variations, you may need to do this till the two meet neatly as possibe then fix the cornice and fill and sand till it looks right!
- Mark as New
- Bookmark
- Subscribe
- Mute
- Subscribe to RSS Feed
- Highlight
- Report Inappropriate Content
Re: How to join this cornice?
Hi @pat83,
I can't say for certain whether they are the same size or not based on the photos. You'd have to measure them to be sure. This image from the Gyprock Cornice Cove - Product Data Sheet will be handy.
This type of connection is referred to as coping, rather than mitring. I can't say I have done it with cornice, but I have done plenty with skirting boards. The basic idea is that you make a 45° angled cut away from the existing cornice, then remove the plaster from behind the line of the paper. As it stands, the paper on your cornice is the correct profile; it is just the plaster behind it that is getting in the way.
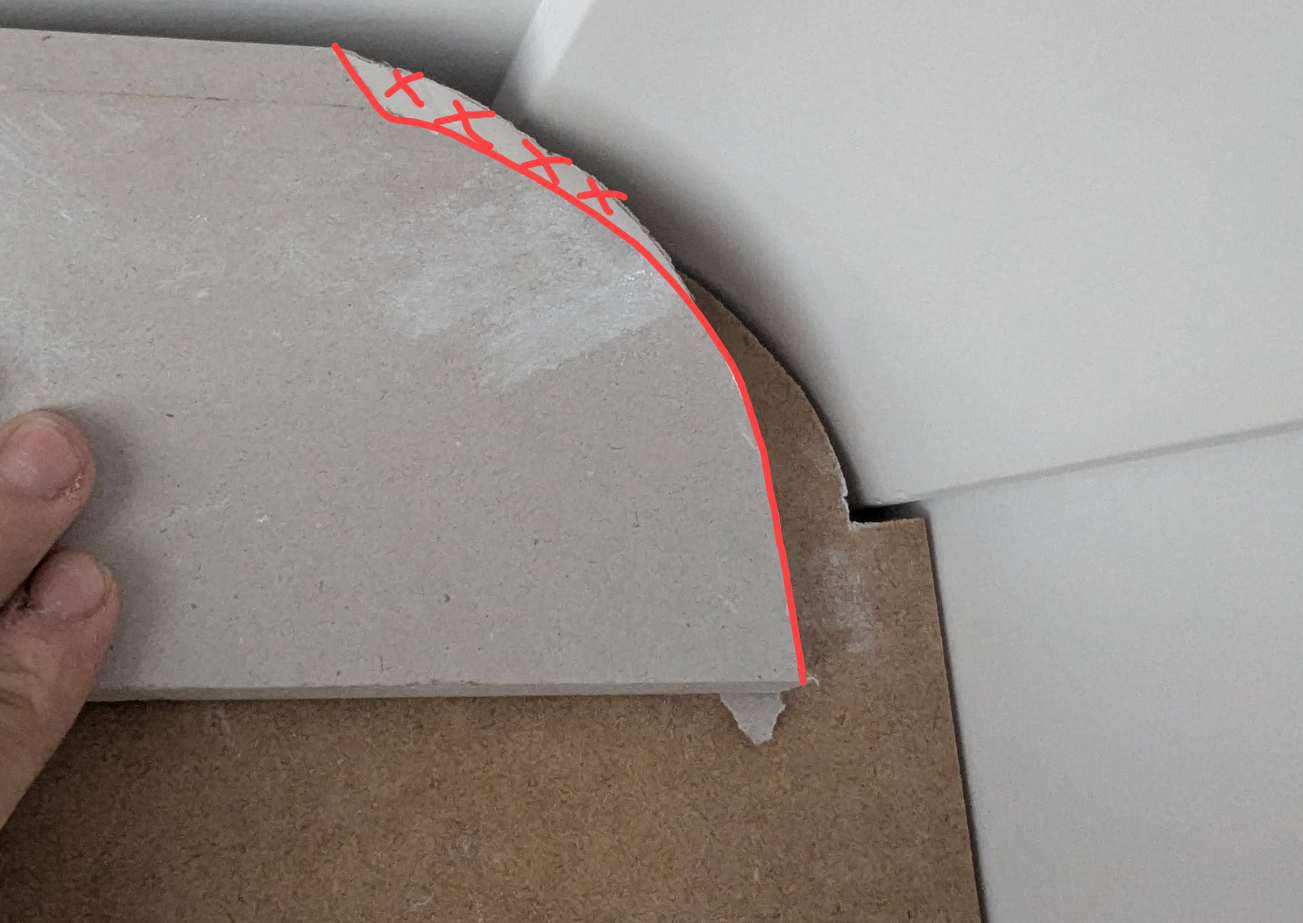
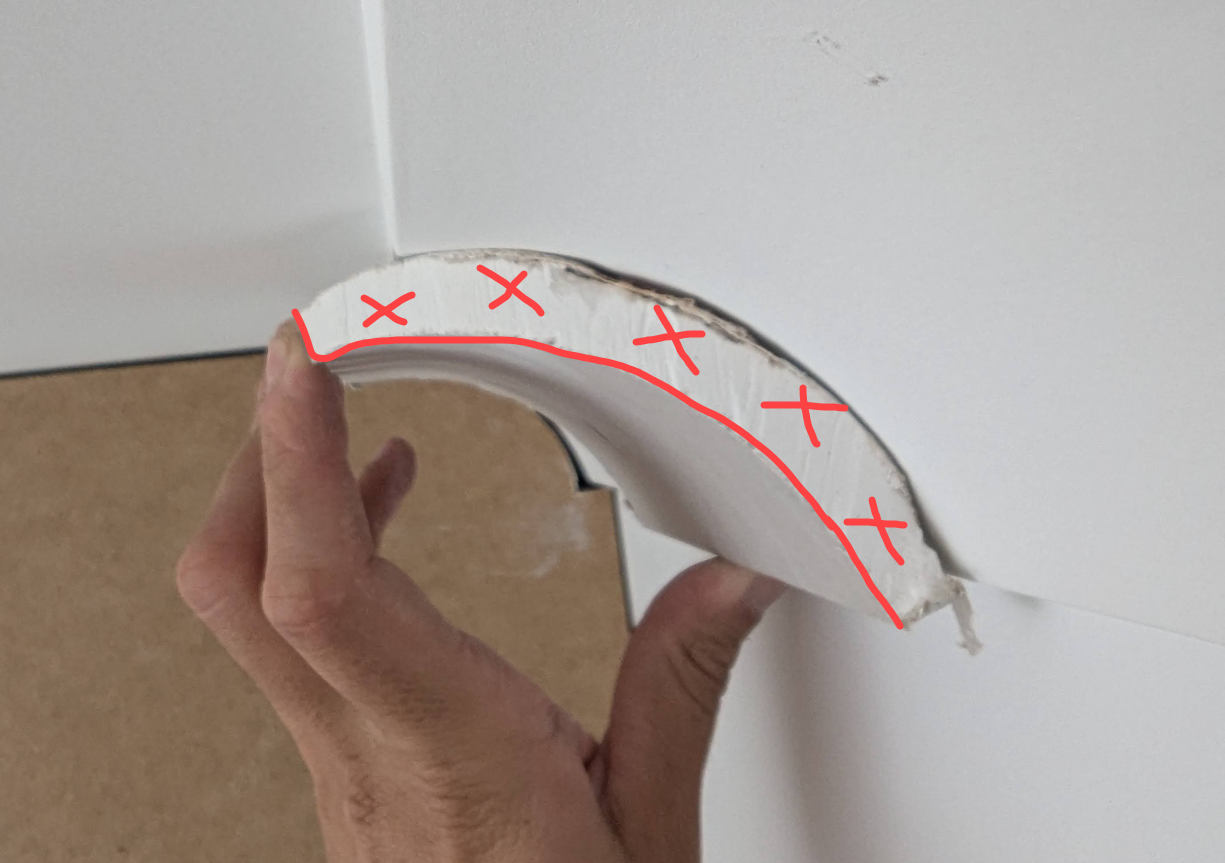
You'd have to take it slow, but cutting this plaster away with a Coping Saw would be the method.
Have a look at @MGusto's discussion, How to butt into cove cornice?
After confirming that the cornice is in fact the correct size, this would be how to do it. It can take a bit of playing around, but you should be able to get it relatively close, then tidy things up once the cornice is in place.
You might like to check out How To Cut and Install Cornice to see the installation process once it is cut.
Let me know what you think.
Jacob
- Mark as New
- Bookmark
- Subscribe
- Mute
- Subscribe to RSS Feed
- Highlight
- Report Inappropriate Content
Re: How to join this cornice?
Hi @pat83
The picture in JacobZ post actually shows an easy mistake to make. It shows the cornice being offered up lower down than the baseline of the existing cornice. The reason I suggested a pencil line is drawn is that if you place the bottom of the new cornice on the line with the top touching the ceiling, it will put the new cornice at the correct angle for you to guage the line of the cut needed to butt them together properly.
Why join the Bunnings Workshop community?
Workshop is a friendly place to learn, get ideas and find inspiration for your home improvement projects
You might also like


We would love to help with your project.
Join the Bunnings Workshop community today to ask questions and get advice.